Standing Rigging

Removing Constructional Stretch

Constructional stretch occurs as a byproduct of the splicing method. When you open the weave to bury the tail, you also cause the line to shrink in length. When tension is applied to the line, this looseness in the weave will work itself out in the form of stretch.  

It may seem that a new stay is stretching like crazy, but this is all due to the splicing process. Removing this stretch before installing the stay will greatly decrease the amount of time it takes to setup new synthetic standing rigging. 

upload.jpg

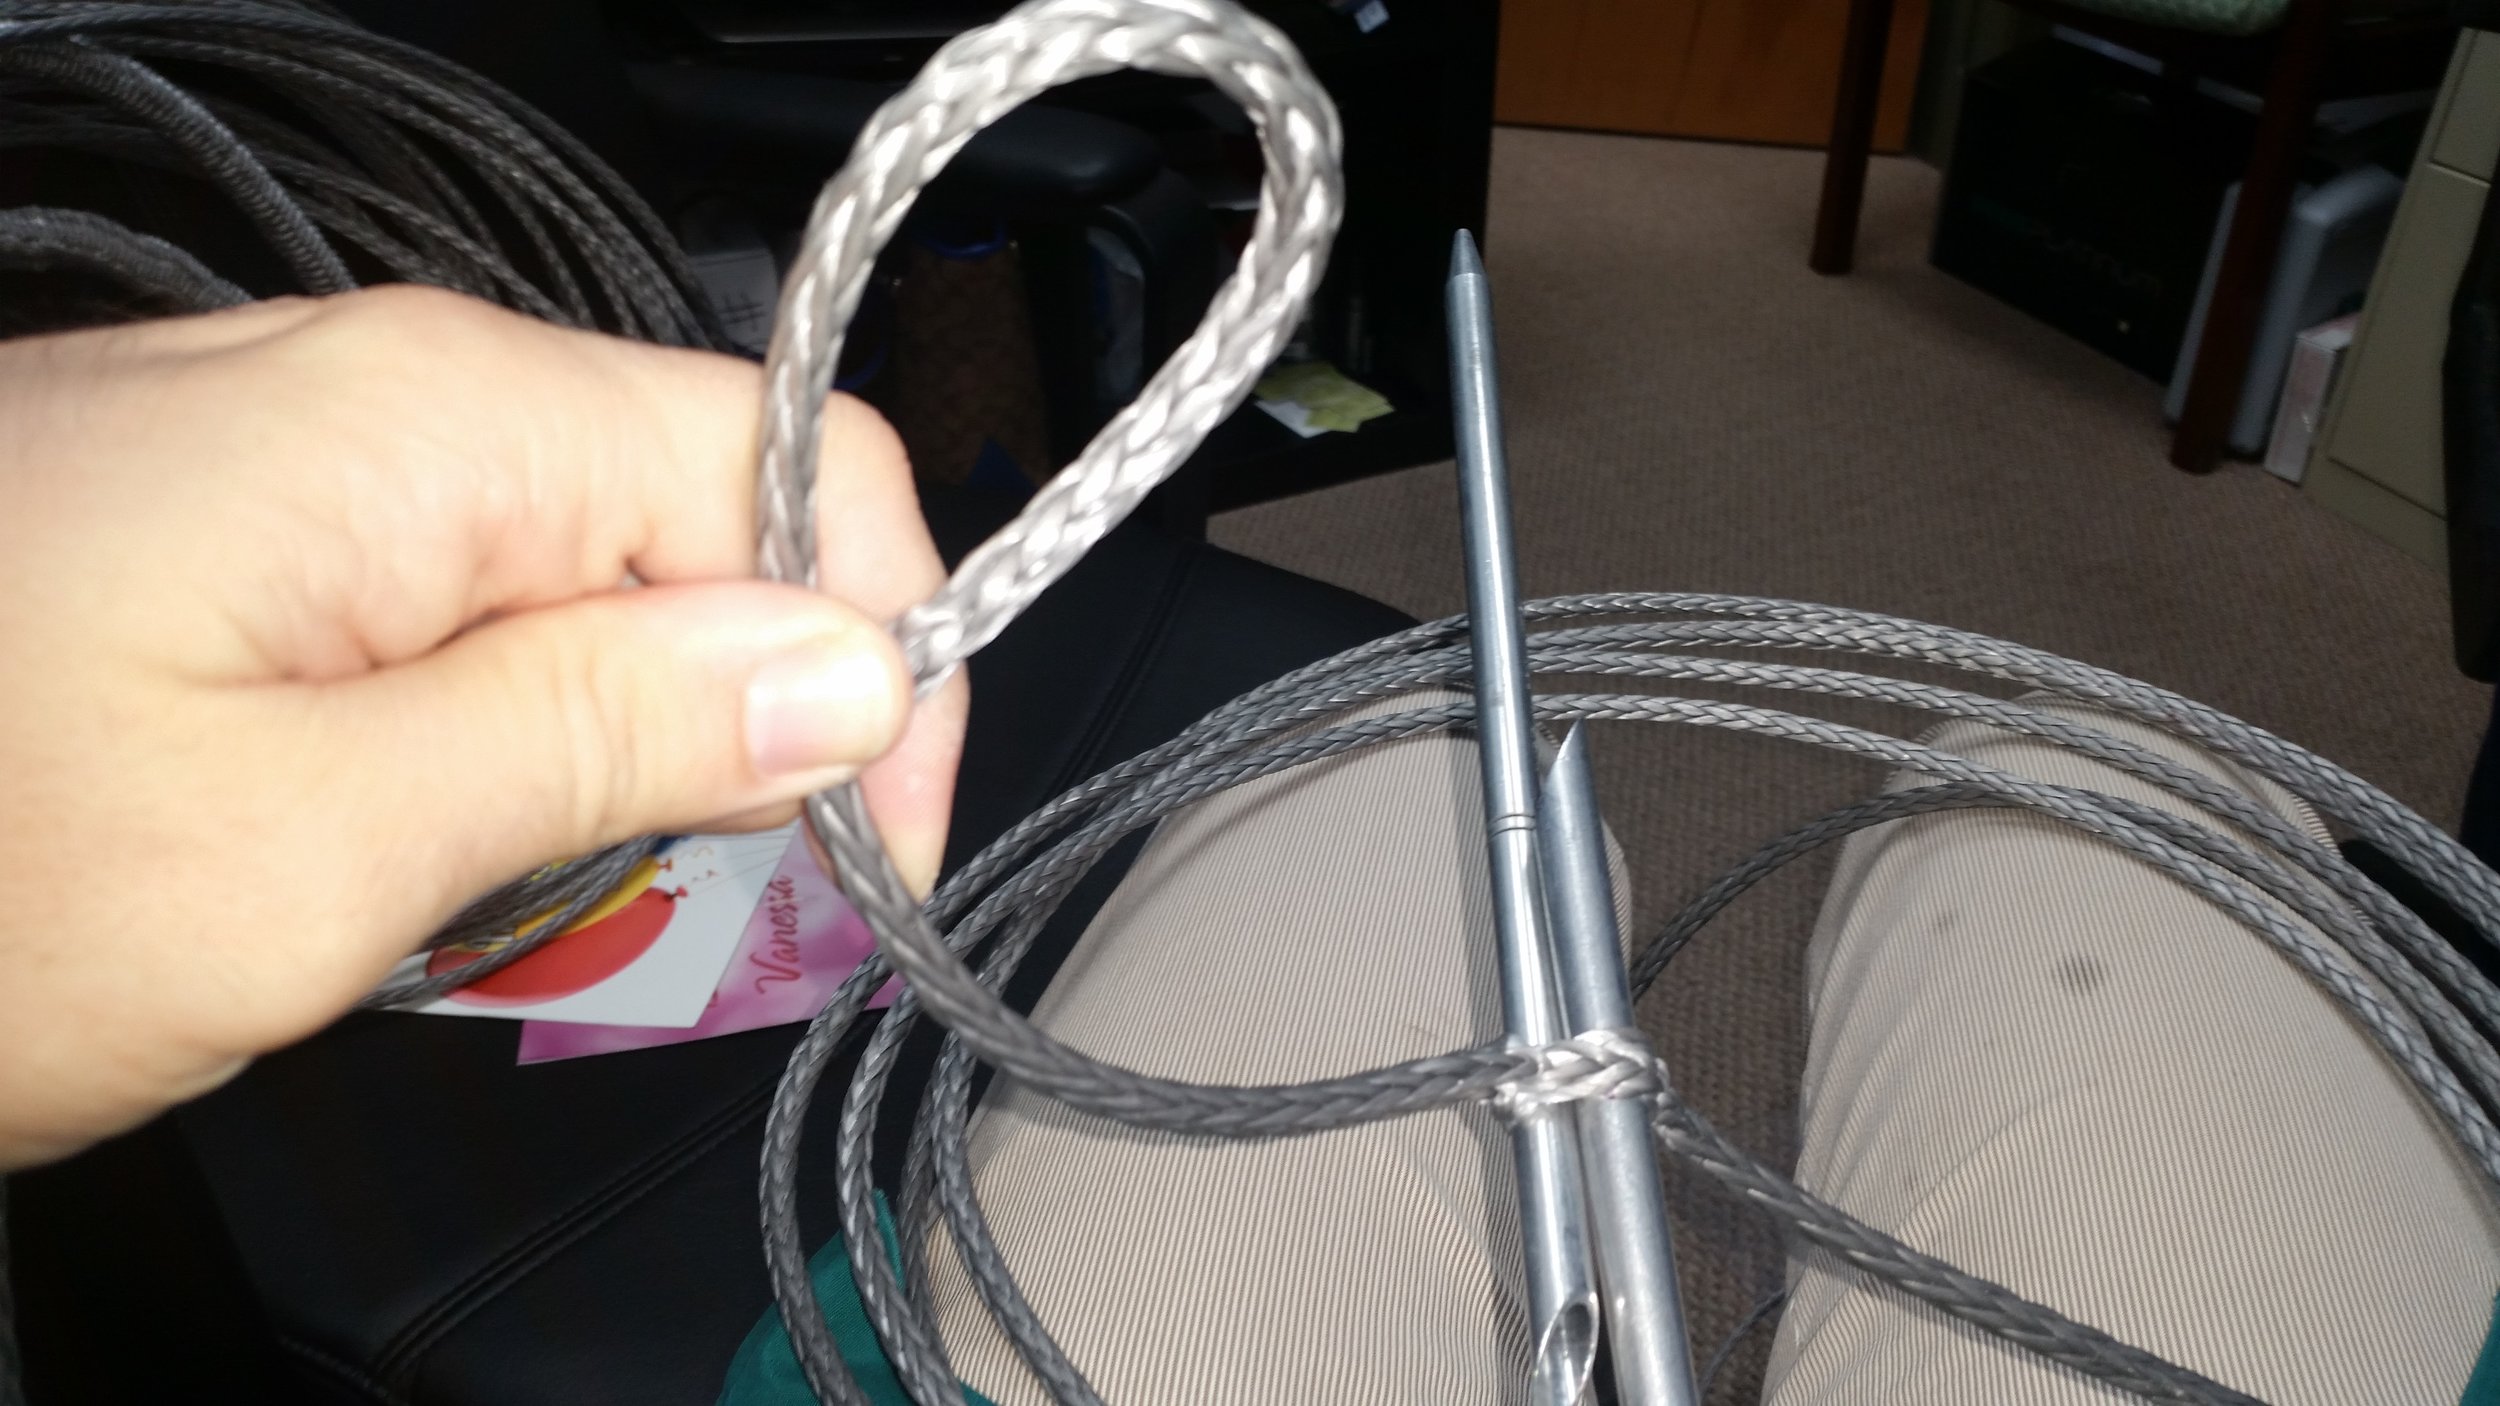
To begin, you need to stretch out all your newly spliced stays and line them up end to end. You will tie the end of the last stay to a strong anchor point, the other end to a strong pulling device, all the stays in between will be tied to each other.  

I like to use a massive tree with a strong root system as my anchor and a heavy truck as my pulling device. With the stays tied between the truck and the tree, I can create a lot of tension on the stays to remove most of the constructional stretch. 

Once everything is setup, the process of removing the stretch is very straight forward, simply drive away from the tree and have the synthetic rigging stop you.  The truck I use weighs around 7,000 pounds, so stopping it requires some serious force. This strong yank will quickly remove any stretch that might still be present in the splices.

The process of removing the constructional stretch is very straight forward, but knowing when you are done is a little less obvious. There are a few ways to check and see if the constructional stretch has been removed, some are more obvious than others.

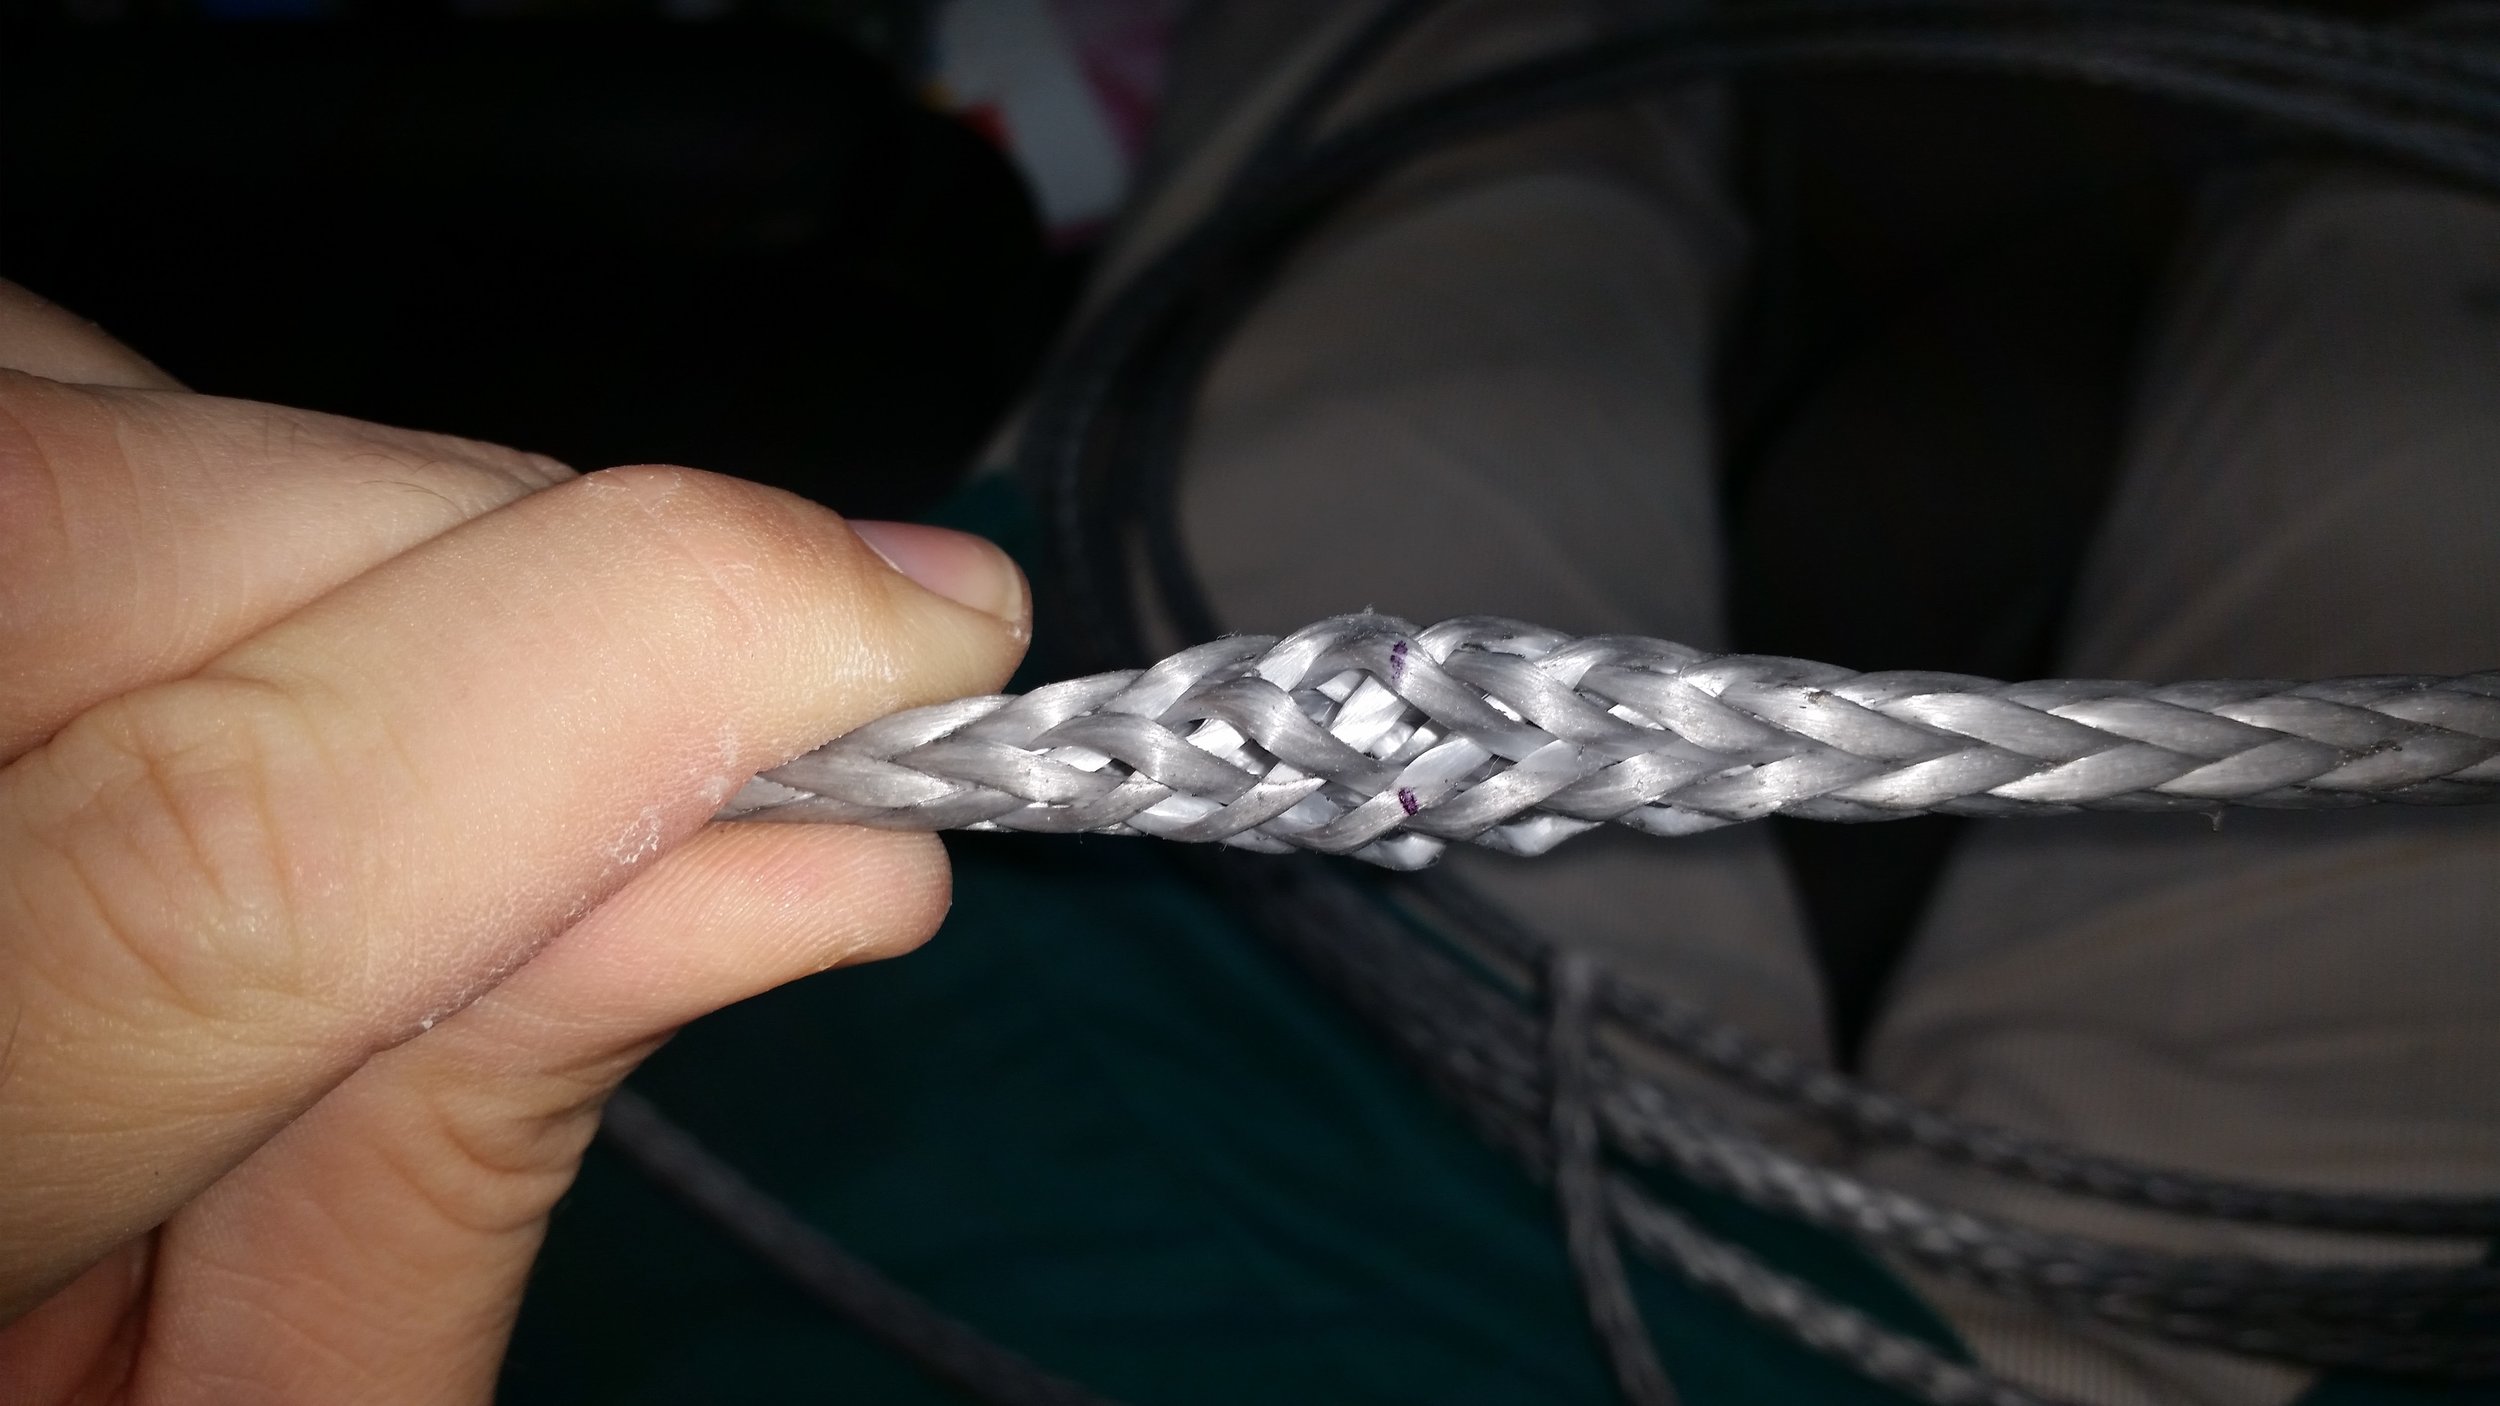
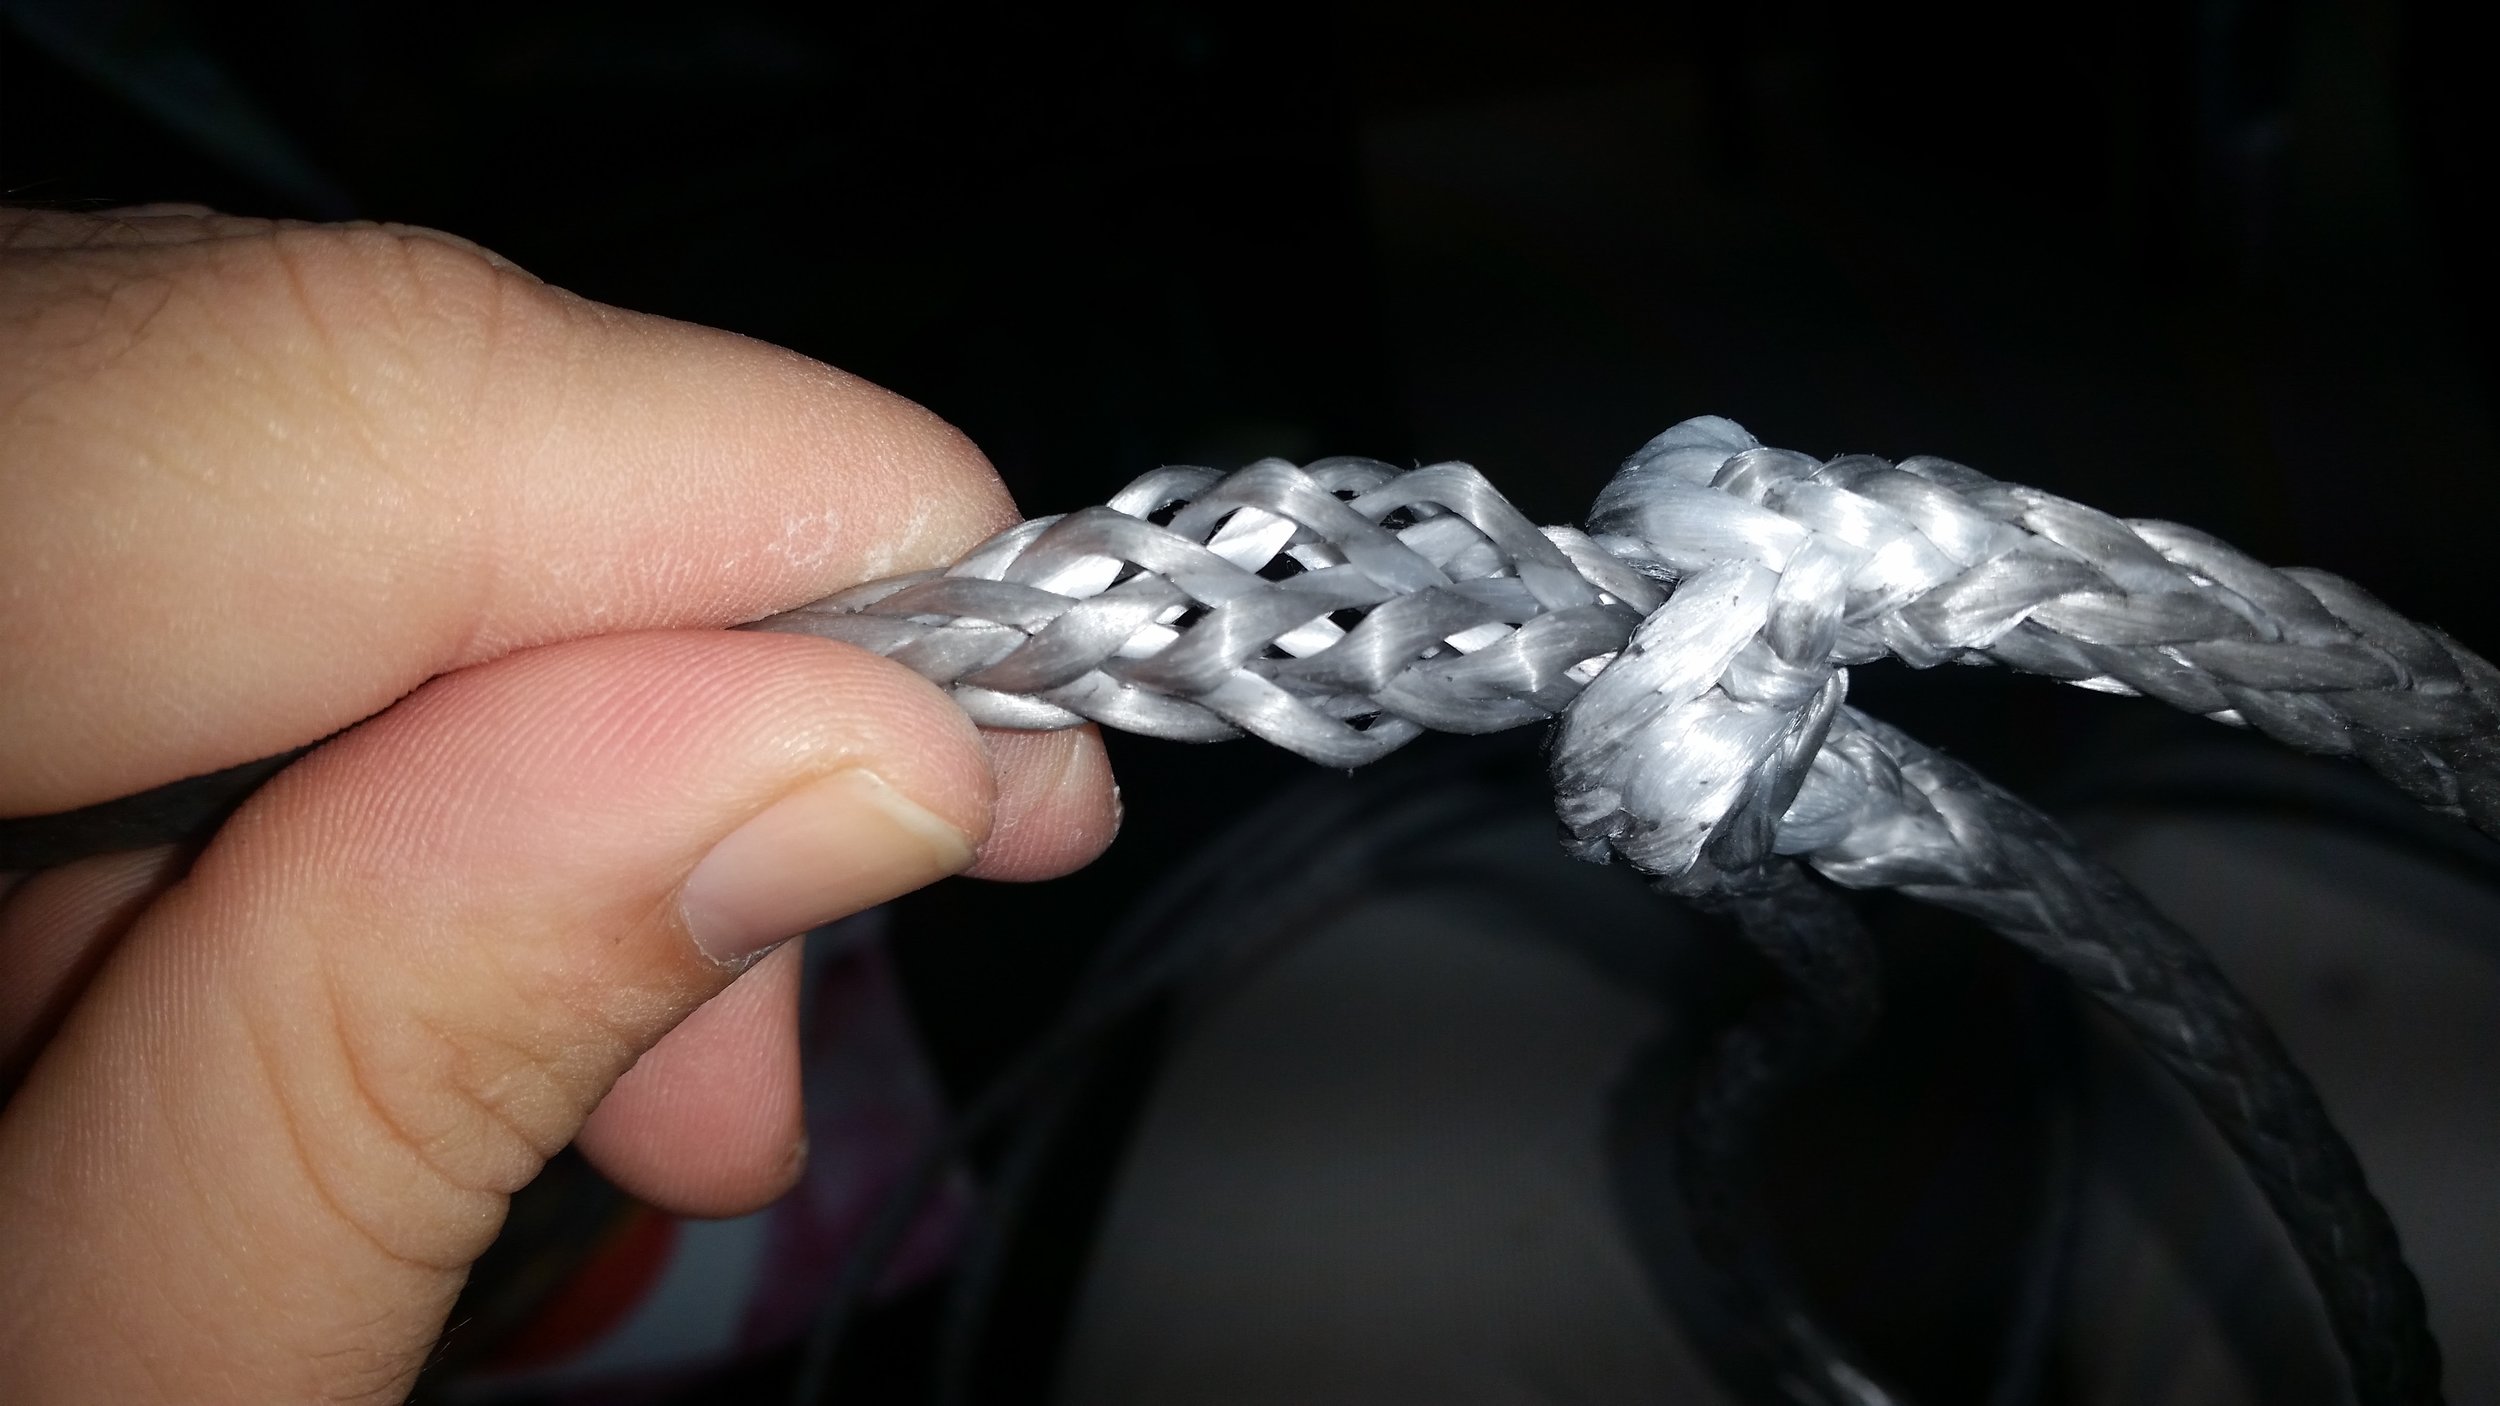
The first way is to milk the splice from the eye splice into the stay. If there is constructional stretch present, the outer weave will begin to bulge. Working these loose strands into the stay will greatly remove constructional stretch. If you can't get the outer weave to bulge, most of the constructional stretch has been removed.

upload.jpg

Another way to remove the stretch is to push up and down on the stay while it is pulled tight by the truck. I push the stay down with my foot in the middle of the length where my force will induce the most tension. If there is constructional stretch present, the tight stay will become slack when I release my foot. If it becomes slack, move the truck forward to tighten the stay again and repeat the process.

Both of these methods involve close inspection of the stay, and a lot of walking. Walking from the truck to the splices and back to the truck over and over takes a lot of time. Instead of all this walking, an easier method is to simply drive the truck forwards and backwards repeatedly. The sharp yanks induced by the truck will remove the stretch in a very short amount of time. After a few yanks, you can feel free to do the first two steps and evaluate if any stretch is remaining in the stay. 

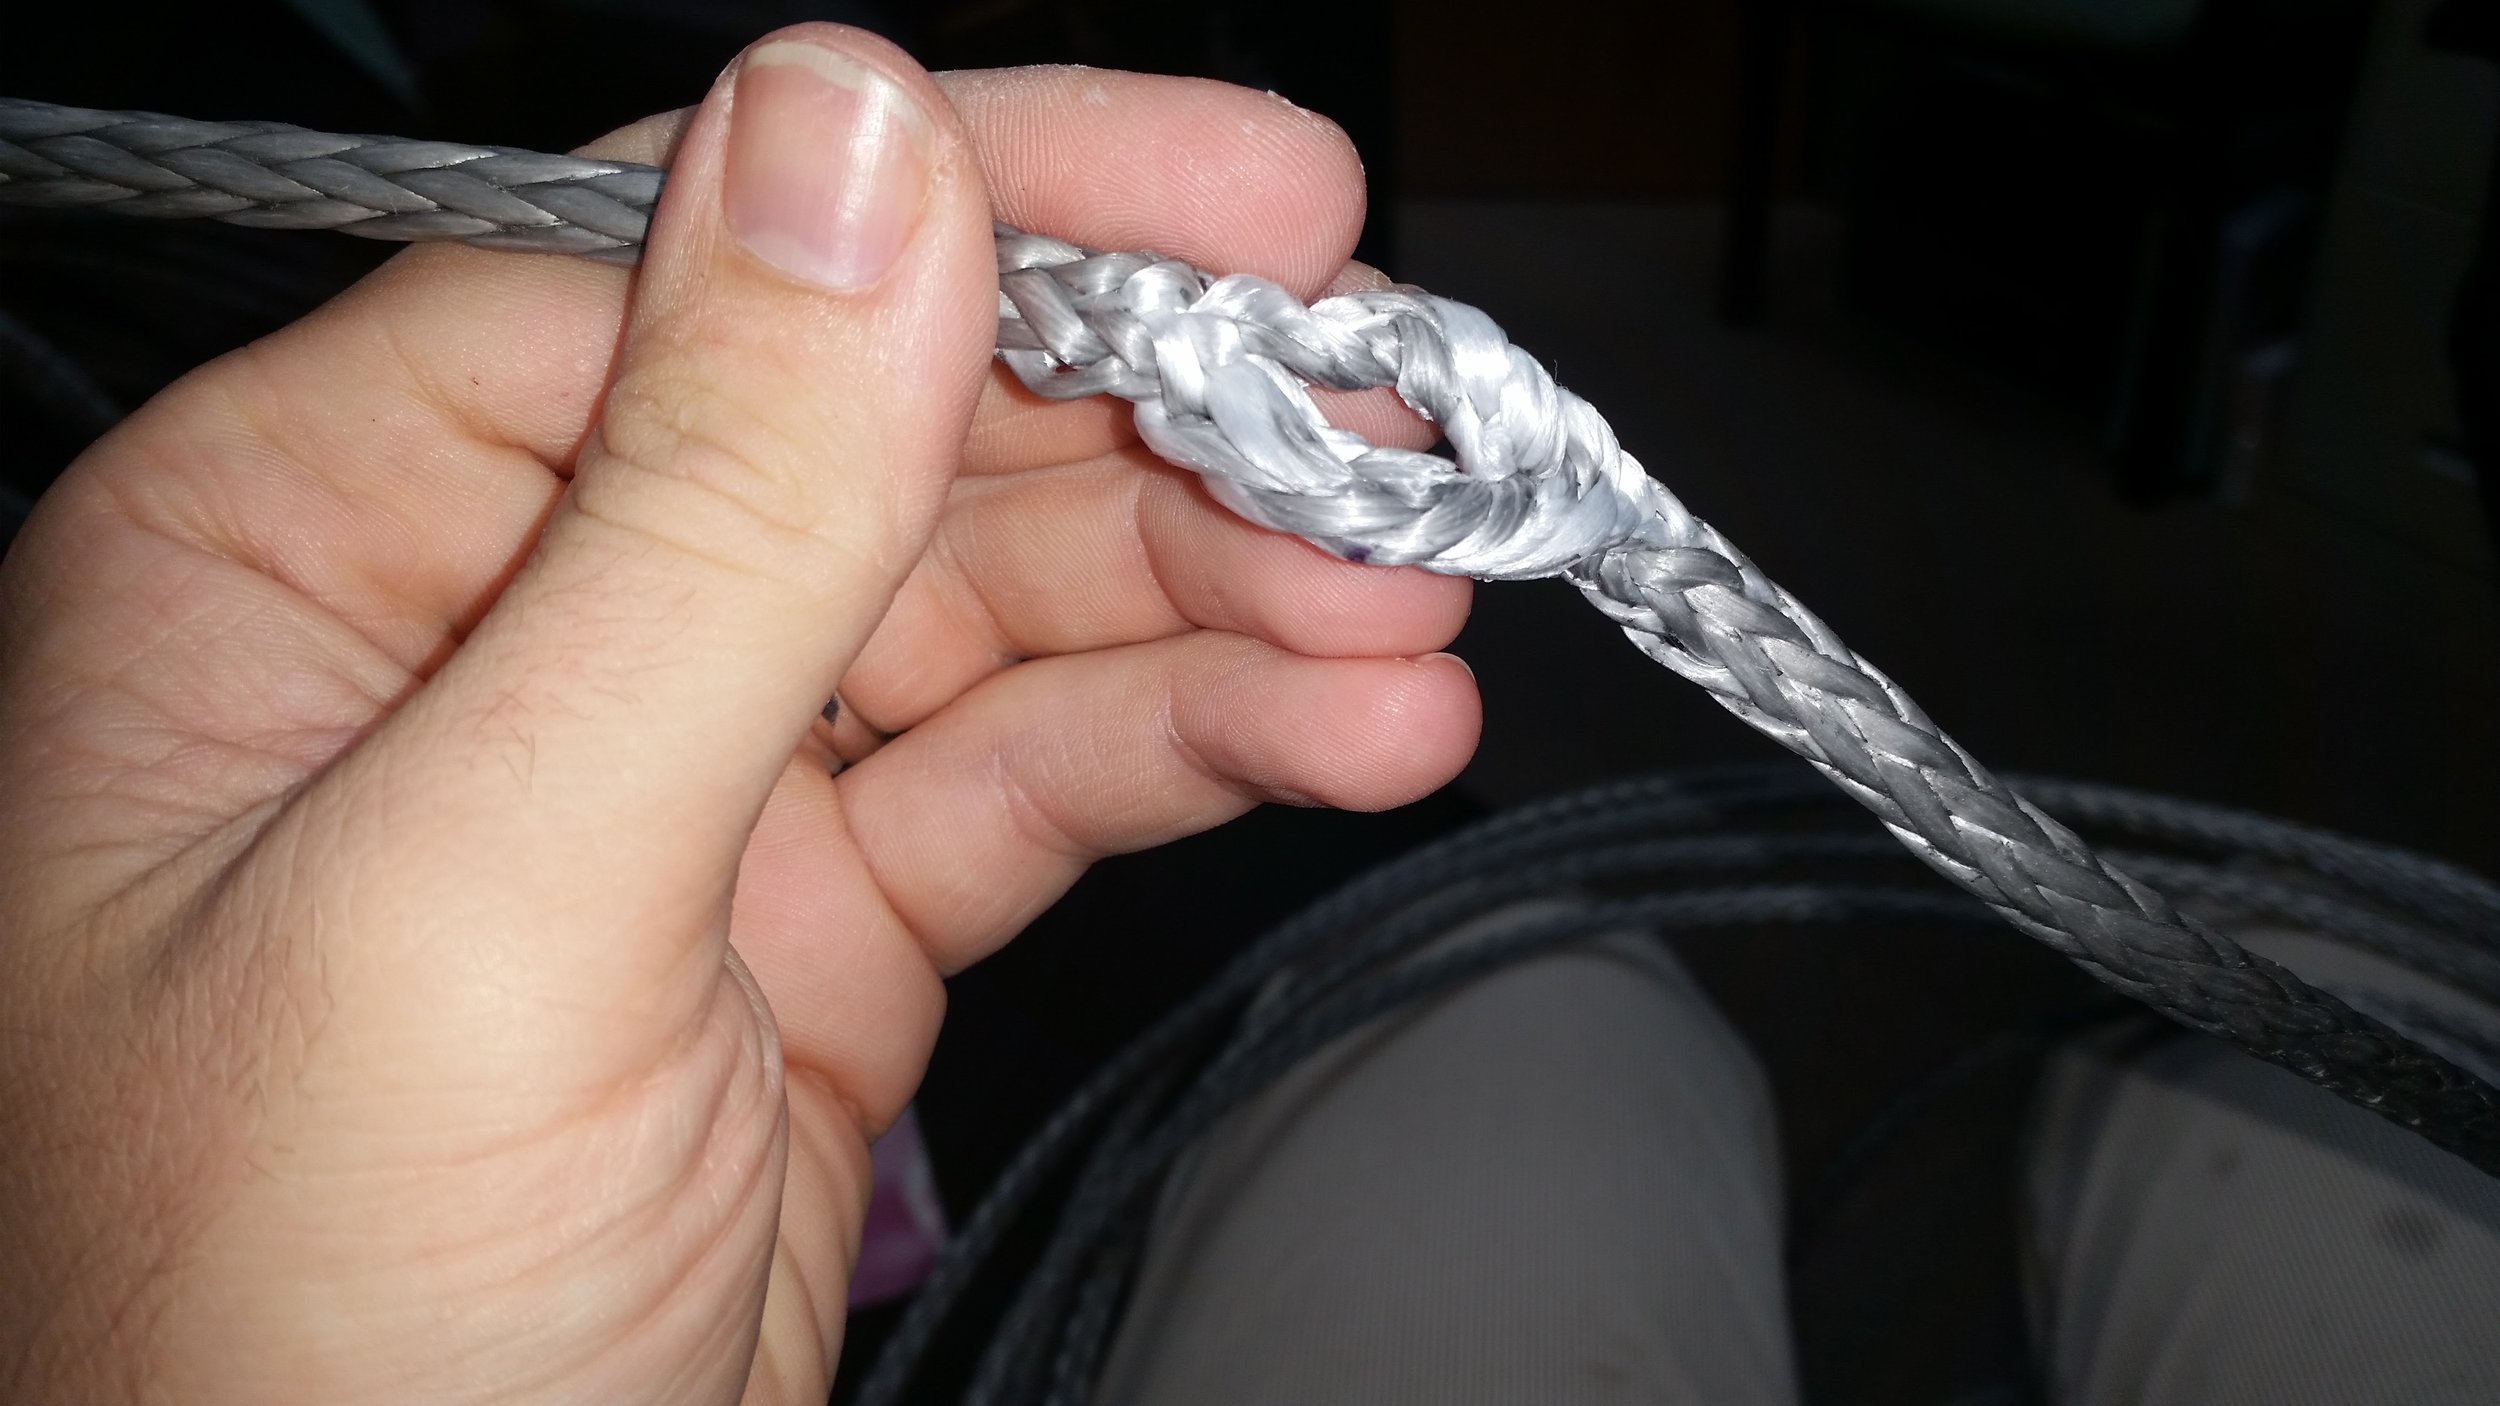
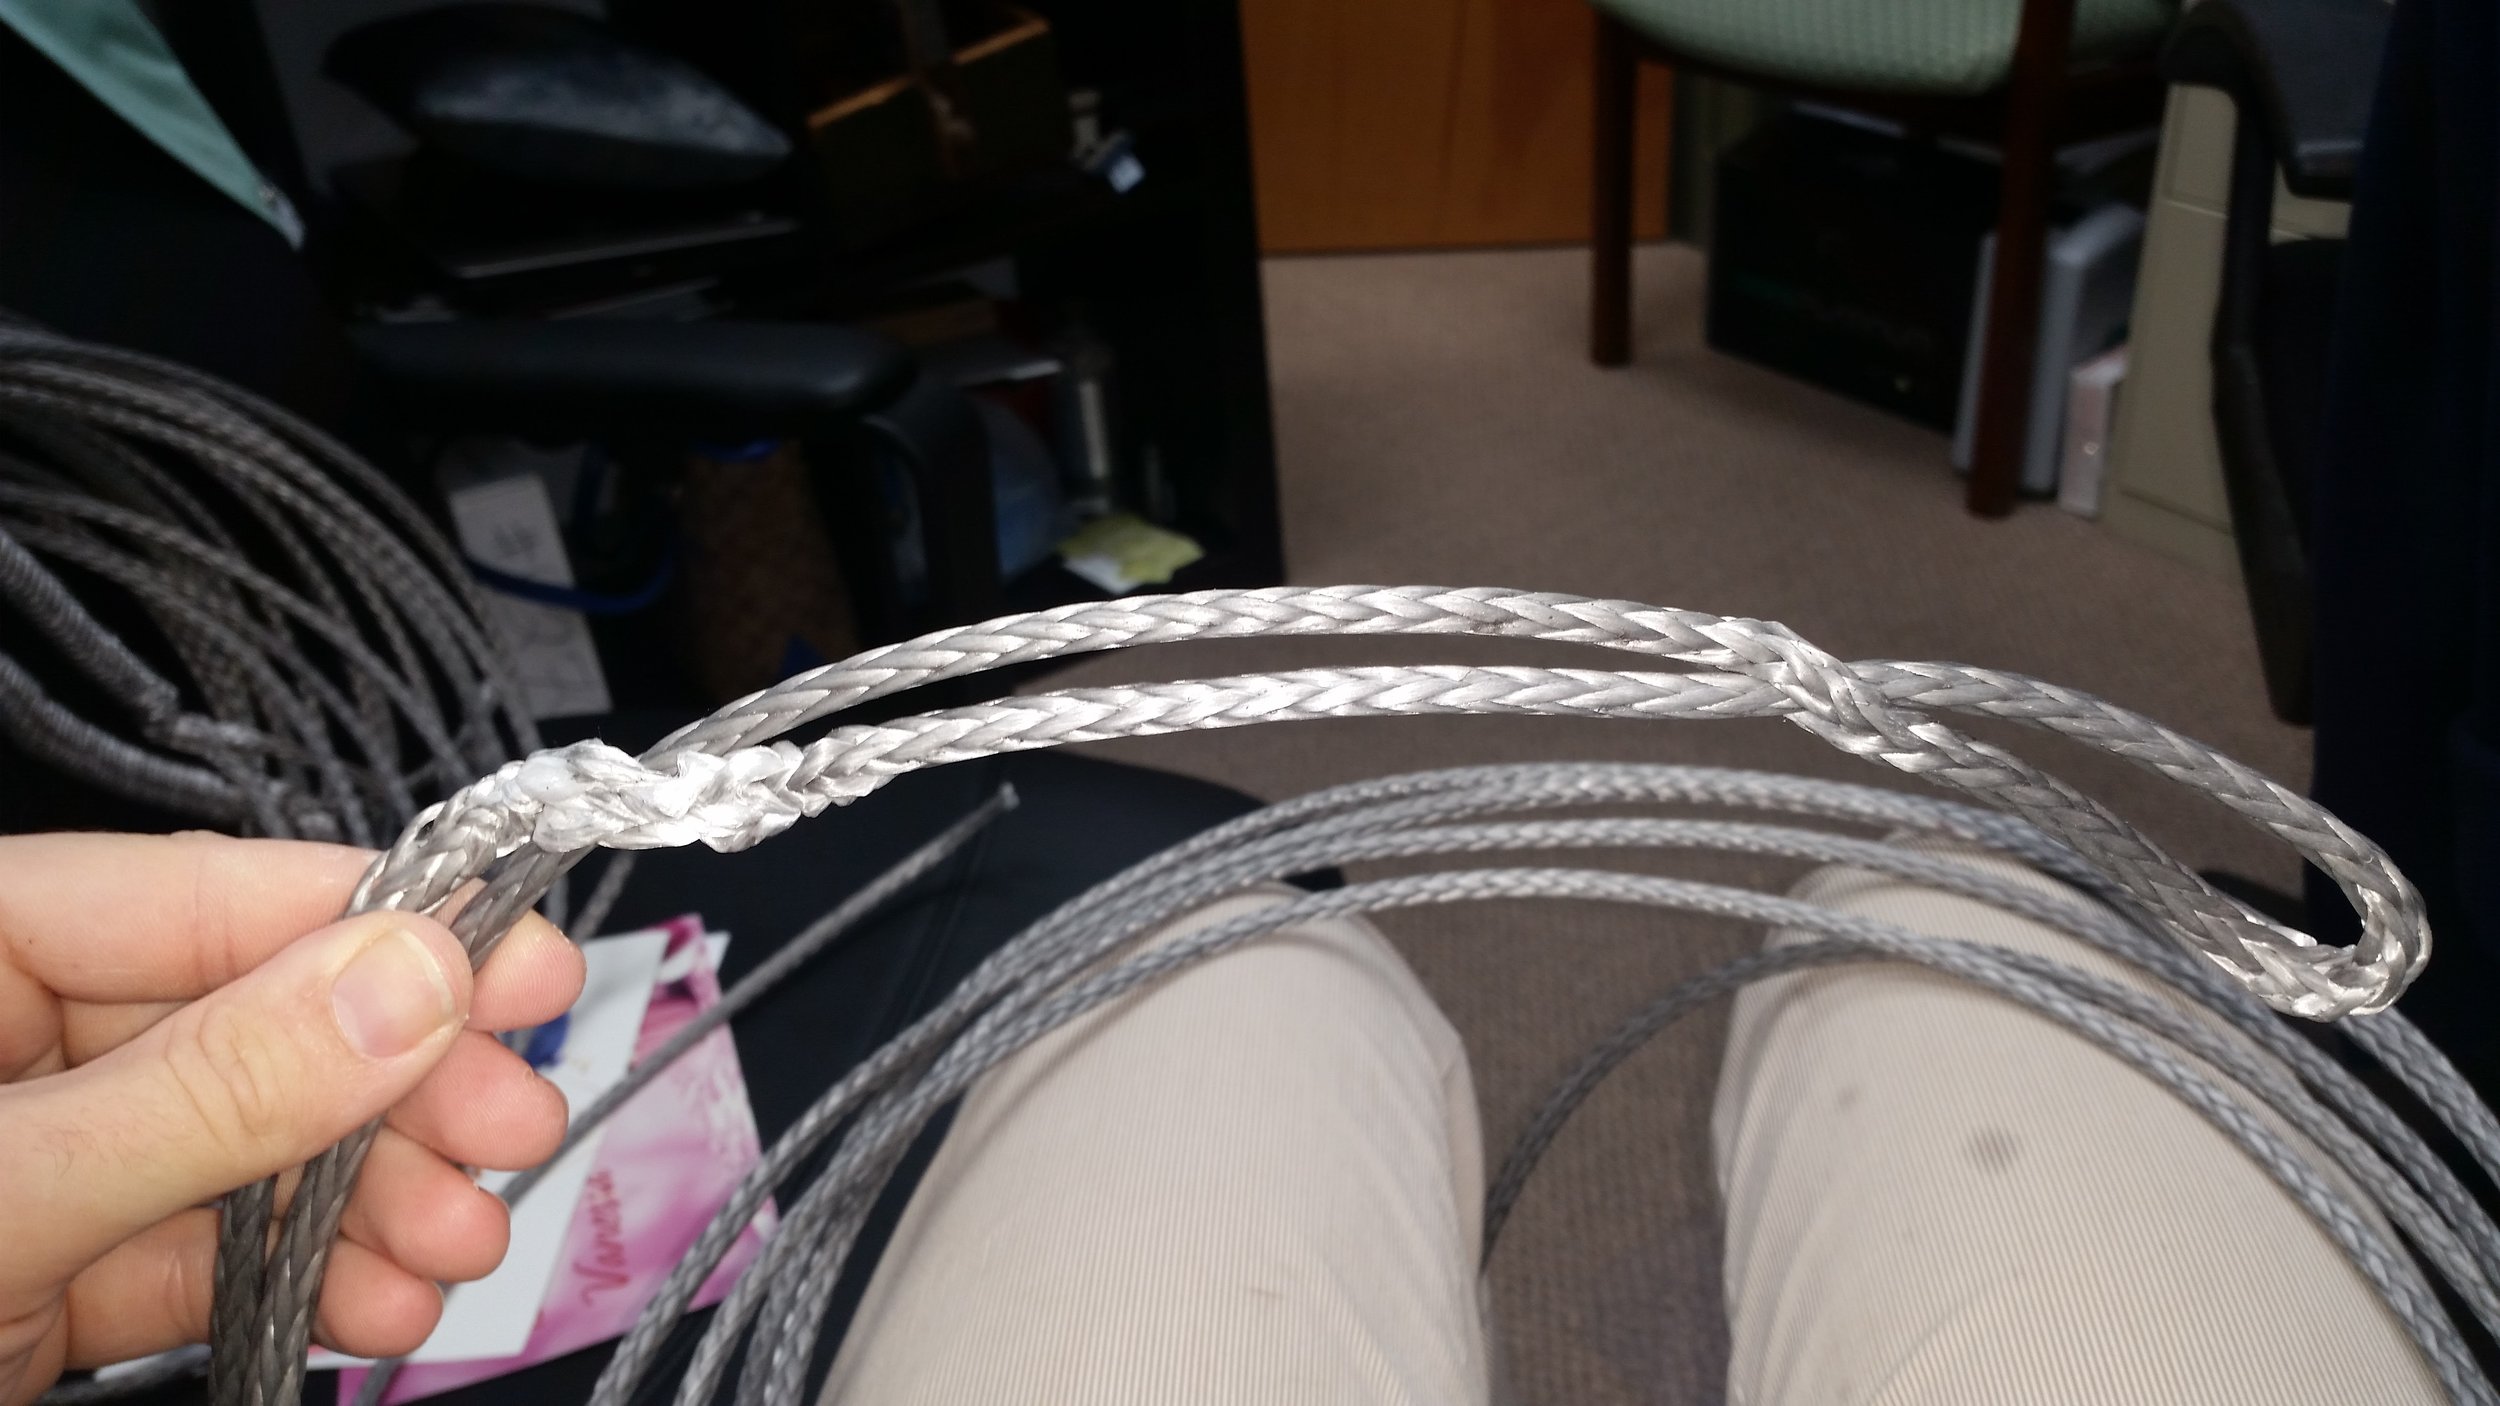
The easiest way to evaluate if any constructional stretch is present is to look at the thimbles. A new thimble that has never been loaded will have an opening near the throat. After a thimble has been loaded with a lot of tension, the throat will close and the ends of the thimble will touch.

upload.jpg
upload.jpg

After a few pulls with a truck, you will see the thimbles starting to close. Simply repeat the process until all the thimbles are closed, then evaluate the stays by milking and pushing down in the middle. If all the thimbles are closed and there is no remaining stretch, the stays will remain tight after testing them with your foot (pushing down in the middle of the stay and releasing to see if the line goes slack). If there is any stretch in them, simply do a few more pulls with the truck and re-evaluate the stays.

Islander 36 Conversion: Shrouds

The last stays that were fabricated were the cap shrouds and intermediate shrouds.

These stays are the longest and will be the shrouds that will hold the most force. When wind heels your yacht over, what is actually happening is your sails are pulling your mast over, which transfers the force to the shrouds, which transfer the force to the chainplates, which transfers the force to your bilge and keel. The true reason you heel over is your shrouds are pulling the windward side of your hull up! That is how much force the shrouds are under. 

The farther up the mast, the more force is placed on the shroud due to the increase in leverage. This is why the lowers are never under much load while the cap shrouds are under immense tension. To create a very safe and secure splice I used a Mobius Brummel Eye Splice with a much longer tail buried into the stay. 

A longer tail buried into the stay will provide more security against the unlikely event of the Mobius Brummel splice failing. While the splice alone is very strong, the extra security of a longer tail is a small price to pay when manufacturing new synthetic standing rigging.

The minimum length of the tail is 72 times the diameter of the line. In our case, we are using 6mm New England Ropes STS-HSR.

72 x 6mm = 432mm
432mm / 25.4 = 17 inches

In our case, 17 inches is the minimum length we need to bury to produce a very secure eye splice. To further strengthen this splice, I buried 36 inches of tail, which is the equivalent to 152.4 times the diameter of the line. 

When the stays were measured and cut, I marked the locations for the splice with a marker across two strands. When you mark 12 strand dyneema, be sure to mark across two strands in a parallel fashion. This will ensure that your splices come out even and along the prescribed lengths. If you only mark one strand, you will have to choose which area of that strand you want to pass your fid. A single strand difference will make your stays drastically different. When you mark two strands, you know exactly where to insert your fid.

Now you will be able to pass your fid through the correct location every time you make a splice!

The first pass is simple and straight forward. Simply open the weave and pass the fid through, then feed the tail through the fid to form a loop. The next loop is a bit more complicated, but it will form a Mobius Brummel Eye Splice with only one free tail.

Heat set dyneema is a bit stiffer than regular dyneema, making it a bit difficult to perform the splice. To loosen the dyneema up a bit, insert two fids through the same hole in the weave and twist them. This will stretch out the opening in the dyneema and allow you to complete the Mobius Brummel Eye Splice.

Pass the tail through the enlarged opening in the weave of the dyneema and pull it all the way through. The loop will pull through and twist the dyneema. This twist we be removed in a moment, so don't be concerned with any losses in strength due to the twisted fibers. If you didn't perform this twist now, the final splice would have a twist in it which could lead to premature failure of the stay.

Passing the twisted opening over the loop will complete the splice and take out the twist in the fibers. Regular dyneema is much softer, so the opening doesn't need to be exaggerated since the fibers will squirm and allow the formation of the splice. Heat set dyneema is very stiff, so twisting fids in it is necessary to expand the opening and allow all of this twisting to occur.

Sliding the twisted opening down all the way will eventually take you to the end where the twist will invert and the splice will be formed without any twisted fibers. 

Working the fibers back into place will reduce any signs of the expanded opening in the immediate moments following the splice. Once the stay is under tension, all the fibers will settle back into place.

As with any 12 strand splice, expand the weave by pushing on it and insert the fid through the opening that is directly under the tail. This will make certain that the tail is buried into the stay with minimal twist. 

Now pull the tail all the way through and out further down the stay. You want to make certain that the entire tail will be buried after you milk the splice. To ensure that no strands remain un-buried, simply bury the tail further into the stay than the length of the tail. This will ensure that you don't have to try and bury a tapered tail (which can be rather tricky).

Finally, taper the tail and milk it back into the splice. For these stays, I tapered the tail every third strand. This means I counted 36 strands back from the end and then pulled out every third strand. After they are all pulled out and the taper looks even, I cut the strands and milked the tail back into the splice. 

Repeat these steps a few times and you will have yourself a set of stays that is ready to replace your old steel stays!

Islander 36 Conversion: Deadeyes

The grommets for the deadeyes have been spliced and made and most of the thimbles have arrived. I have enough thimbles present to finish all the deadeyes for the shrouds and backstay. 

The backstay deadeye is symmetrical, as the lashings will only serve to absorb creep throughout the life of the rigging. The backstay will retain the turnbuckle, allowing the screws to serve as the main tensioner rather than the pulley system created by the deadeye.

The lower shroud's deadeyes have slightly larger top thimbles to allow for more passes of the lashings to tension these stays. The stays will not have turnbuckles, so the lashings will be responsible for developing the proper amount of tension in the rigging.  

The cap shroud and intermediate shrouds have significantly larger thimbles simply to accommodate more passes with the lashings. The lowers will only need around four passes to create an 8:1 mechanical advantage pulley system. The cap shrouds, on the other hand, need to develop a lot more tension and will require seven passes with the lashings. Seven passes would create a 14:1 pulley system which will provide plenty of tension to the rigging. 

At this point, all the deadeyes, the backstay and the lower shrouds are completed. The only shrouds left to fabricate are the cap shrouds and the intermediate shrouds.

Islander 36 Conversion: Lower Shrouds

The lower shrouds on the Islander 36 are each 17 feet long and will attach to the mast via T-Ball fittings and to the chainplates via deadeyes.


upload.jpg
upload.jpg

To begin the process of fabricating the lowers, measurements needed to be taken. The lowers are not under much stress or load, so the minimal amount of bury will be sufficient for these stays. Since we are using 6mm New England Ropes STS-HSR, we need to bury 17 inches.

The second mark is at the 27 inch position, allowing us to have 10 inches available for the eye splice, letting us insert a variety of thimble sizes while keeping the angle of the throat to a minimum. 

With these positions marked on the rope, a mobius brummel eye splice was performed in the ends of each stay, producing four identical stays that will be installed to replace the forward and aft lower shrouds.

Differences in Rigging: Turnbuckles vs. Deadeyes

To calculate how long your stay will be, you need to know what length is occupied by the tensioning system. Are you doing deadeyes, or deadeyes with turnbuckles? What's the difference?

If you are going to use deadeyes only, you will need a toggle which is sized appropriately to the chainplate clevis pin hole. The lower thimble of the deadeye needs to be small enough to fit between the jaws of the toggle. The top thimble needs to be large enough to serve as a turning block for the lashings. For stays under more load, a larger thimble is needed as it will allow more lashings to lay next to each other without overlapping any of them. For stays under less load, smaller thimbles can be used as less mechanical advantage will be needed to tension the stays.

When you use turnbuckles, they become the main choice for tensioning the stays. The deadeyes and lashings are simply to absorb the constructional stretch and creep over the lifetime of the stay. Turnbuckles only have a few inches of adjustment, where deadeyes and lashings can absorb feet of stretch. Since the deadeye doesn't need to form a block and tackle system to tension the stays, the thimbles can be significantly smaller. In these cases, the thimbles are sized based on the rope used to make the deadeye rather than calculating the number of passes the lashing will need to make to create the desired mechanical advantage.

The turnbuckle attaches to the chainplate via a toggle jaw on the lower screw, and to the lower thimble of the deadeye via a toggle jaw on the upper screw. While turnbuckles are expensive, they do save the cost of purchasing an additional toggle. 

The last difference between the two systems is the length added to the lower end of the stay. A deadeye will stretch out to around 12 inches in length, and the lashings should be between 18 to 24 inches in length. This will give you plenty of leeway for additional stretch or creep in the stay over the years without the risk of the stay and deadeye becoming two-blocked. If the deadeye were to become two-blocked, the splice would need to be opened up and relocated further up the stay.

A turnbuckle will add additional distance to the lower components of the stay, meaning that the stay should be cut even shorter. A 1/2 inch turnbuckle will be around 15 inches long when fully unscrewed, add to that a 12 inch long deadeye and 18 inches of lashings, and you now have 45 inches of the lower section composed of tensioning equipment. 

In our example the stay would need to be cut 45 inches shorter for a setup of deadeyes and turnbuckles, or only 30 inches shorter for a setup of just deadeyes.

If you are unsure about deadeyes and would like to try them out but want to keep the door open to convert to turnbuckles in the future, cutting the stays to the length needed for a deadeye and turnbuckle, that way turnbuckles can be easily retrofitted should the desire arise.

One last point about positioning the eye splice in the lower portion of the stay is to consider damage from chafe. If your sheets will rub on the shrouds, consider positioning the end of the stay just higher than the area of chafe. This may result in a very long lashing which will still work fine and not cause the standing rigging to suffer.

The reason for setting the lashing in a high chafe region instead of the stay is the ease of replacement. The stay is going to chafe if a sheet is constantly rubbing on it, this is unavoidable. By positioning the eye splice higher than the area of chafe, the lashing will become the sacrificial piece that can be replaced when it becomes severely chafed. Lashings are much cheaper and easier to replace than a stay that has been spliced to exact size constraints. 

If the chafe were to occur on the lower portion of the stay, the whole stay would need to be replaced. If the lashing were to become severely chafed, just the inexpensive lashing needs to be replaced.

Basically, deadeyes alone will have a slightly longer stay, where deadeyes and turnbuckles will have a shorter stay. The only modifications to this rule would be to protect the stay from chafing damage, where it might be set even shorter to remove the lower portion of the stay from risk of chafing damage.