Standing Rigging

Making Dyneema Deadeyes

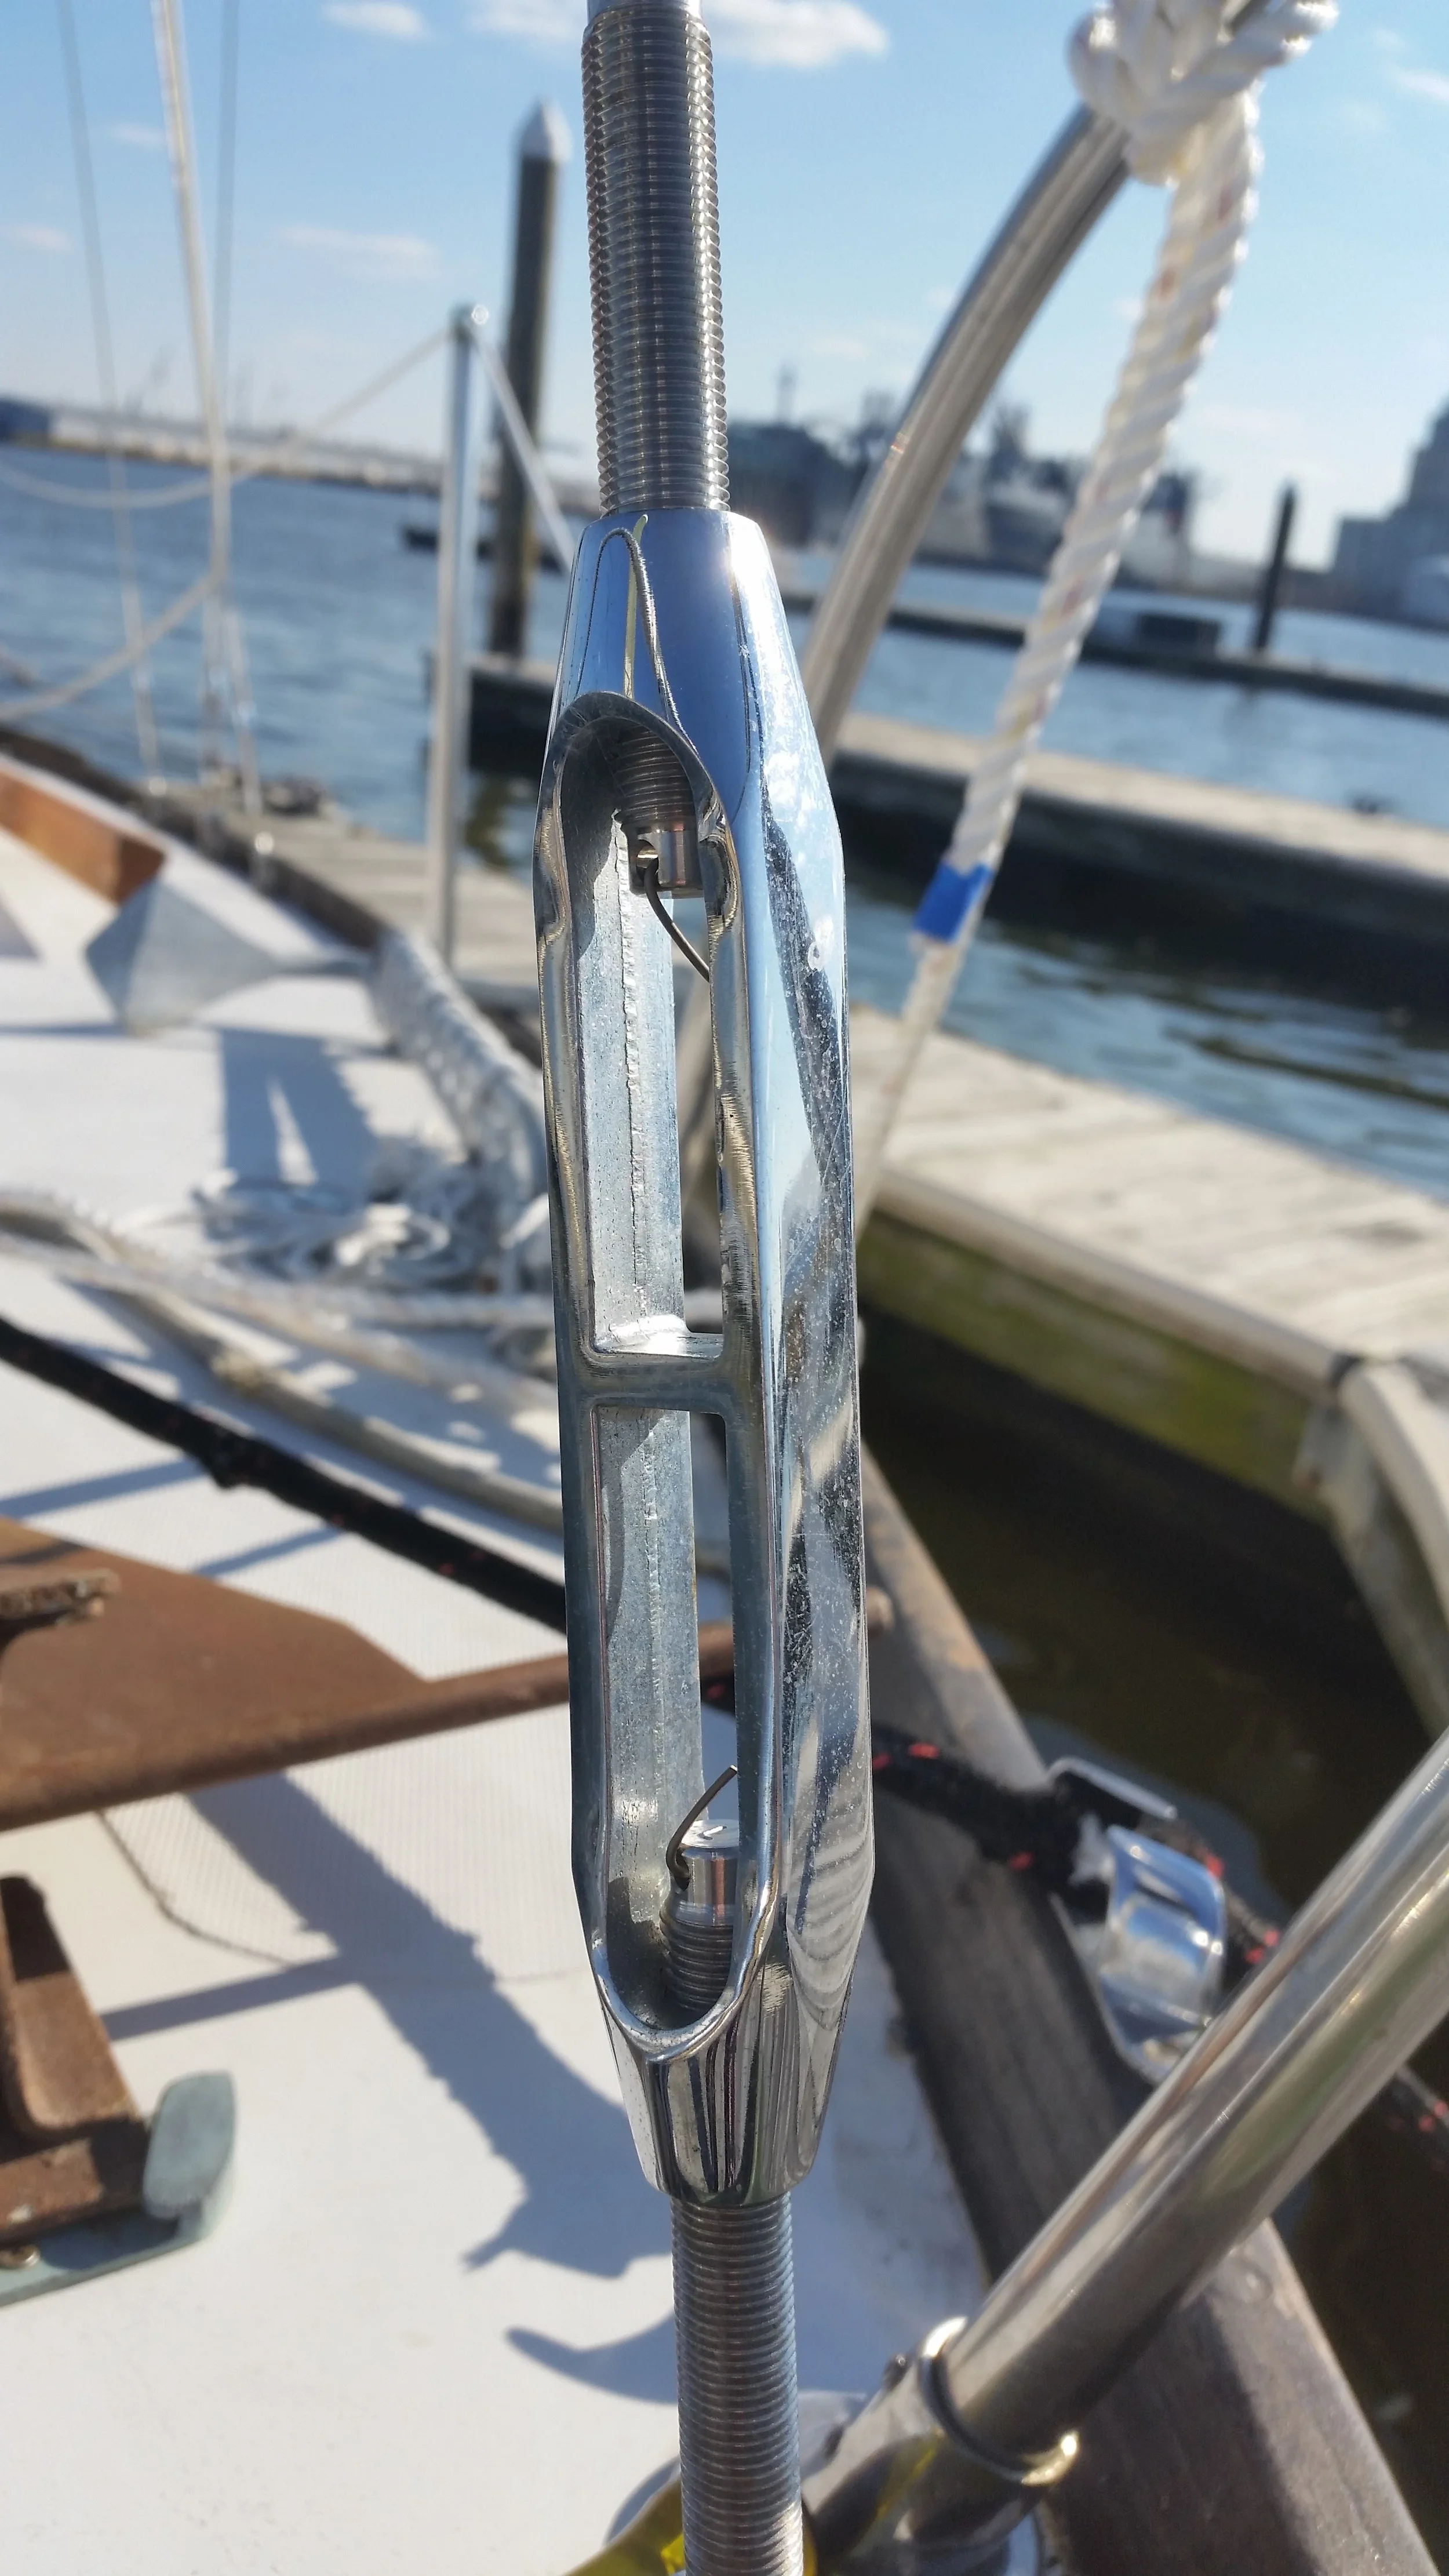
Deadeyes serve one purpose, that is to connect the synthetic stay to the chainplate. Chainplates have a small hole in them desinged to connect the rigging via a clevis pin attachment. Normally, the clevis pin is connected to a turnbuckle, but with deadeyes, the clevis pin connects a toggle to the chainplate.

This toggle serves as a metal strap that will hold the deadeye securely in place.

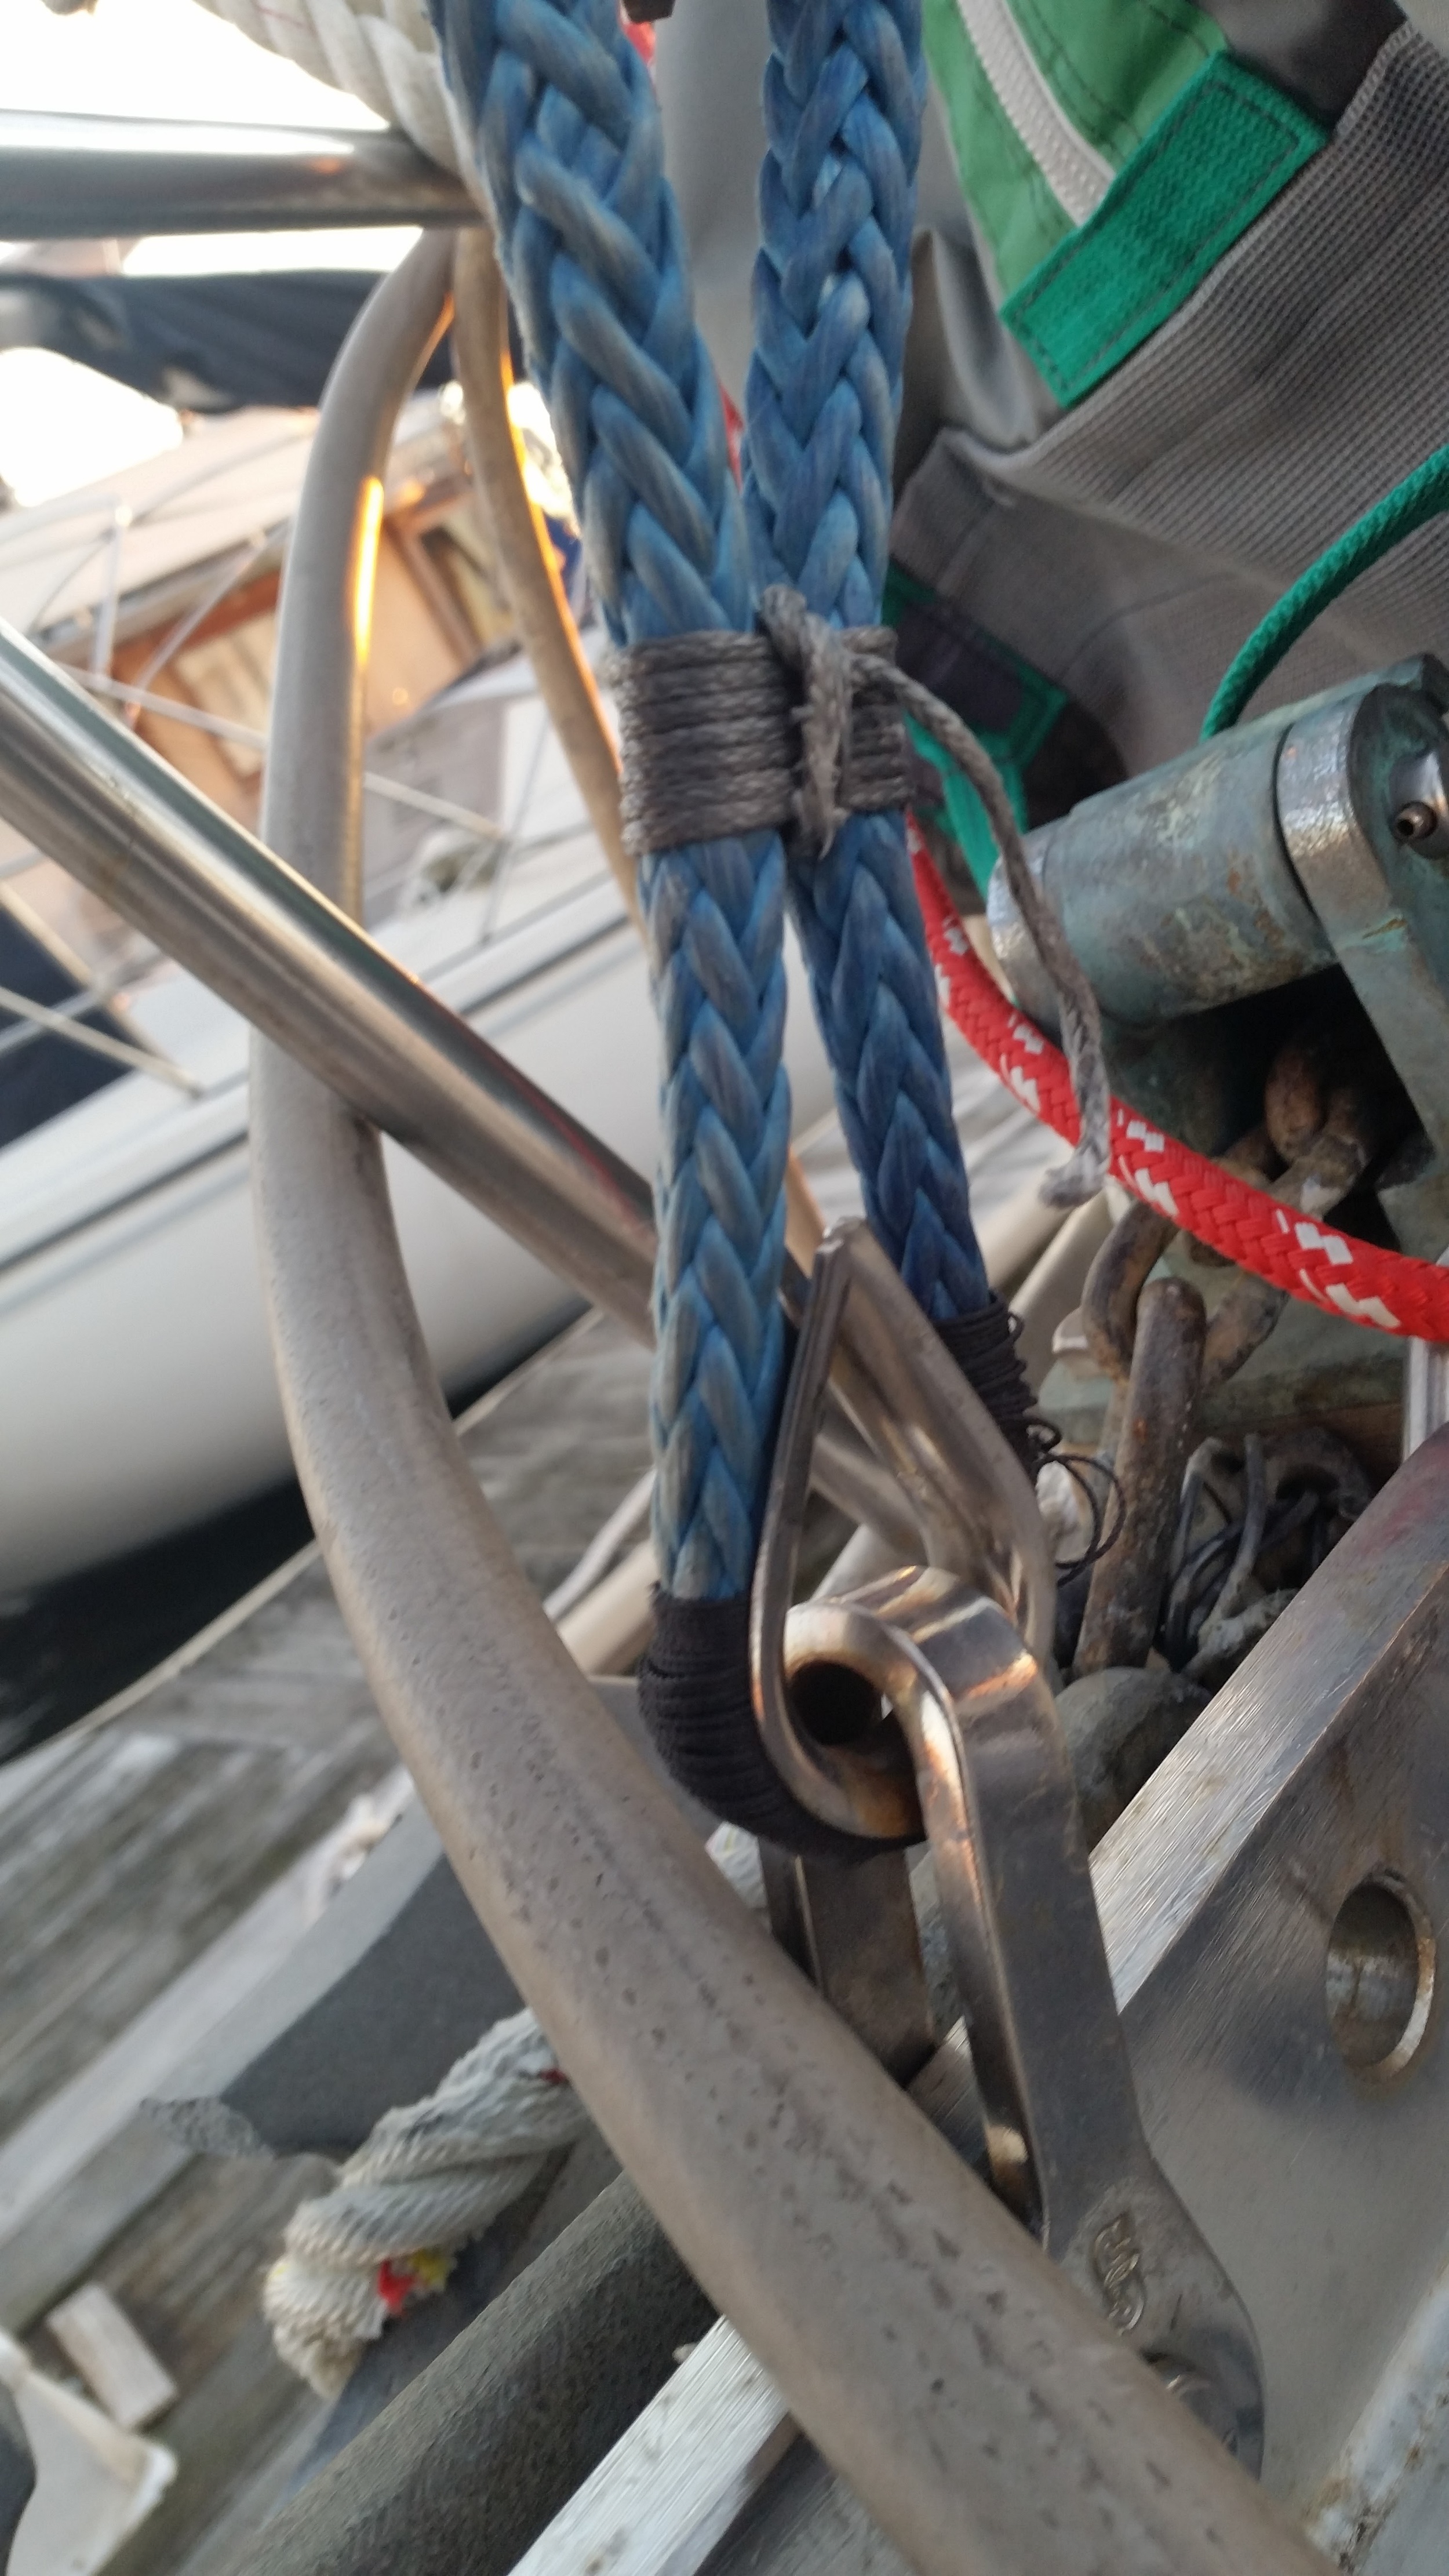
Dyneema deadeyes may look fancy with their loops and fittings, but the are actually just a dyneema grommet with two thimbles in them. The central tie is only there to hold the thimbles in place.

Making a grommet is a tedious task, and making one out of dyneema proves to be all the more complex. Dyneema is classified as 12 Strand Class II rope, and relies on a long bury to securely hold the splice. The typical recommended bury for a dyneema splice is 72 times its diameter. This means that for the 9mm line I'm using for these deadeyes, I need to bury 648mm (25.5inches) on each side. In other words, the grommet would need to be 25.5 inches in long. Mind you that dyneema deadeyes are less than 12 inches long! How can this be done?!

The trick is understanding how the line works and how splices work. 12 strand Class I and II ropes are simply made of 12 lines woven in a tube. When you scrunch the rope together, the hollow center will open up. When splicing 12 strand, the tail is slid through the hollow center and left untouched. There is no fancy weaving involved because the 12 strands surrounding it will crush down on it like a Chinese Finger Trap when you try to pull it apart. Class I fibers are not very slippery, so they require less bury; Class II fibers are very slippery, and require a longer bury. Dyneema is a Class II and is very slippery!

A secret to side step the bury requirement is to perform a Mobious Brummel Splice. A Mobious Brummel works by passing the ropes through each other, causing them to lock against each other when pulled. The tail is then burried, further locking the splice in place. For the junction to open up, the 12 woven strands need to unravel and separate in order to pull apart. The pressure from the woven tube crushing down on the burried tail will not allow the strands to unravel and will keep the splice secure. Locking stitches will add extra insurance to make sure that nothing slips and everything holds

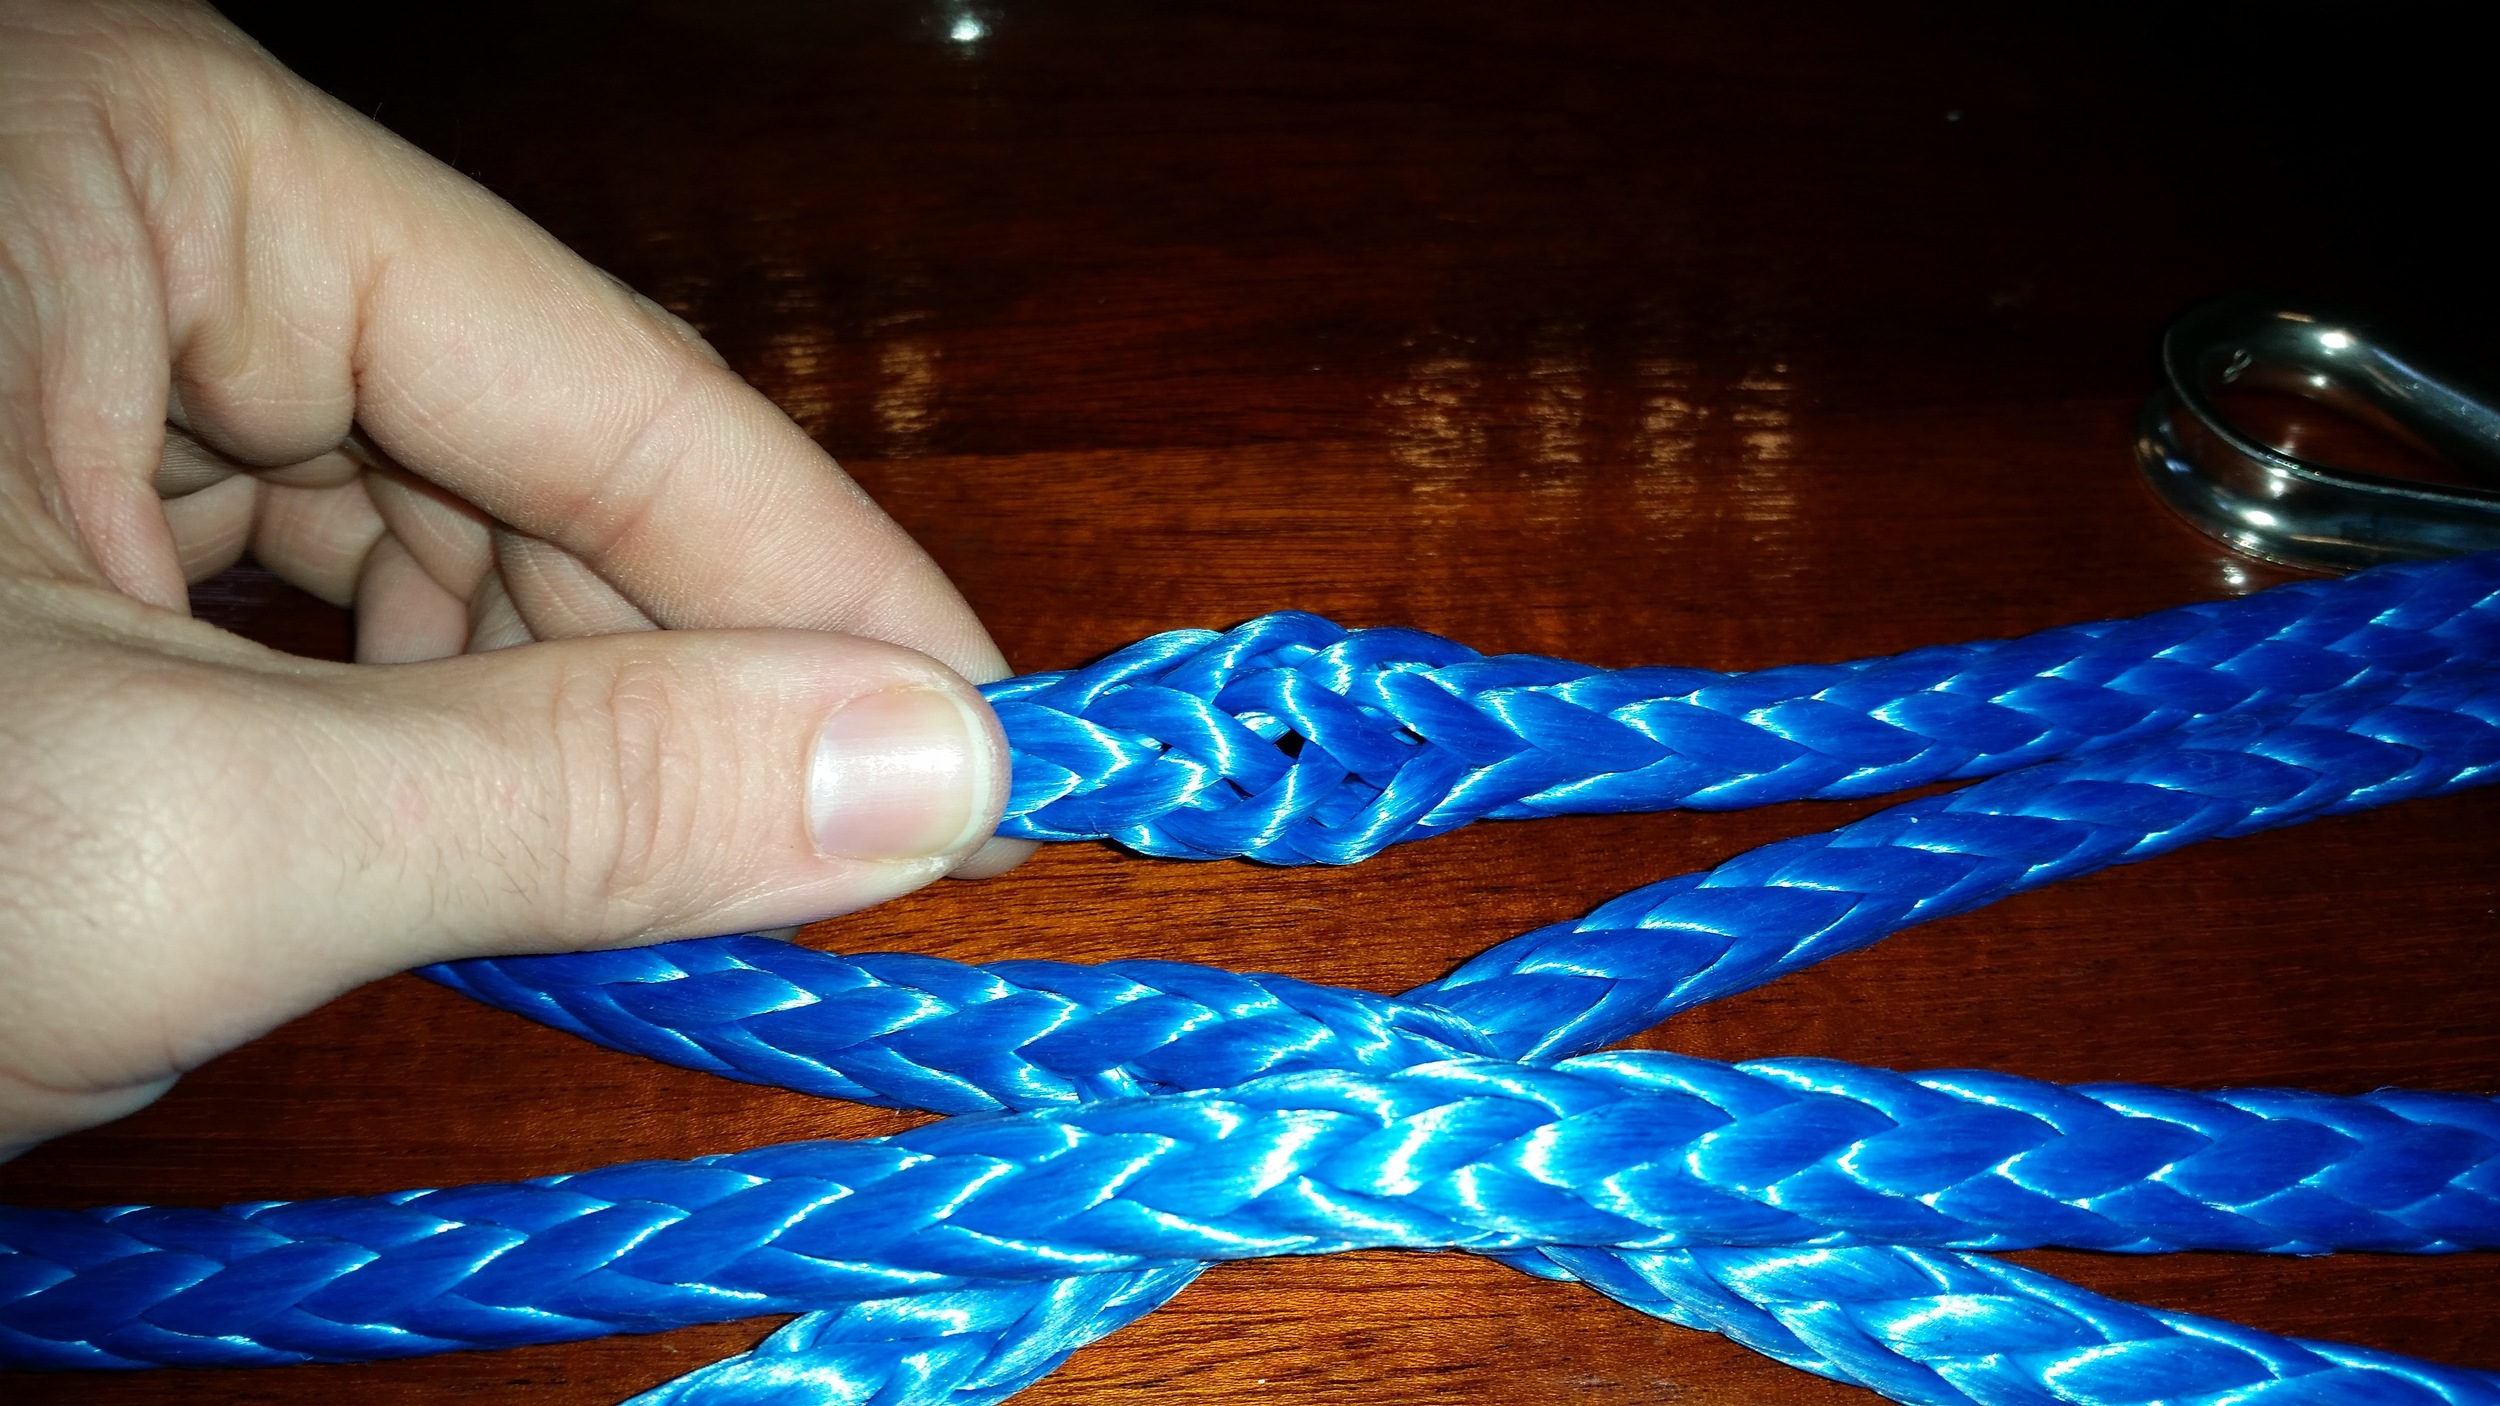
Mobious Brummel splices are easy to do, simply pass the two free ends through each other and bury the tail. When making a grommet, this is not possible. There is no way to pass the other line through as it is trapped on the other side of the grommet. To get around this, you simply deconstruct and reconstruct the line as you make the splice.

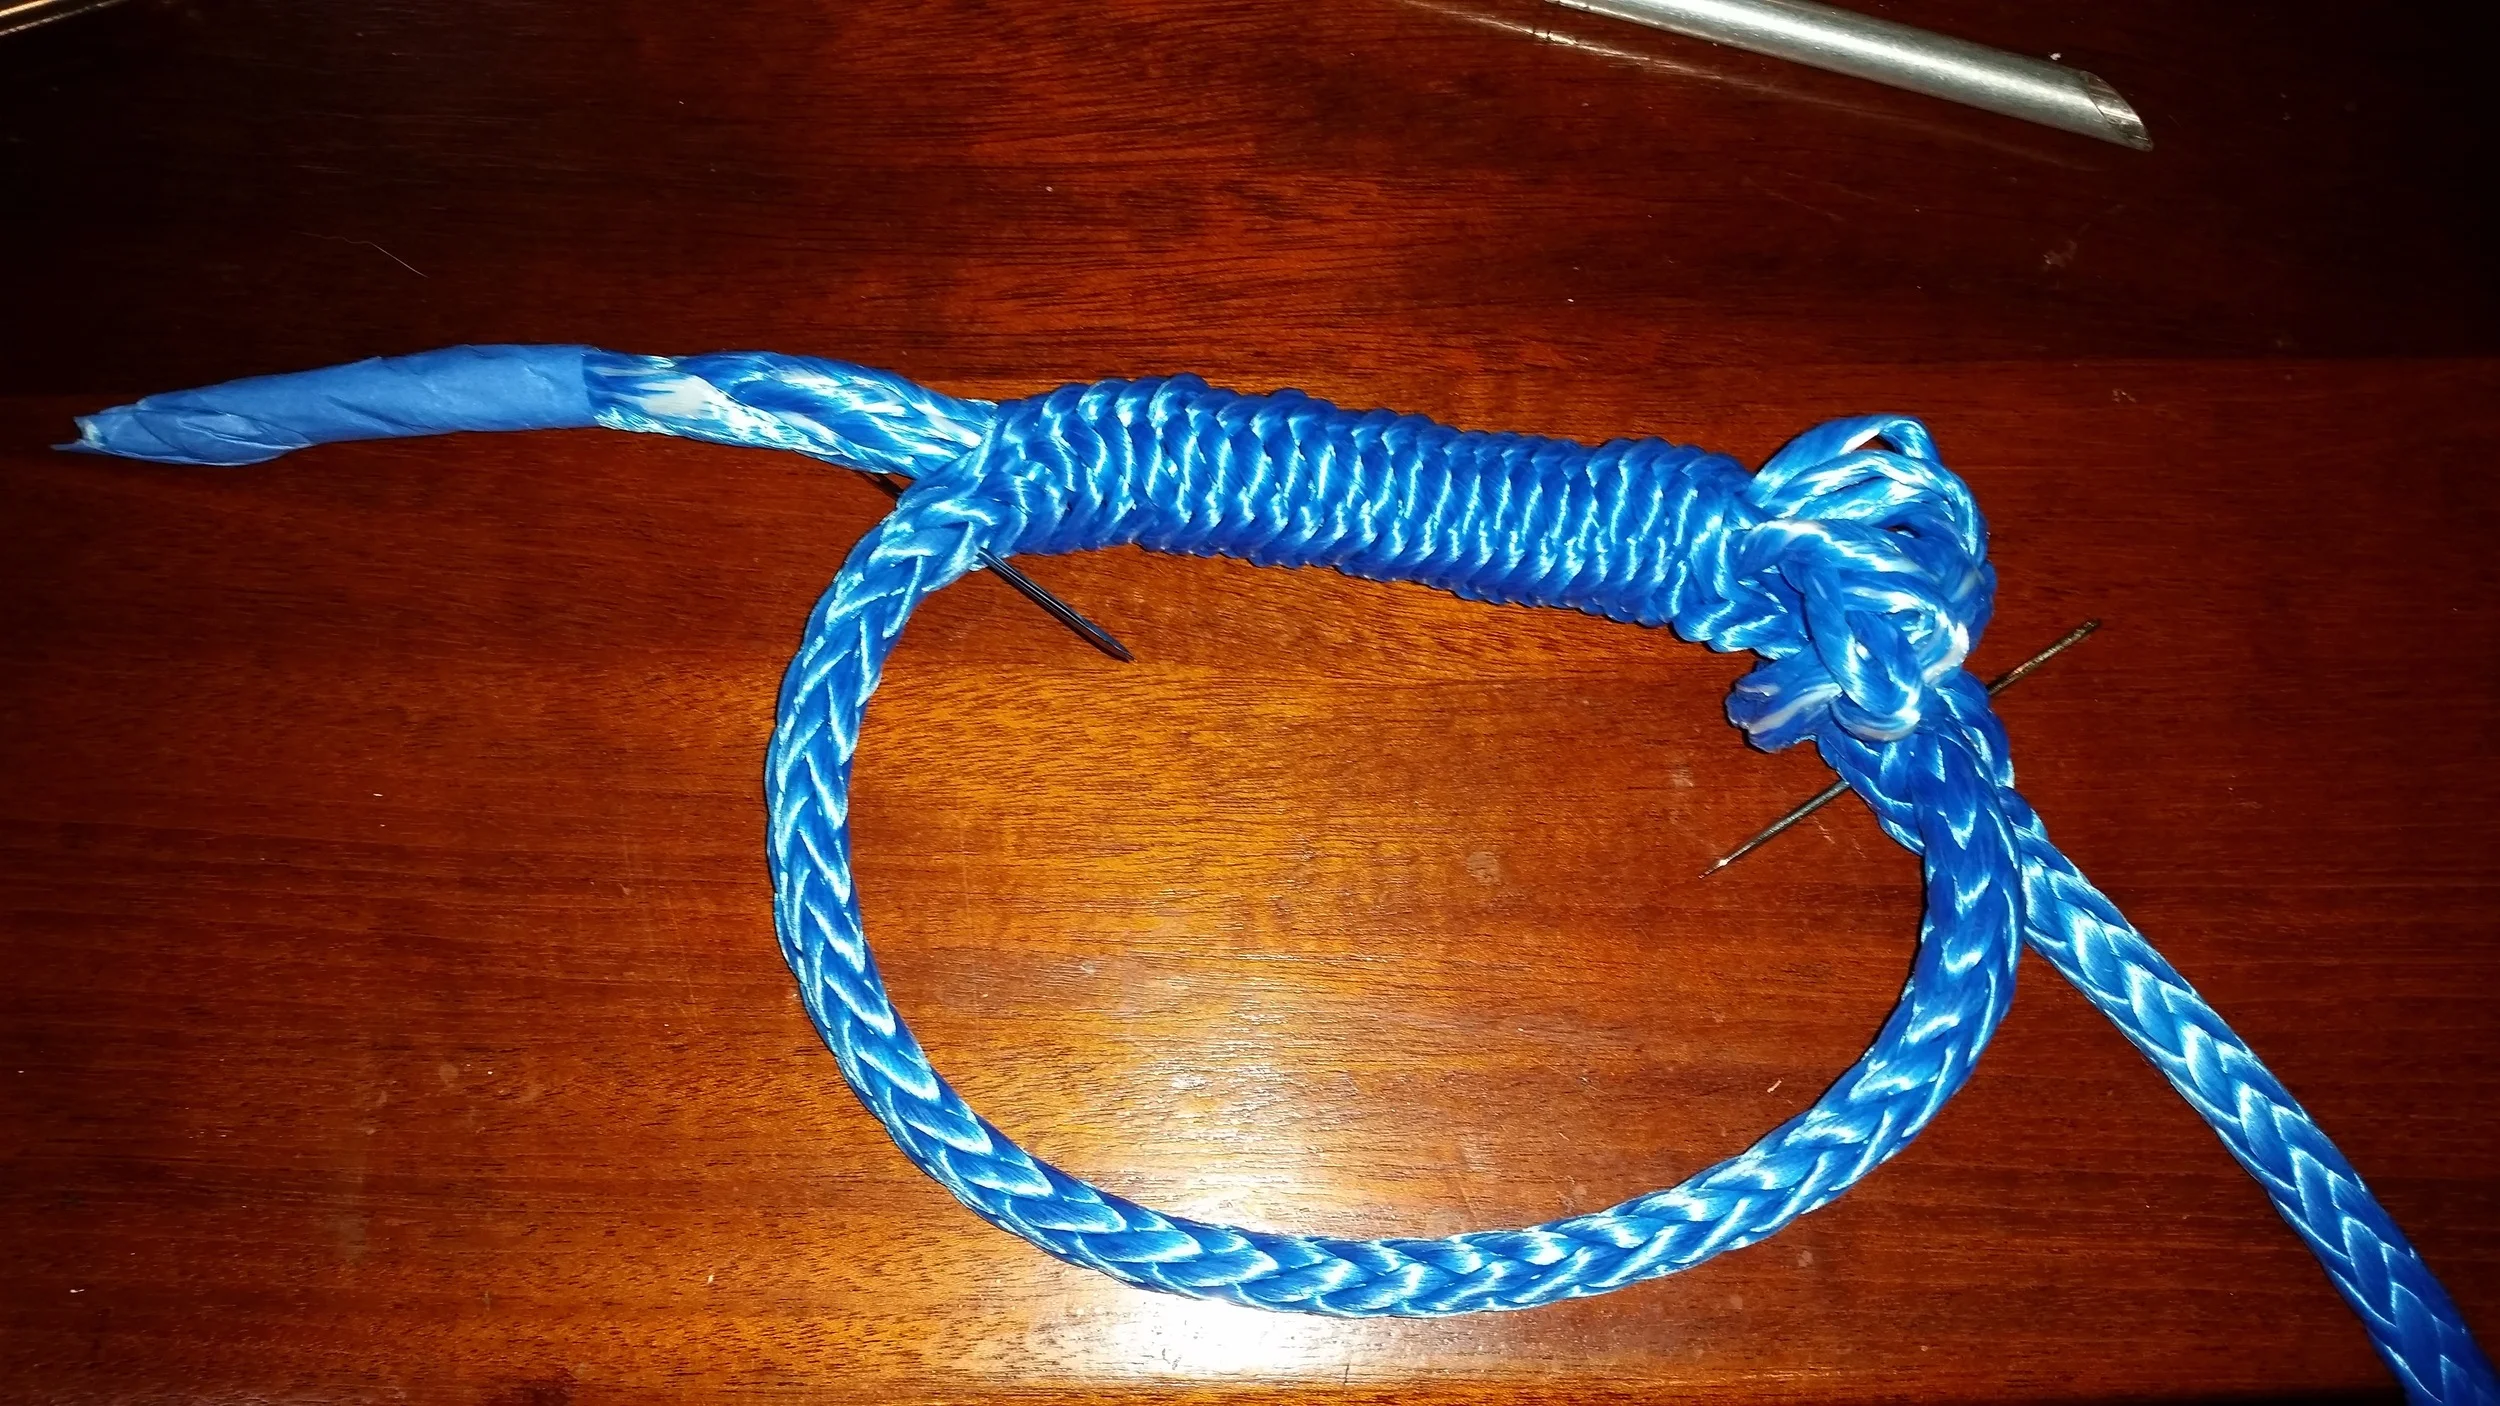
As usual, the first side is the standard and simple way. Simply open the braid with the fids and pass the line through.

Now balance the tails to ensure that everything you are doing is symmetrical. I pierce the splice cross with a pin to keep everything in place. If you are doing multiple grommets, do them all at the same time so they all come out relatively the same size.

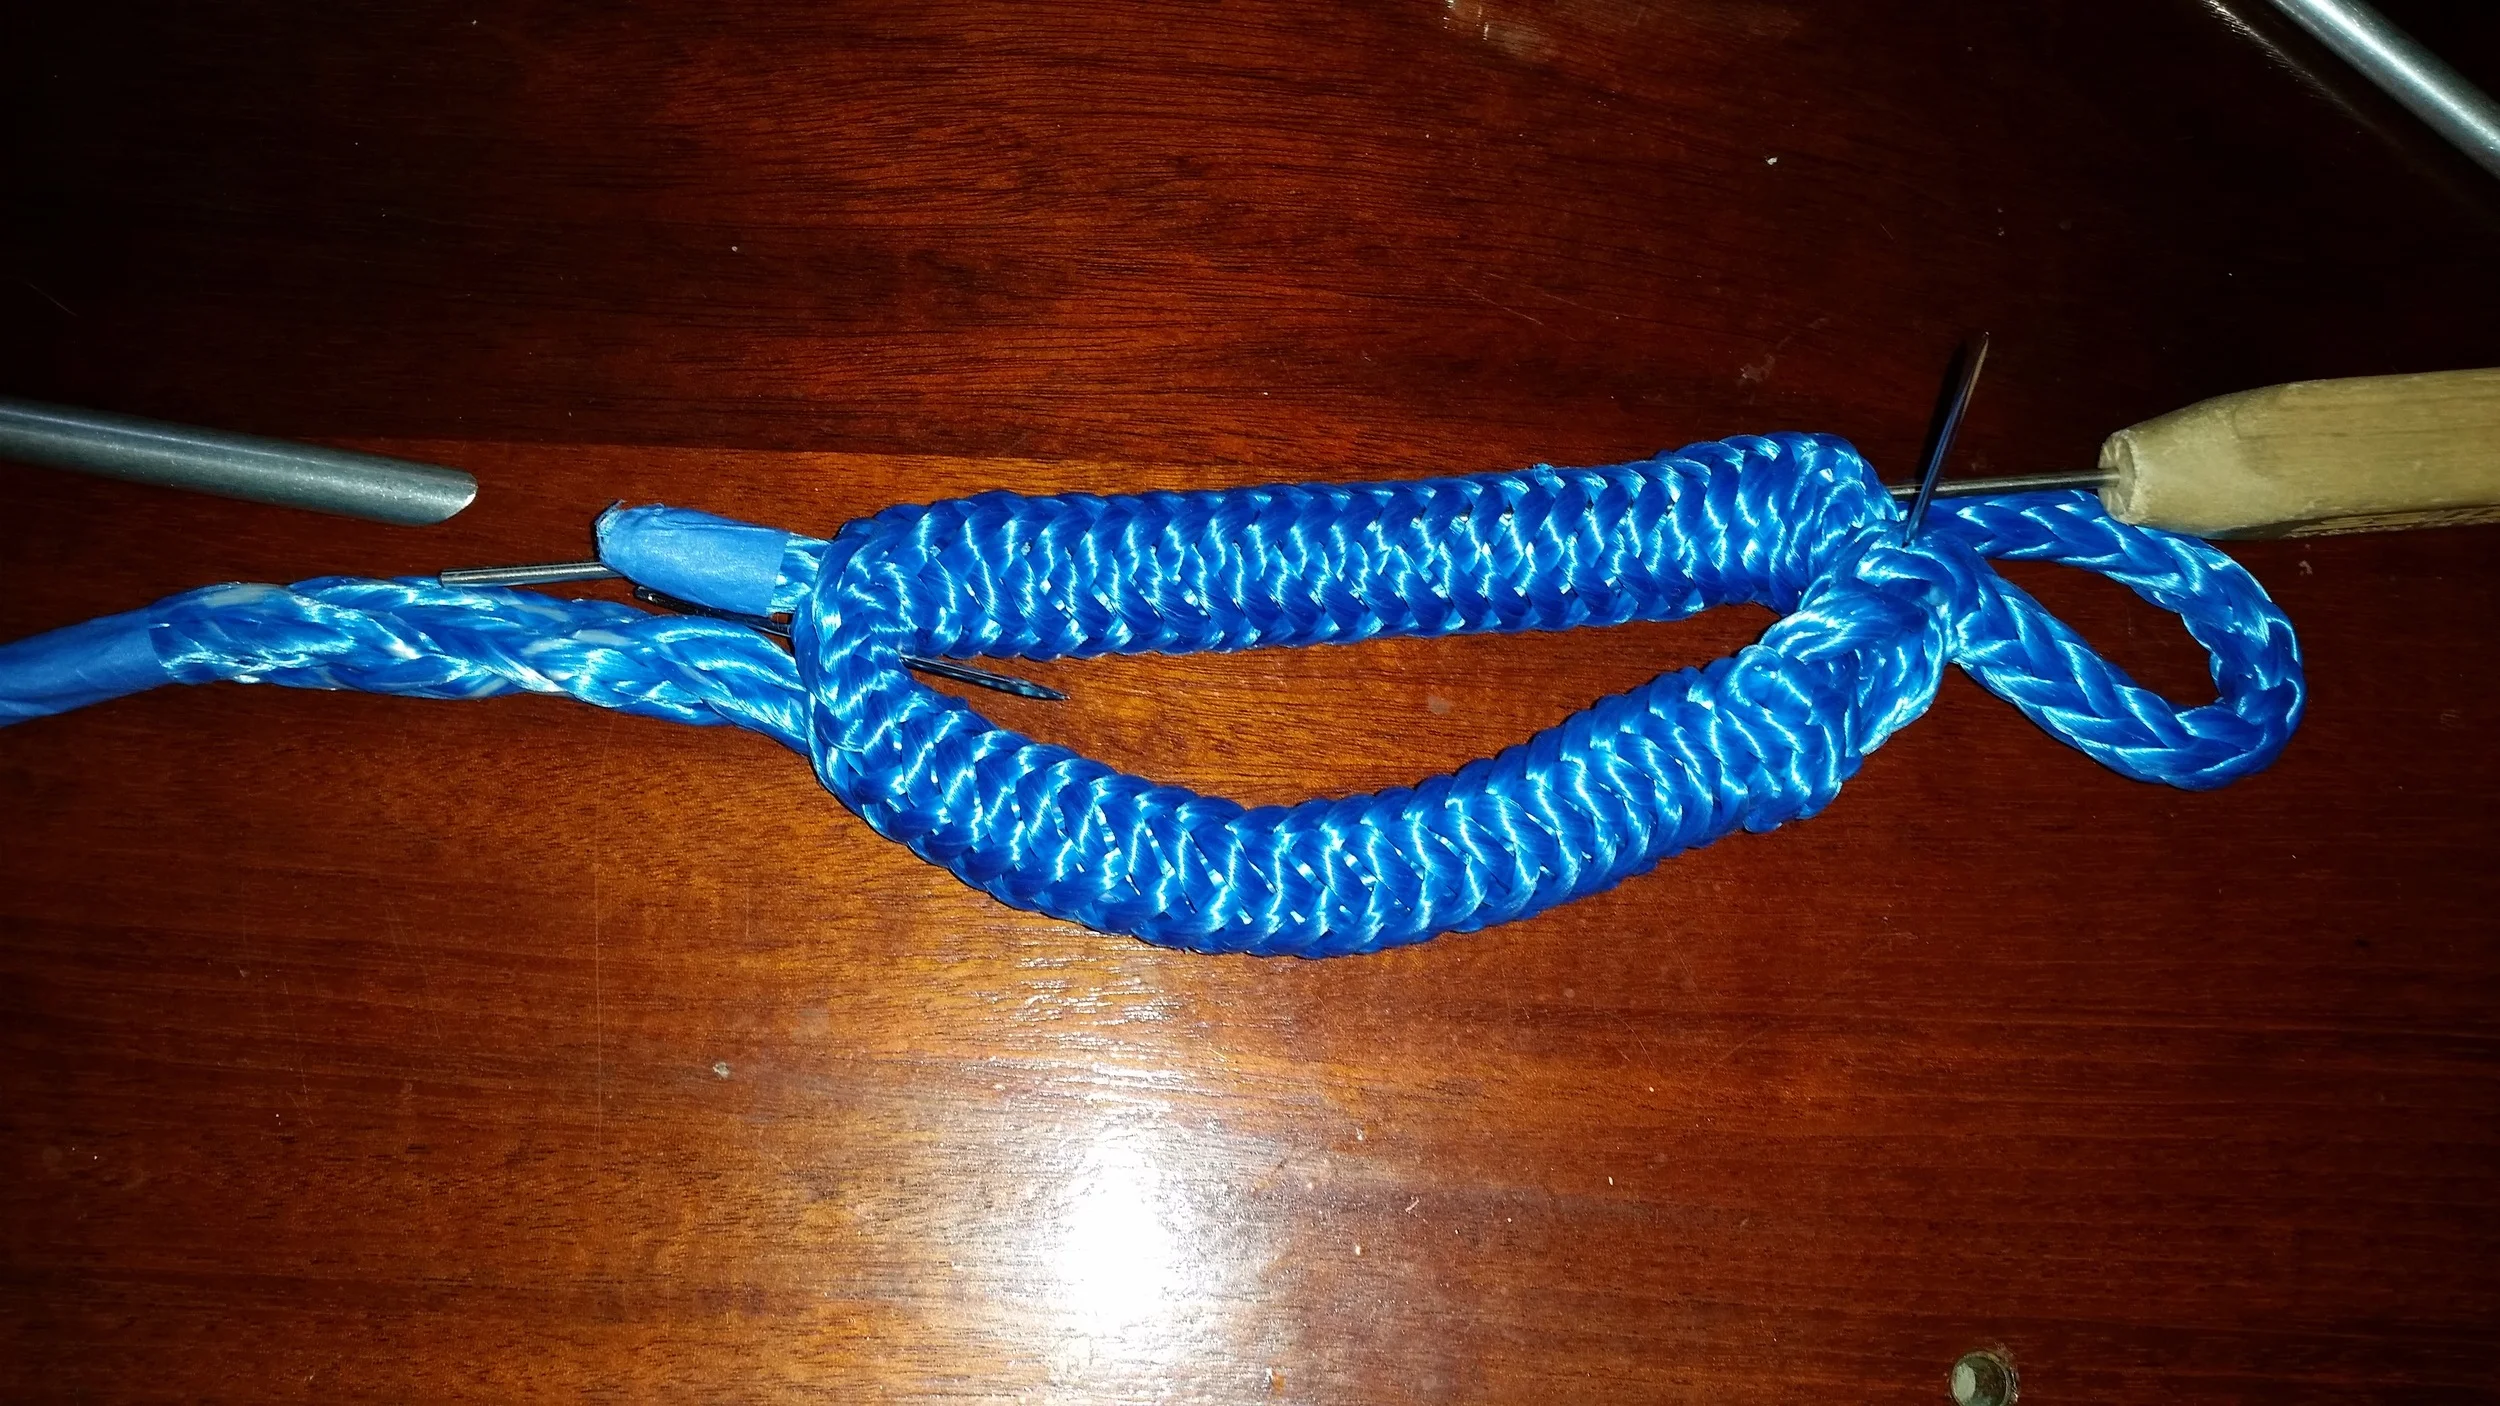
Now prepare to do the second pass of a Mobious Brummel splice. Separate the 12 strands into two groups of 6 strands. The goal will be to reassemble the 12 strands on the other side of the line, thus completing the Mobius Brummel splice. If you feel talented and gifted at weaving, you may re-weave the 12 strands into a hollow tube, as if nothing had happened. I am not that gifted, so I take a different approach.

When you look at a cross section of 12 Strand Dyneema, it can be grouped into 4 clusters of 3 strands. 

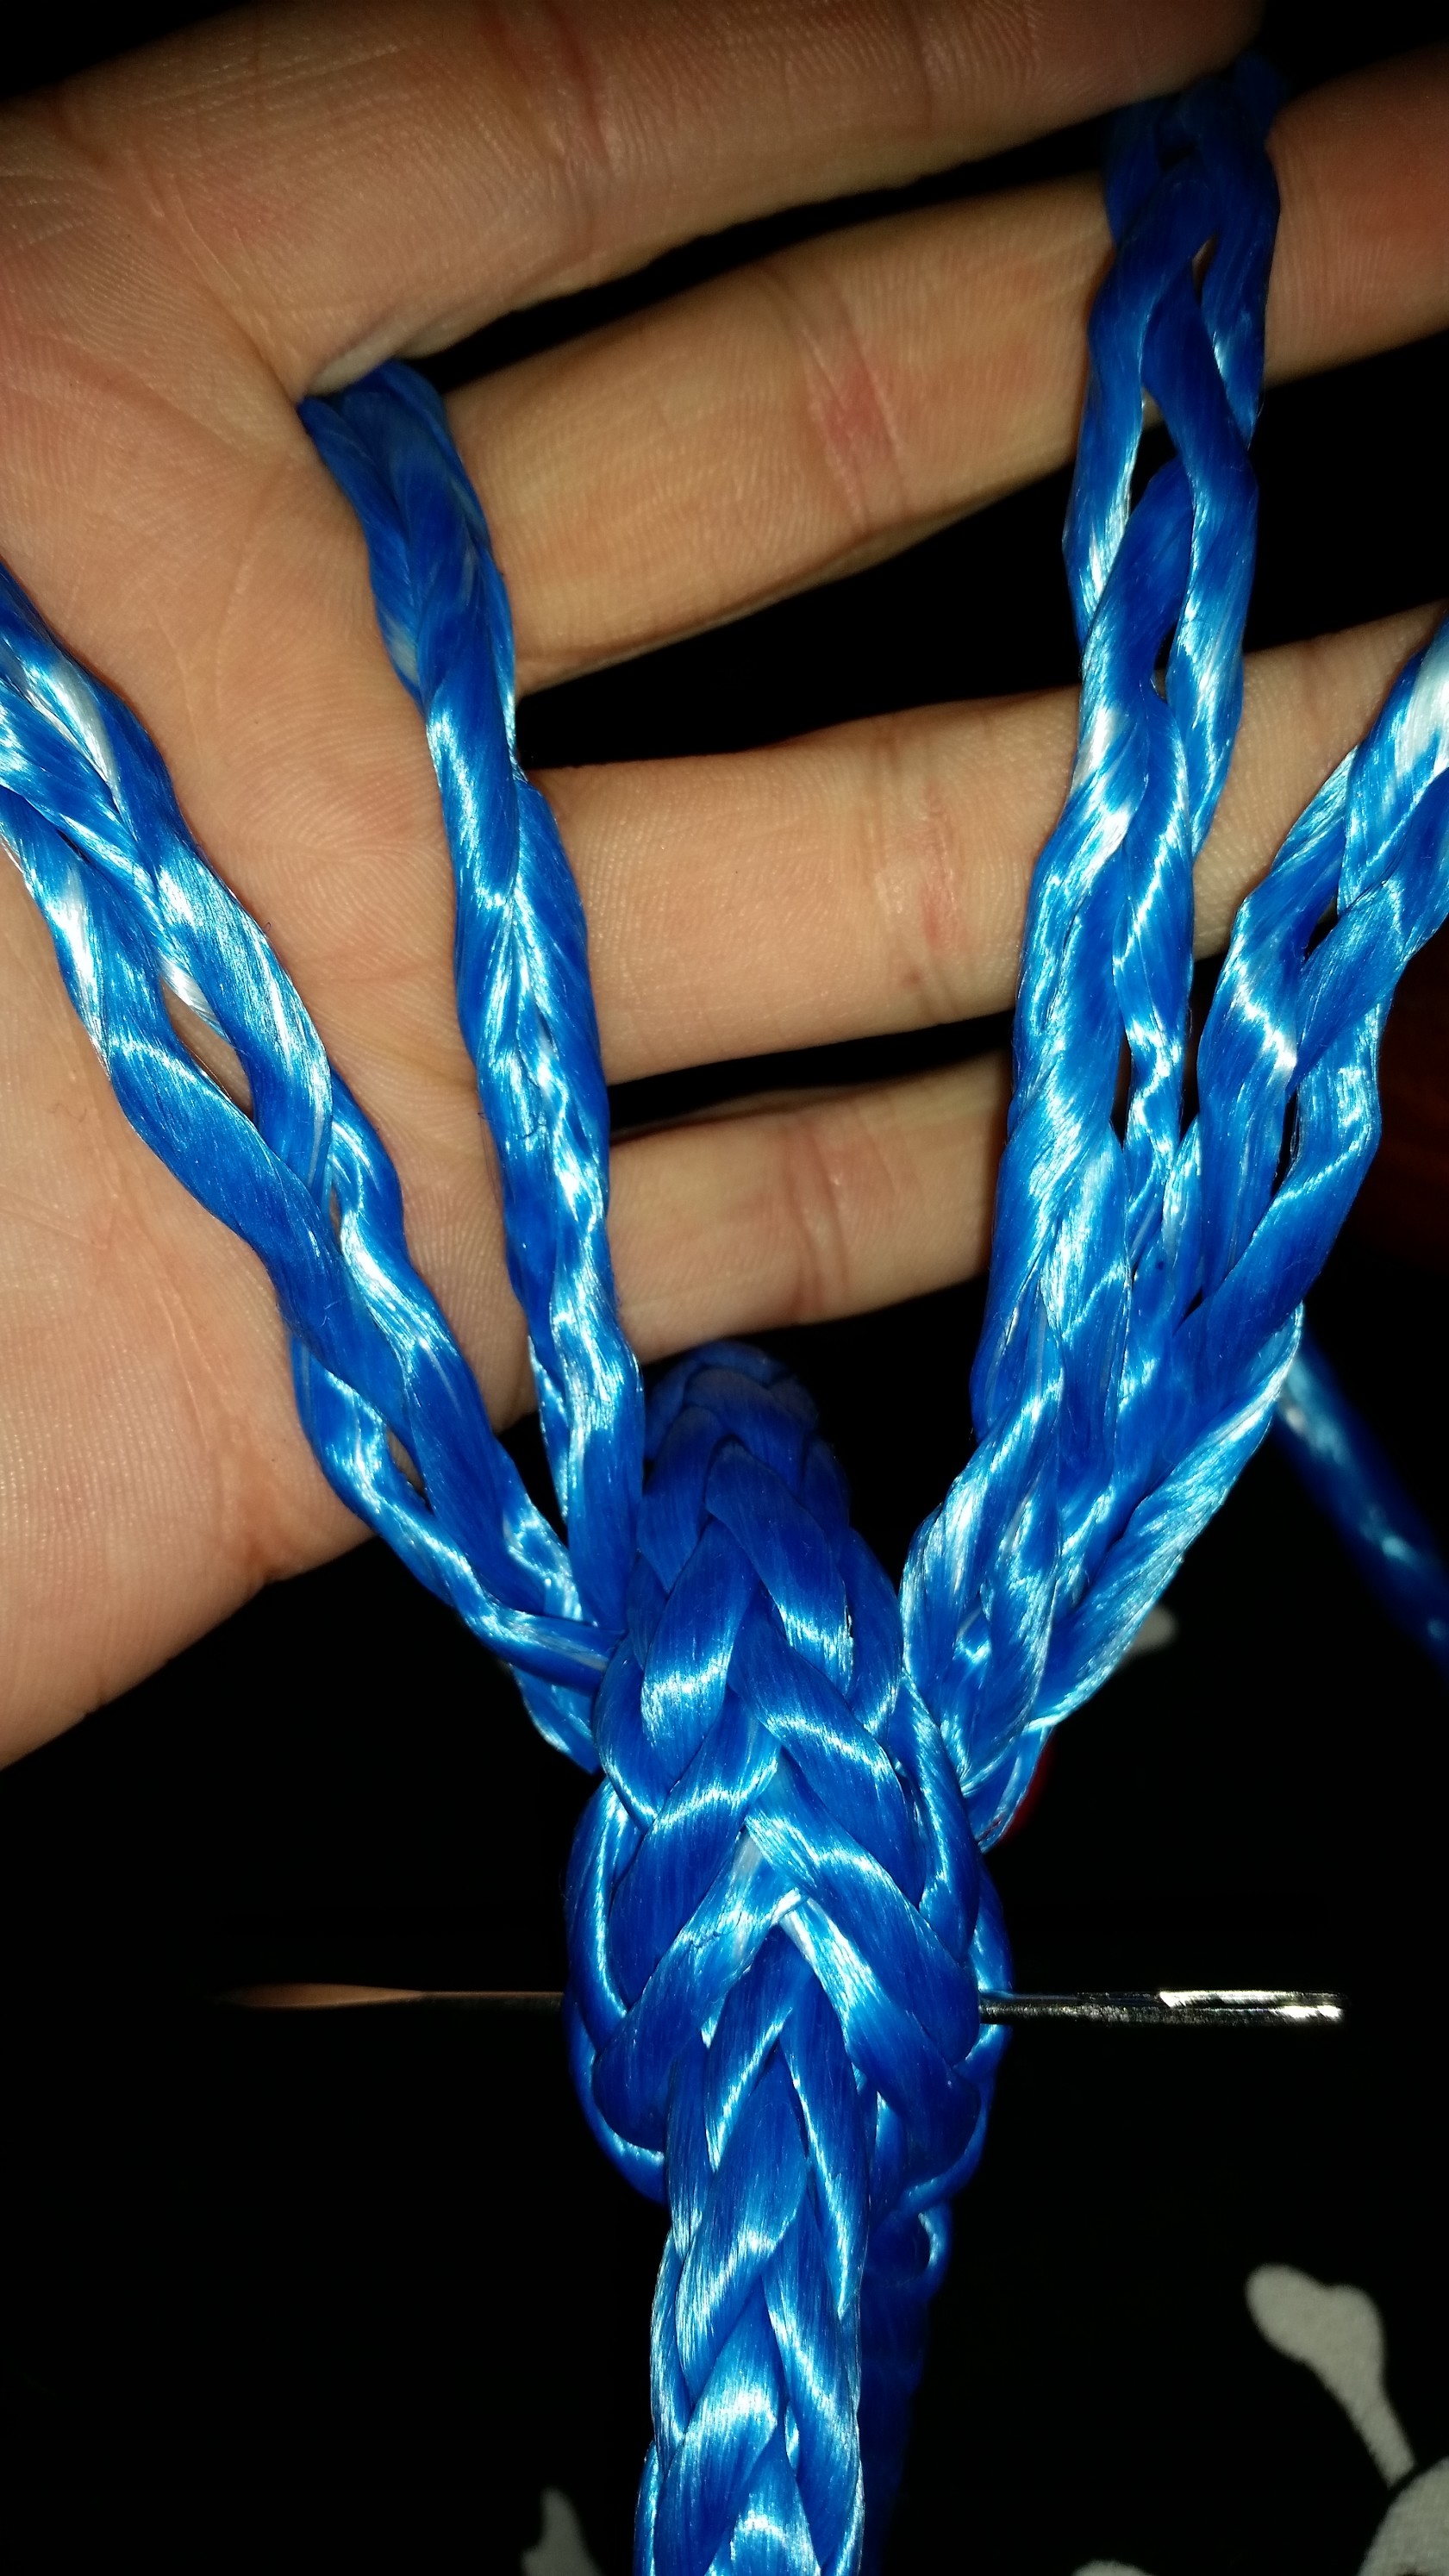
I simply take the 12 strands, split them into two groups of 6 which I weave into 4 groups of 3 strands. This takes the unruly 12 strands and makes it a much more manageable set of 4 strands. Now I have two sets of 2 strands on each side of the line. I pass them around the line and begin weaving them together.

All the weaves are made loosely that way the lines can be stretched and curled back into a round shape. 

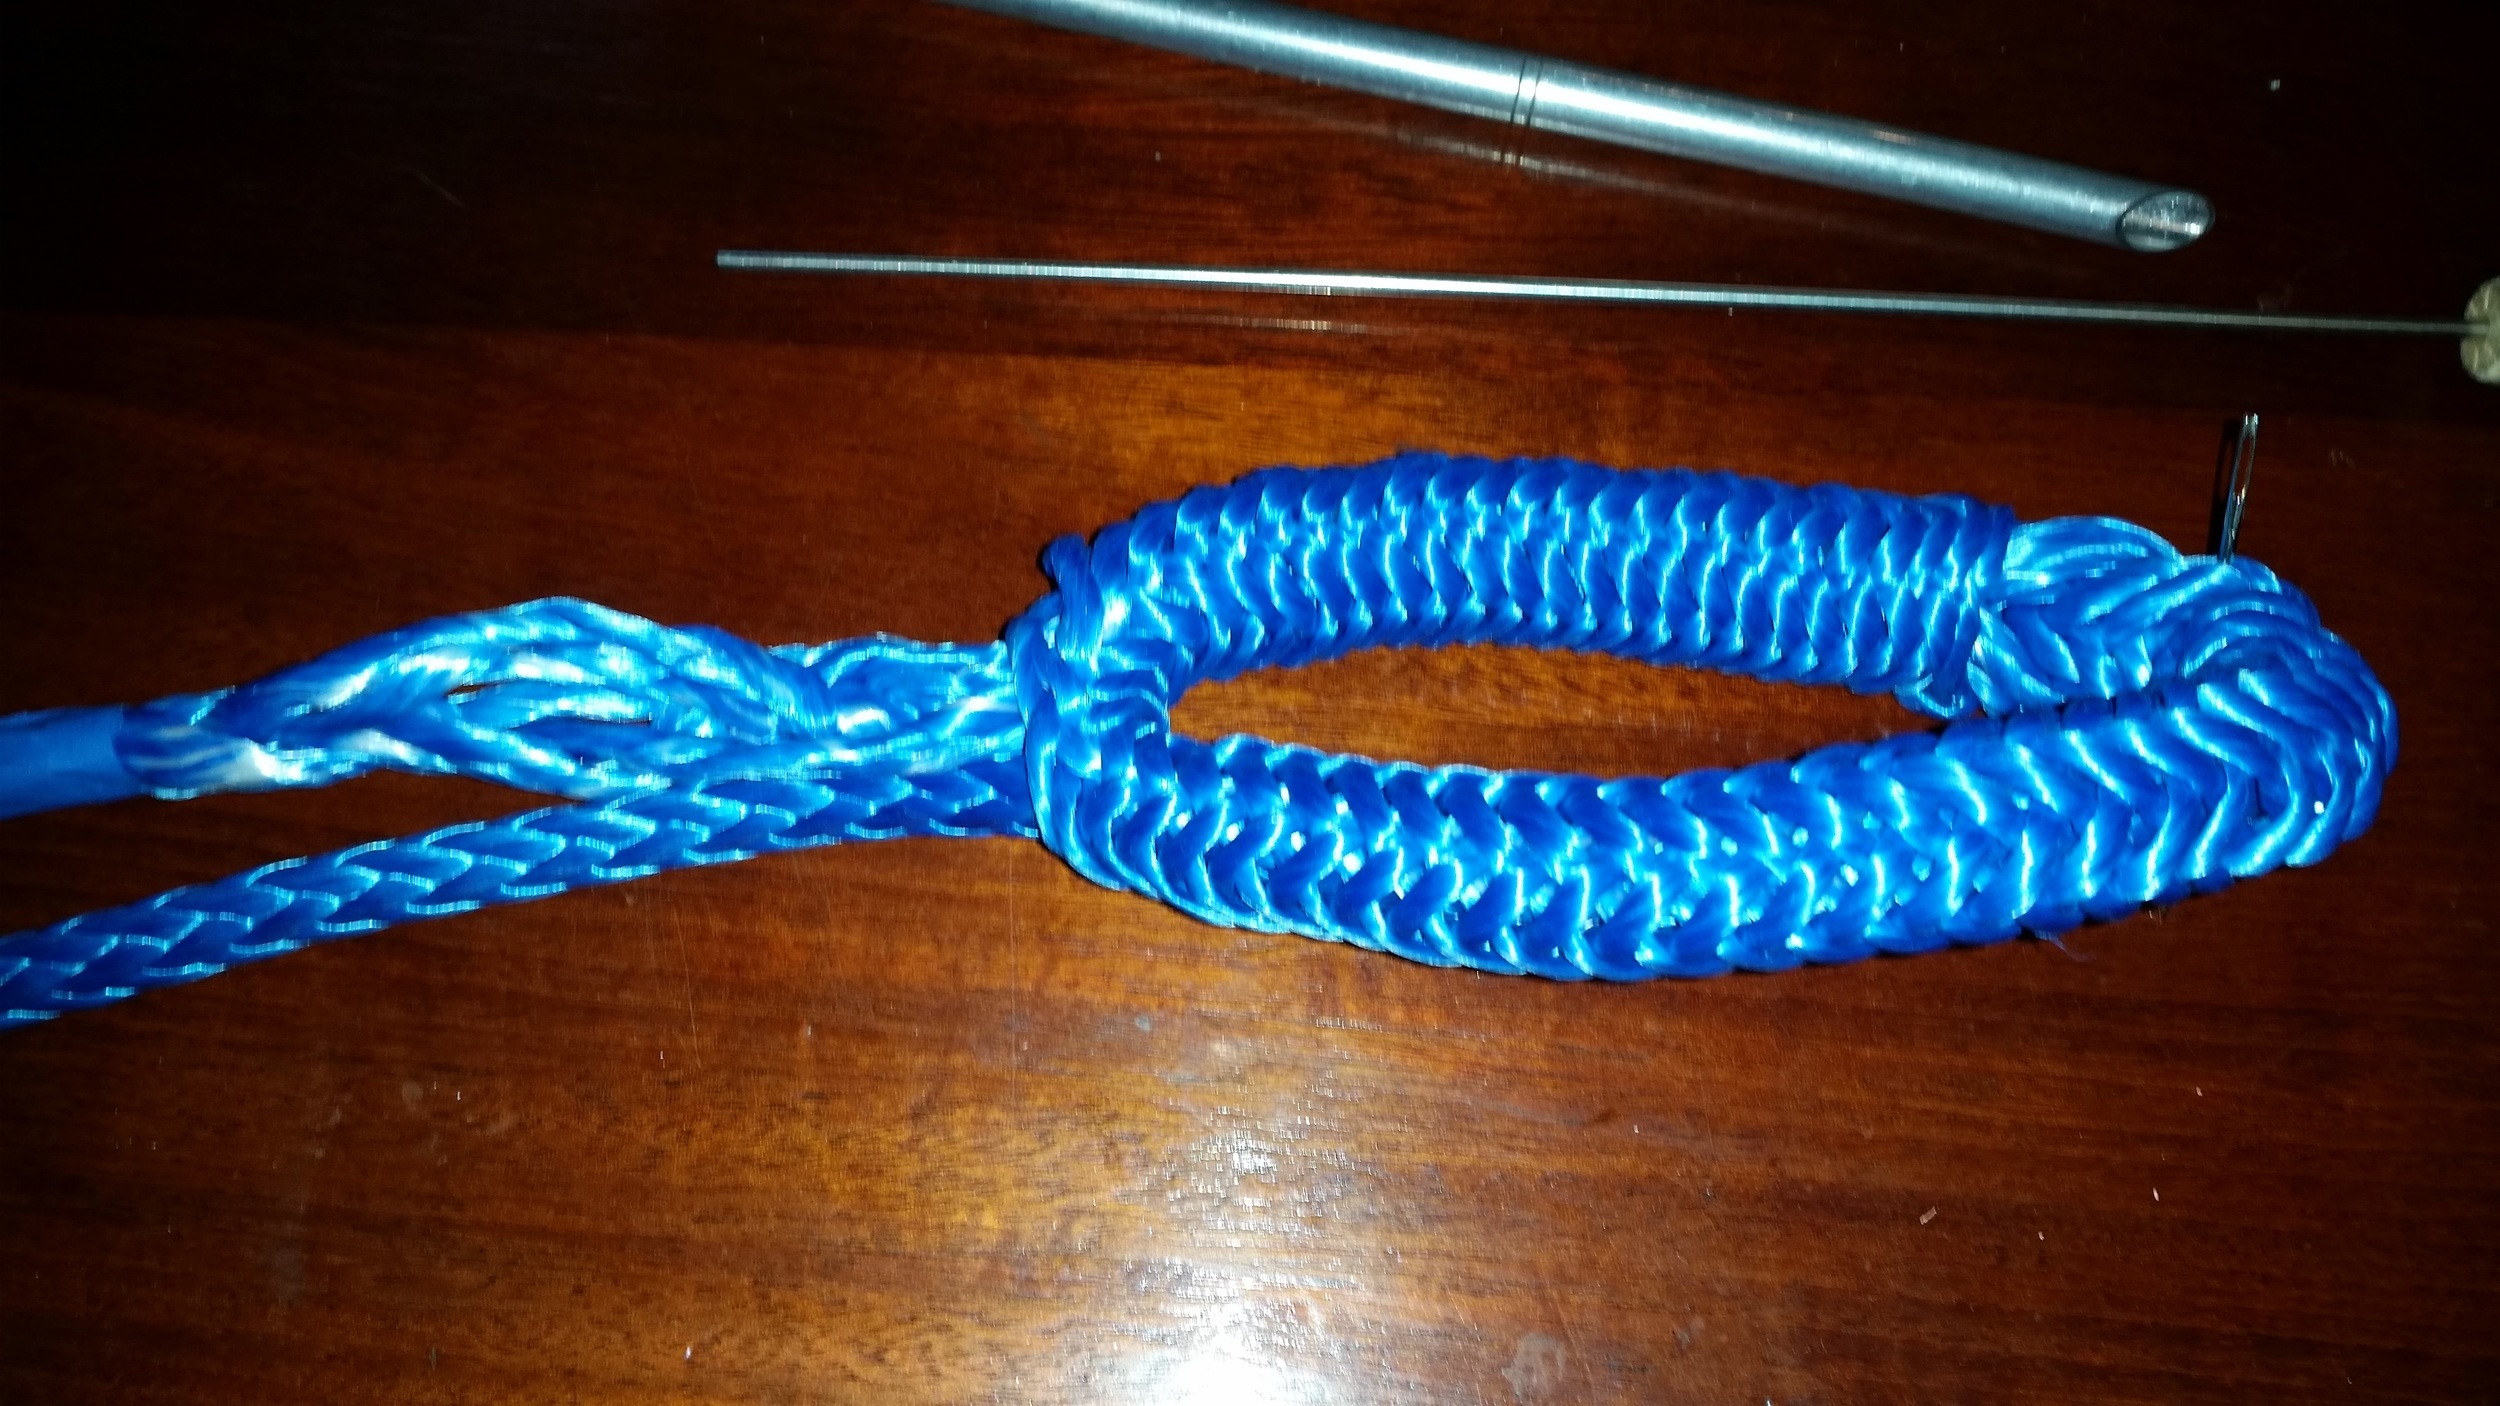
At the end, I have a Mobious Brummel splice made over a grommet. Now to bury the tails!

The midpoint of the grommet is marked with a pin, since the midpoint will move and change as the weave is opened up during the splicing. 

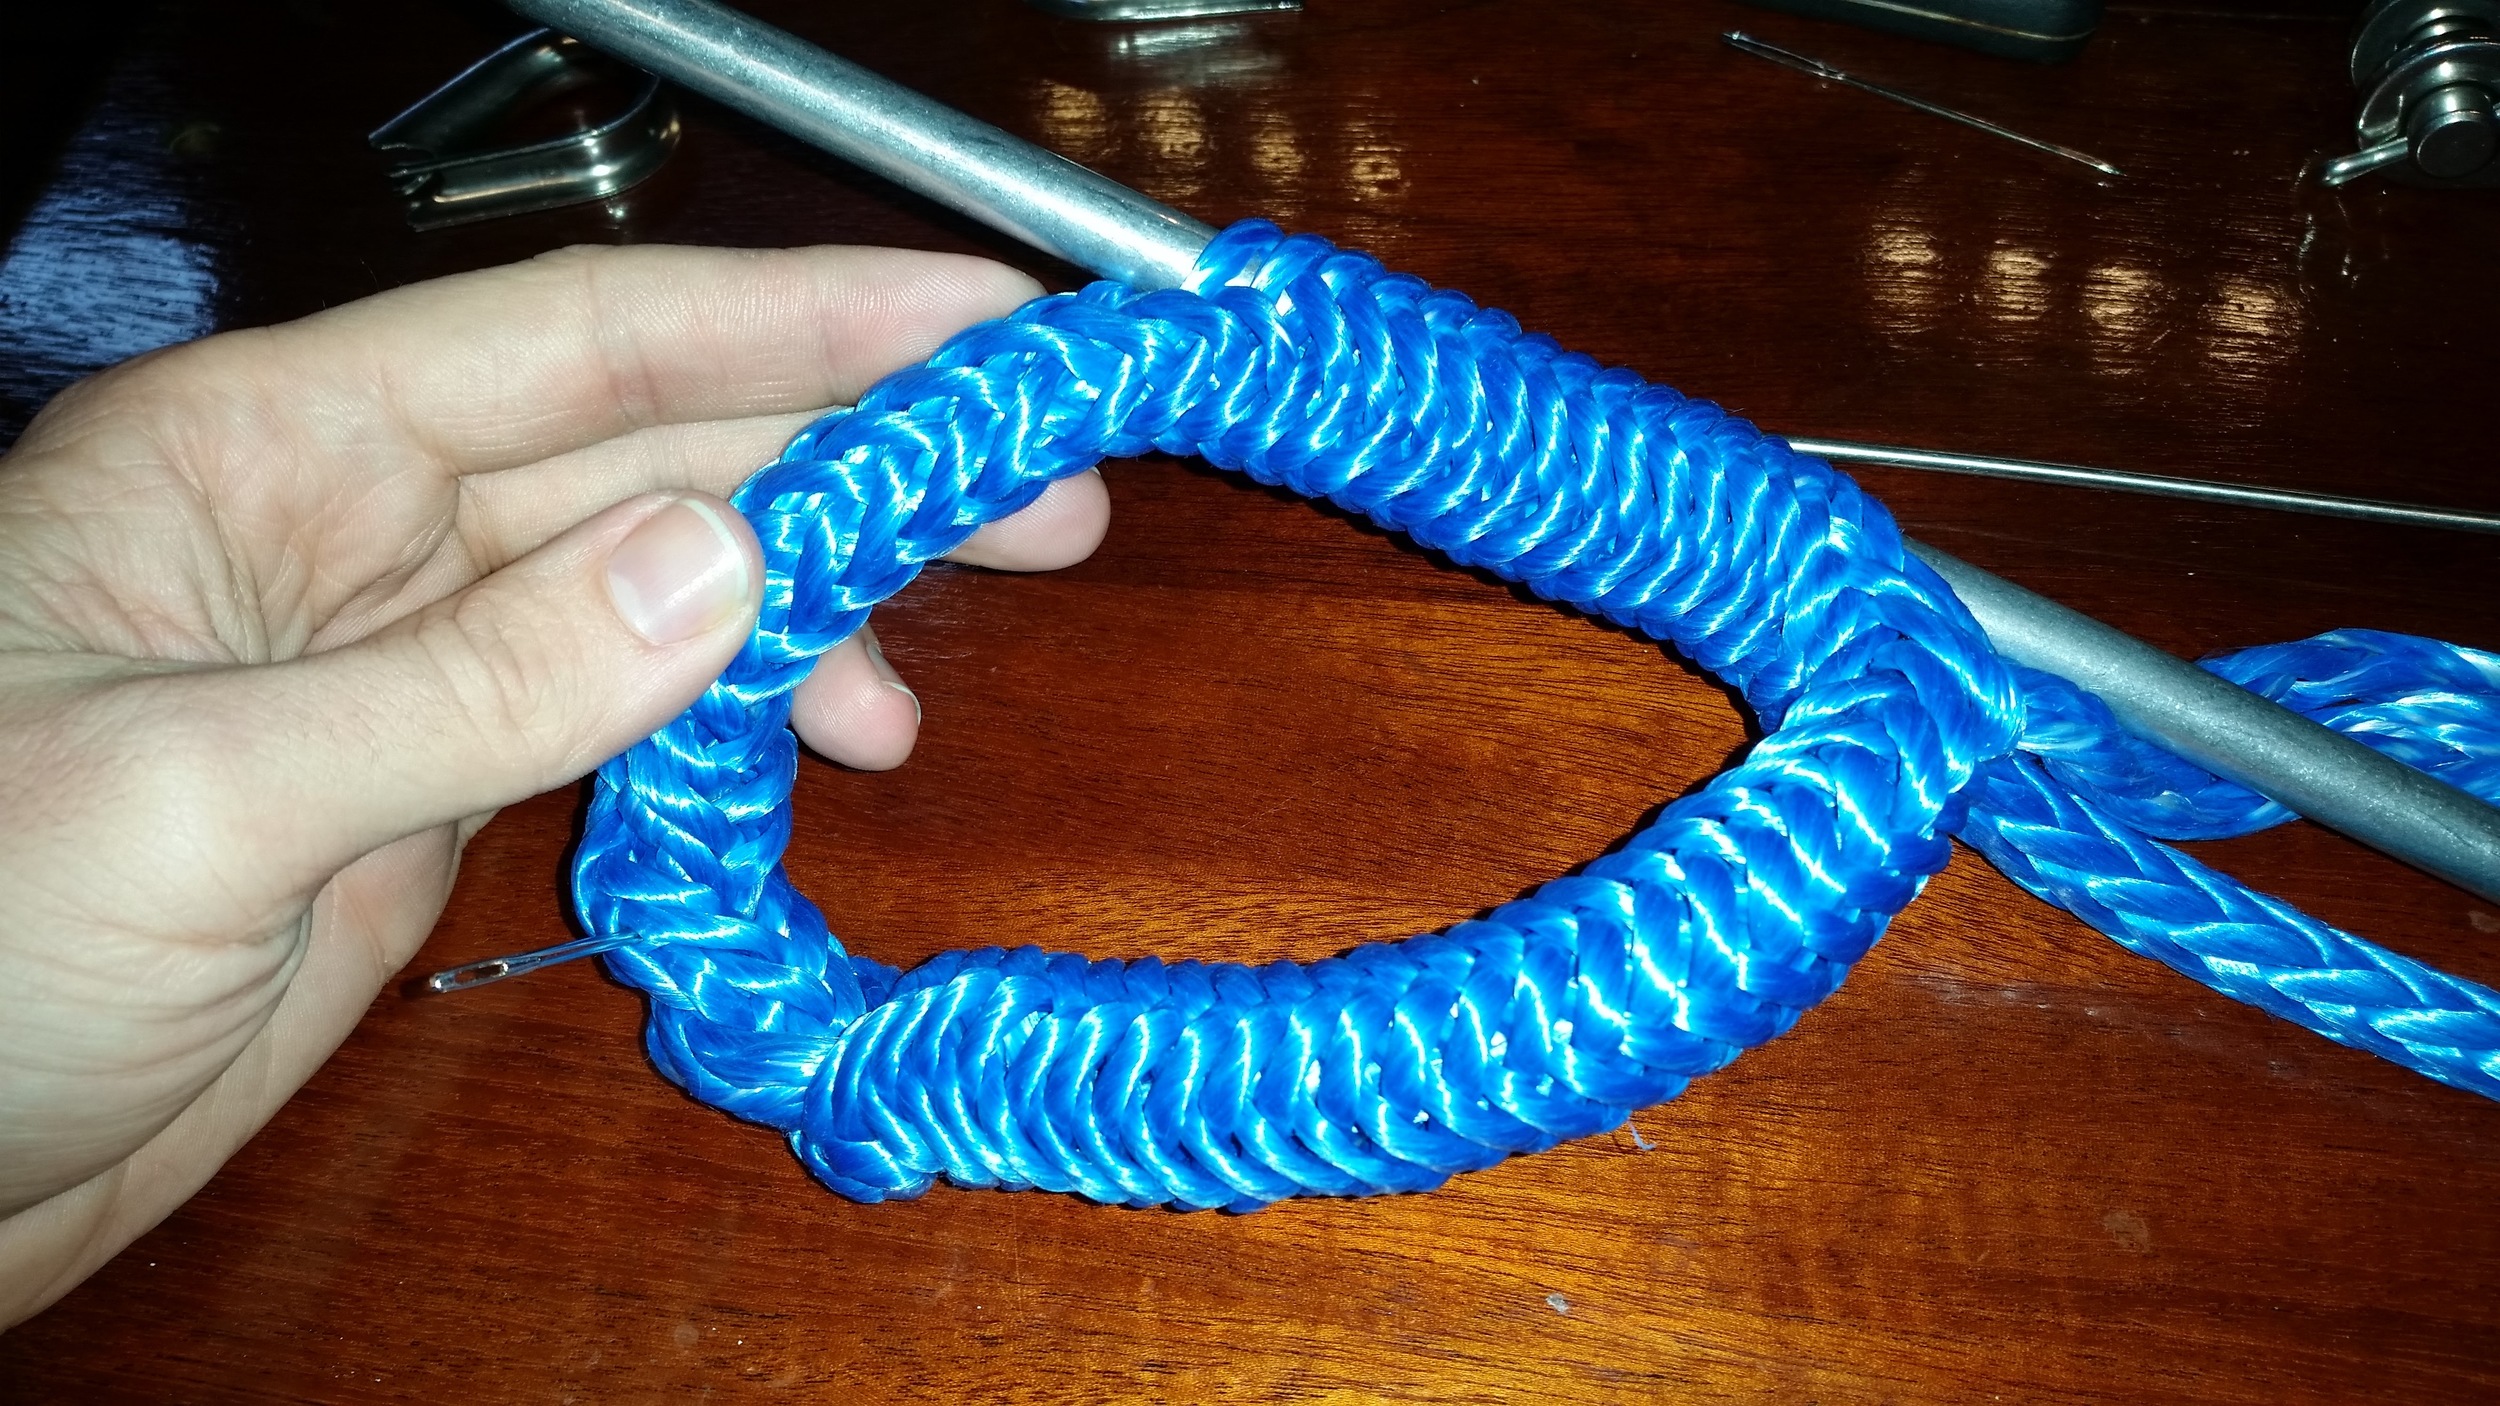
I pass the tails down to the end and have them exit just next to the midpoint.

Now I work the tails through the grommet all the way, making sure everything is even and symmetrical. 

Now I pass one of the tails through a few more weaves so that they both exit from the same hole.

20160320_173846.jpg

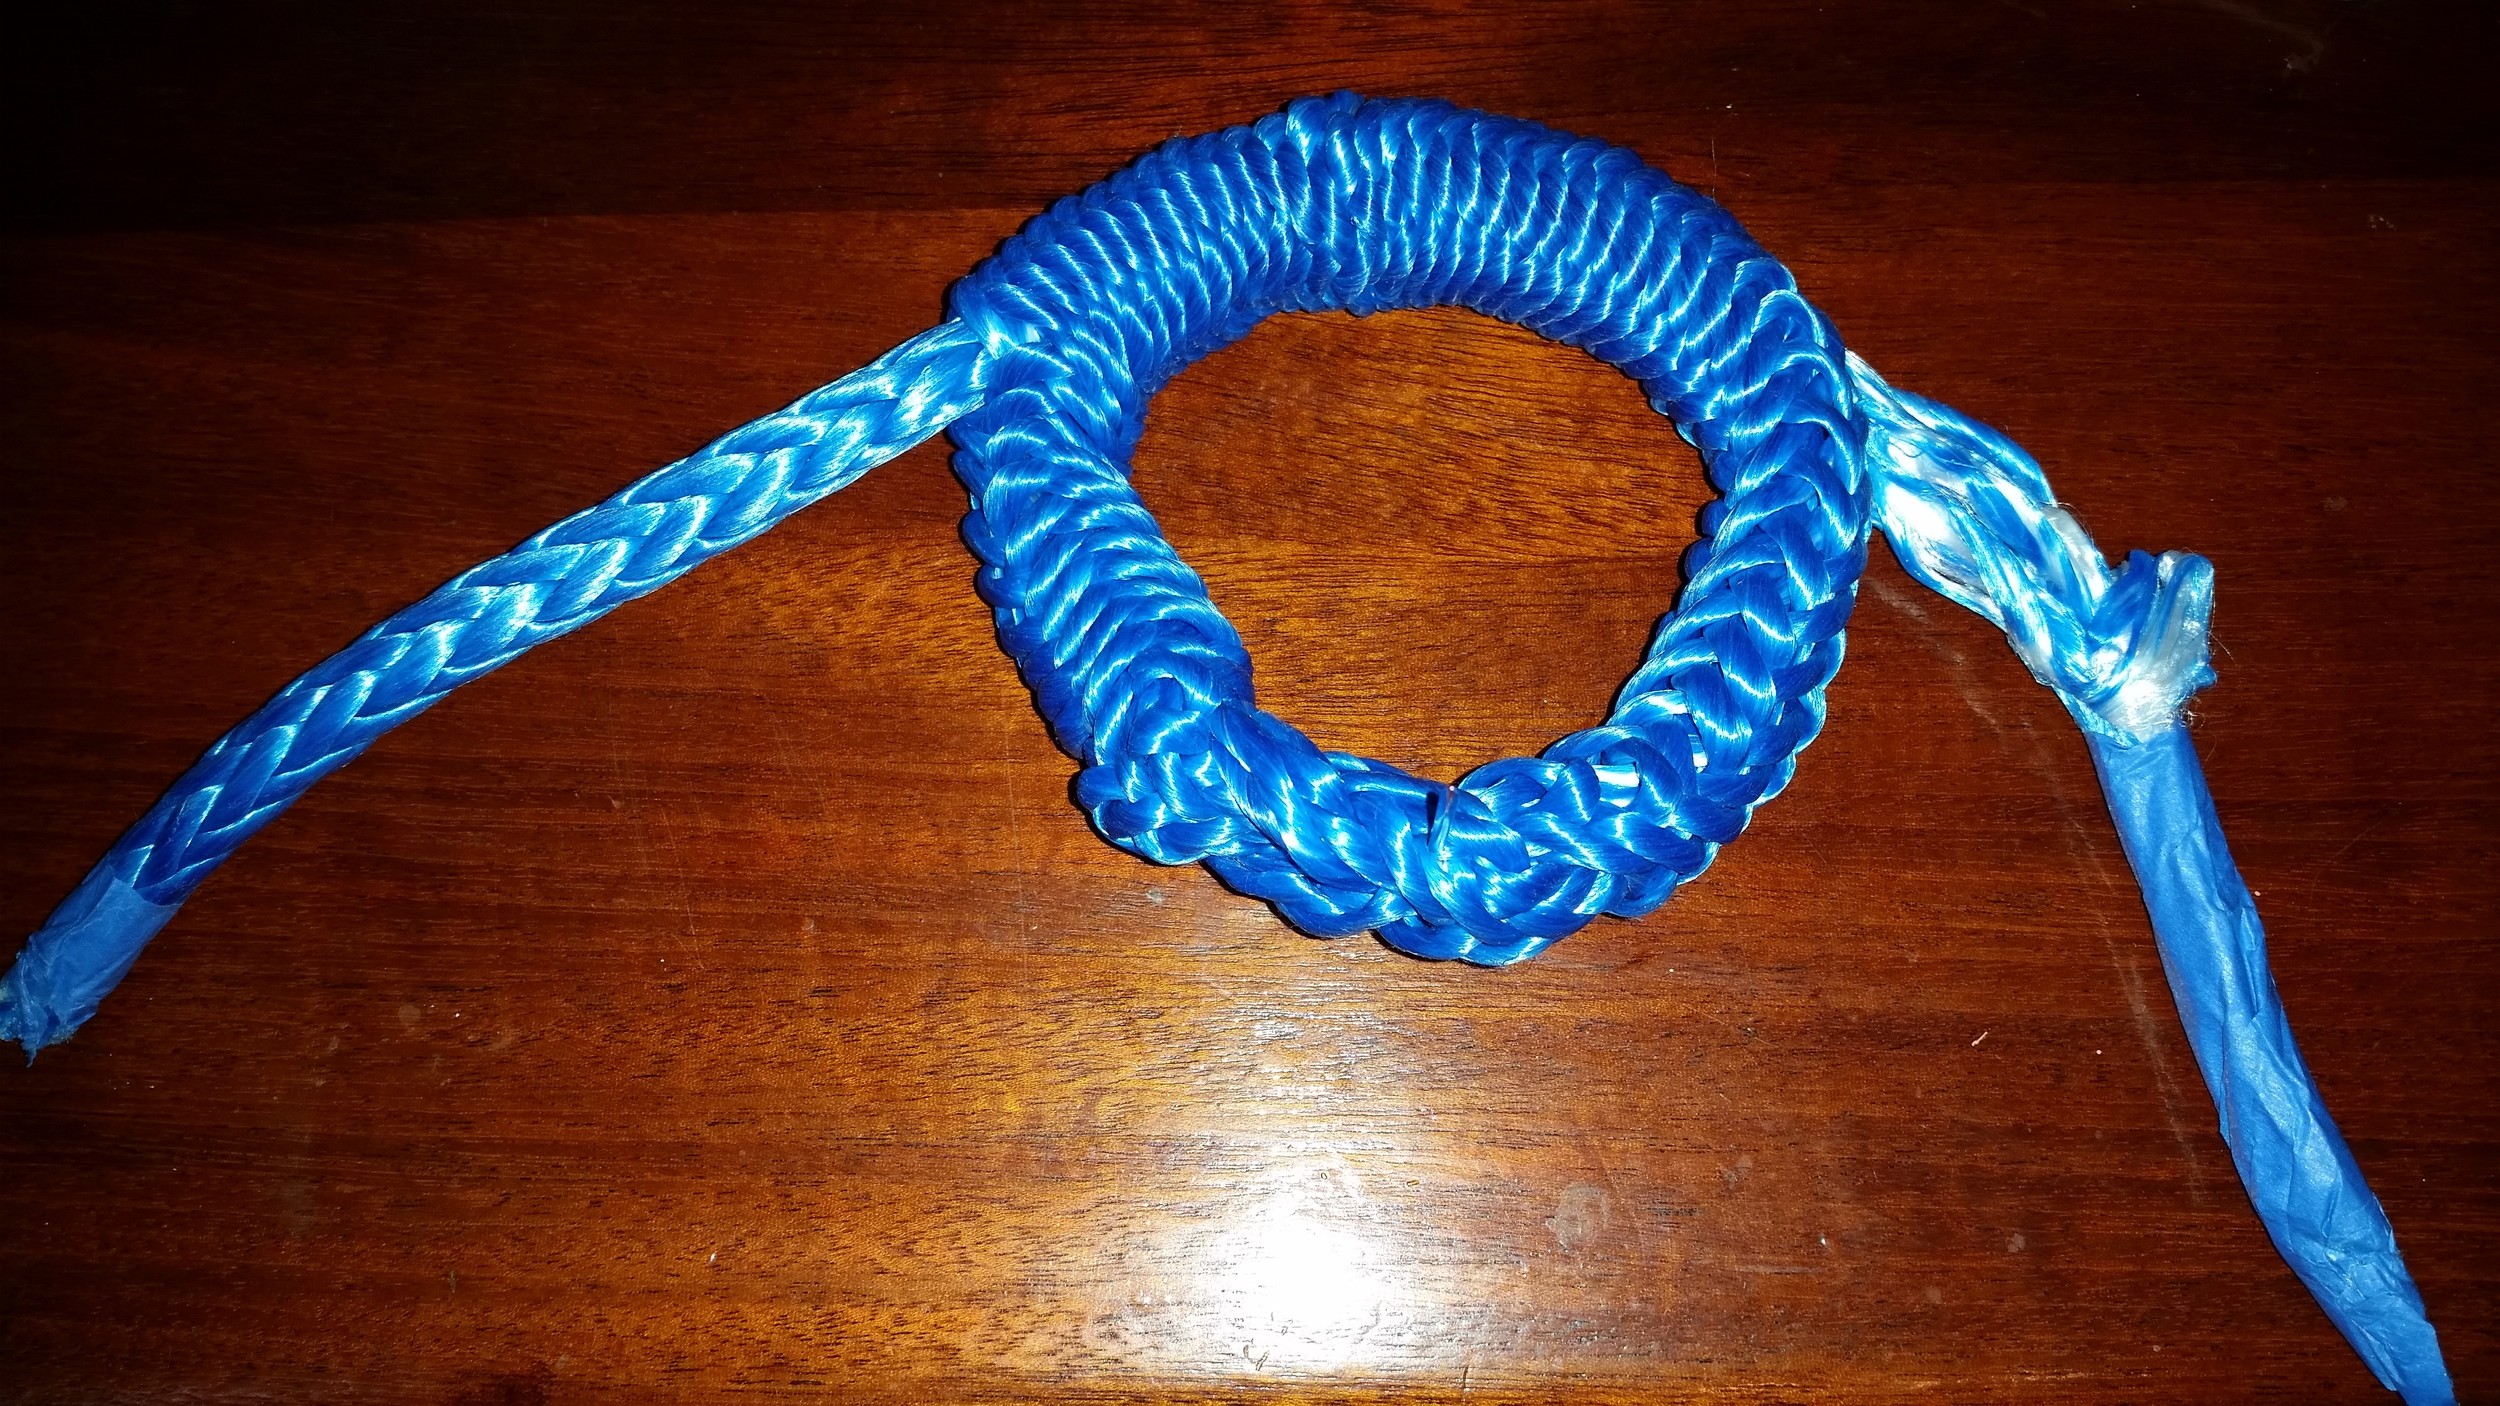
From here I bury the tails halfway through the other side and pull them out.

I then work the dyneema to open the grommet back up and assume a close to finished size and mark where the tails exit the grommet with a pin.

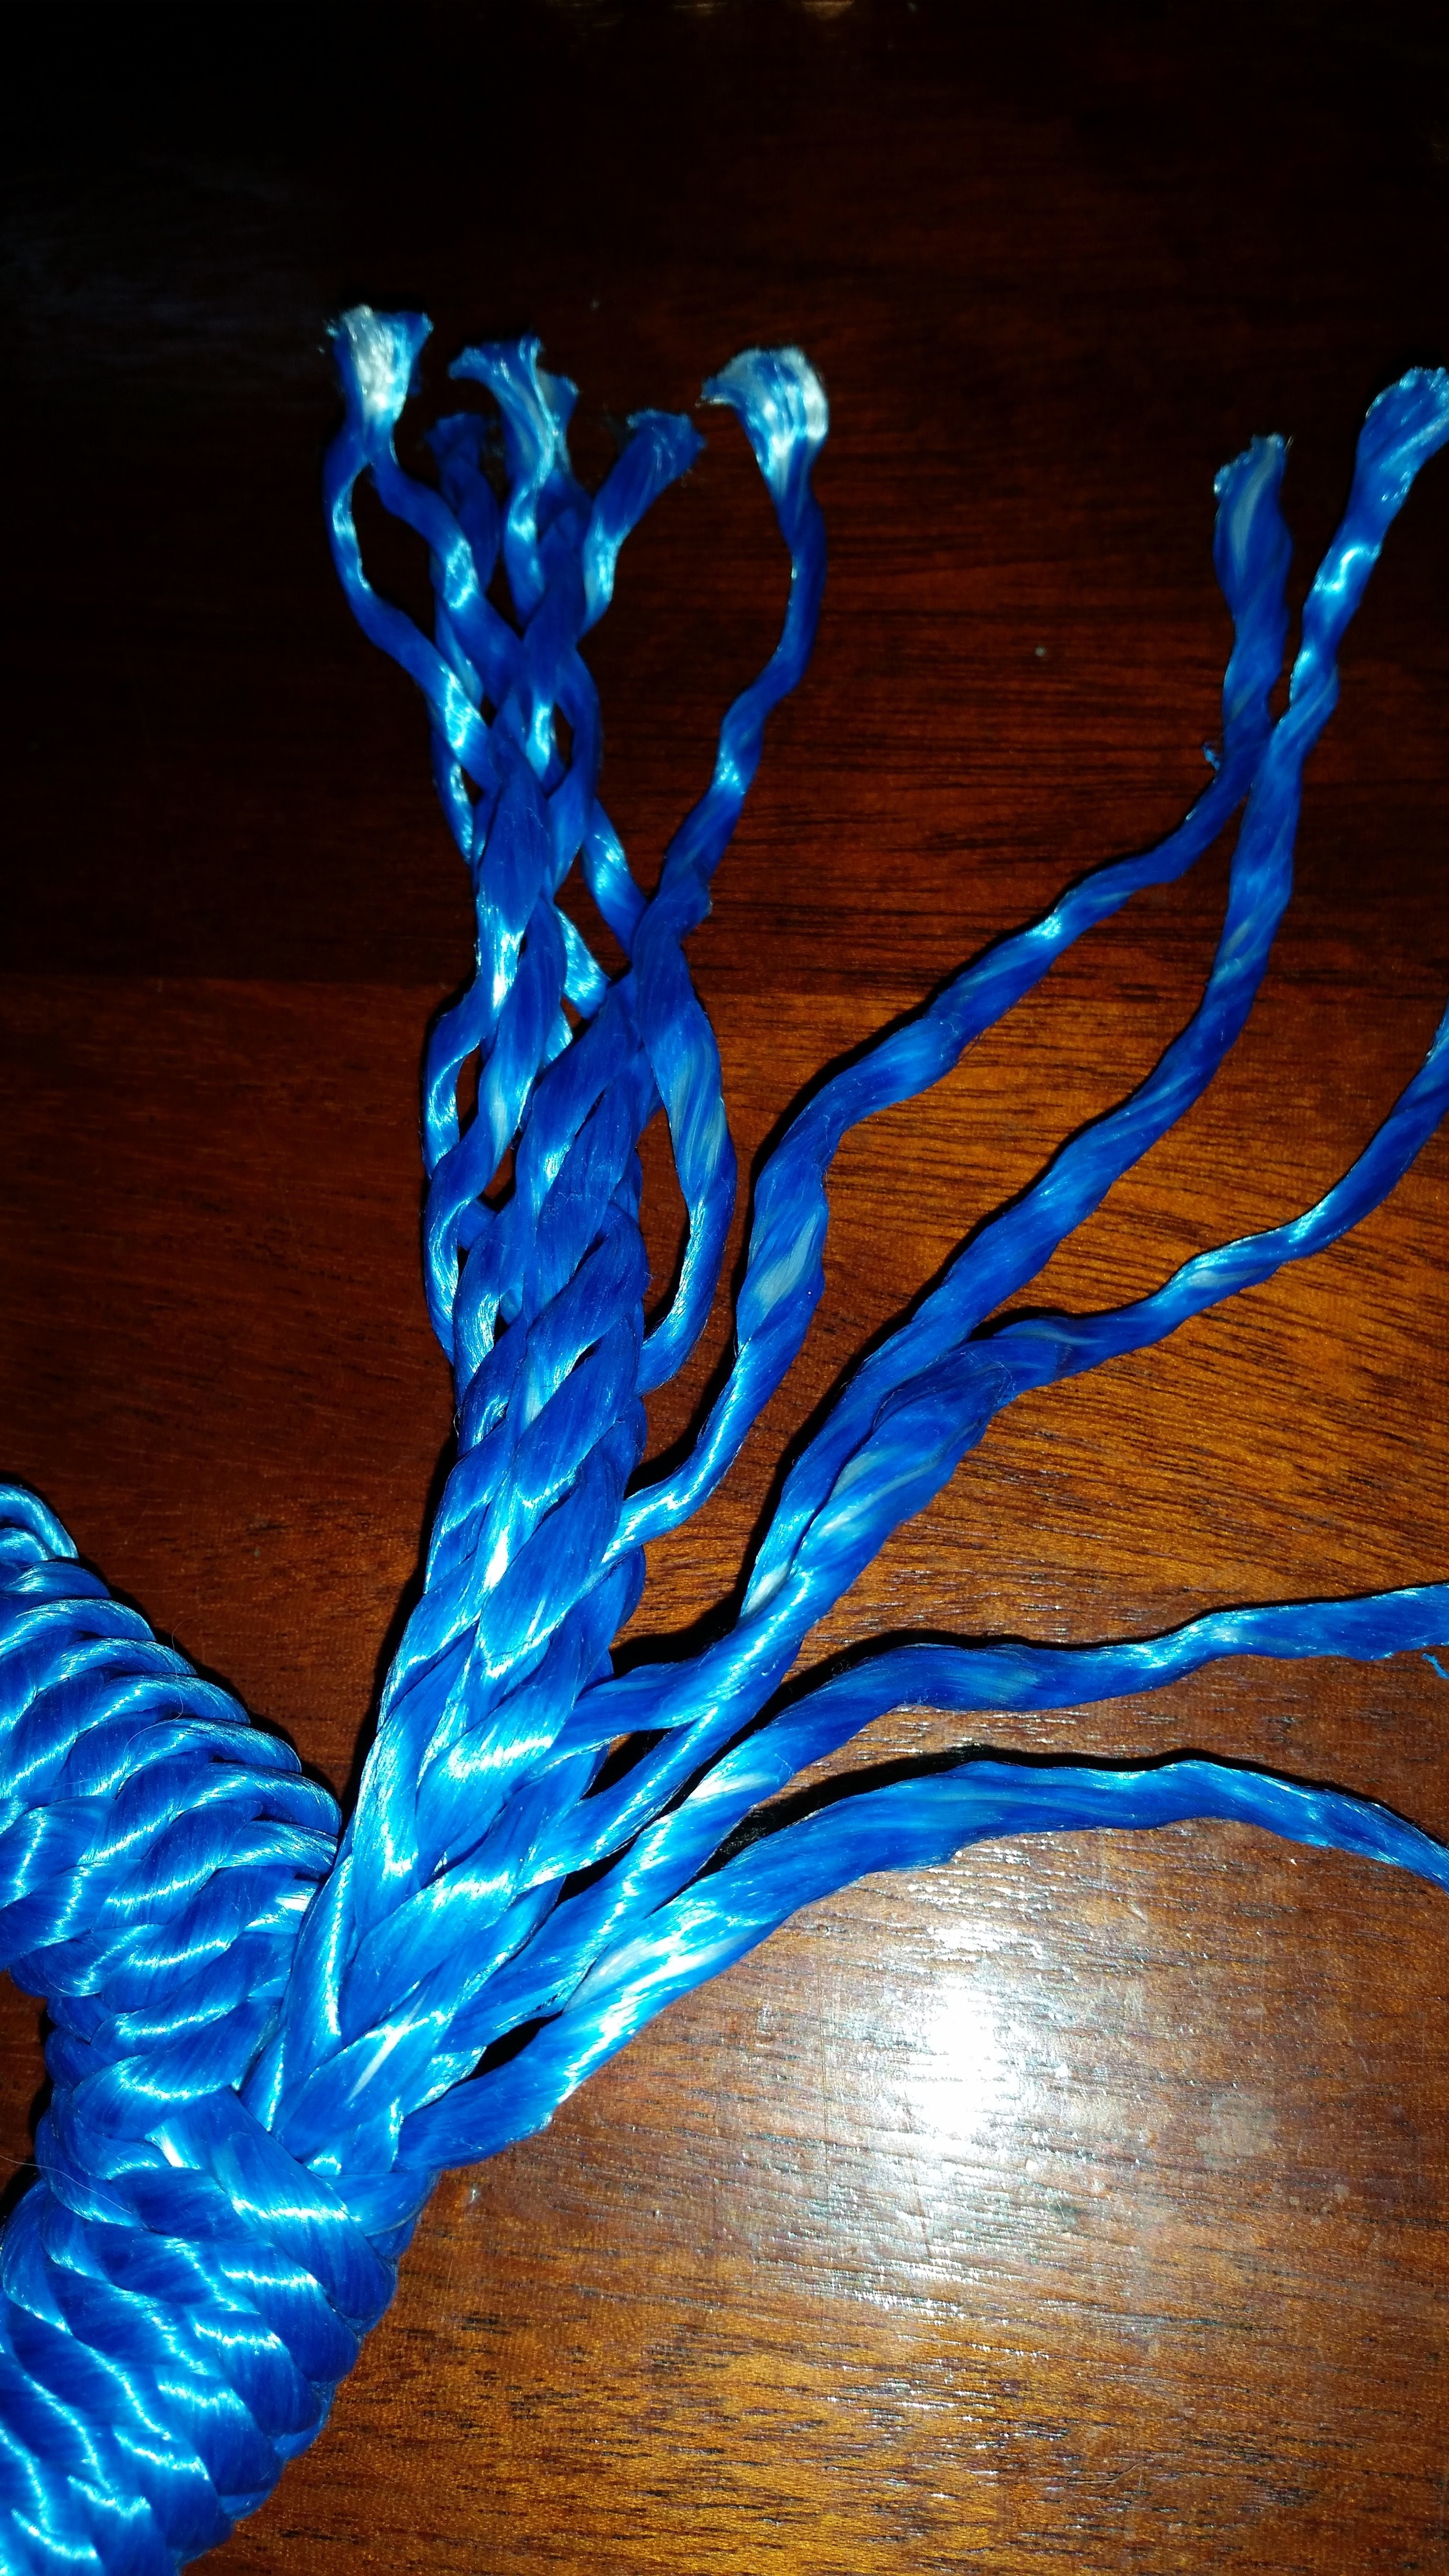
Now pull the tails back out and cut them off just after the pin. The pin marks the length that will go back into the grommet when it is worked out and stretched. Now that the longest point is marked (and cut off), you can begin tapering the tails. 12 strand has 12 tails, which means that you need to trim 11 of the strands to shorter lengths in a gradual and systematic method. 

On grommets, everything is condensed, so I trim back every row of the rope. I pull out the bottom six strands and trim them off, then I evenly trim off the remaining 5 strands. Be sure to keep the first and second strands you cut off as you will use them later.

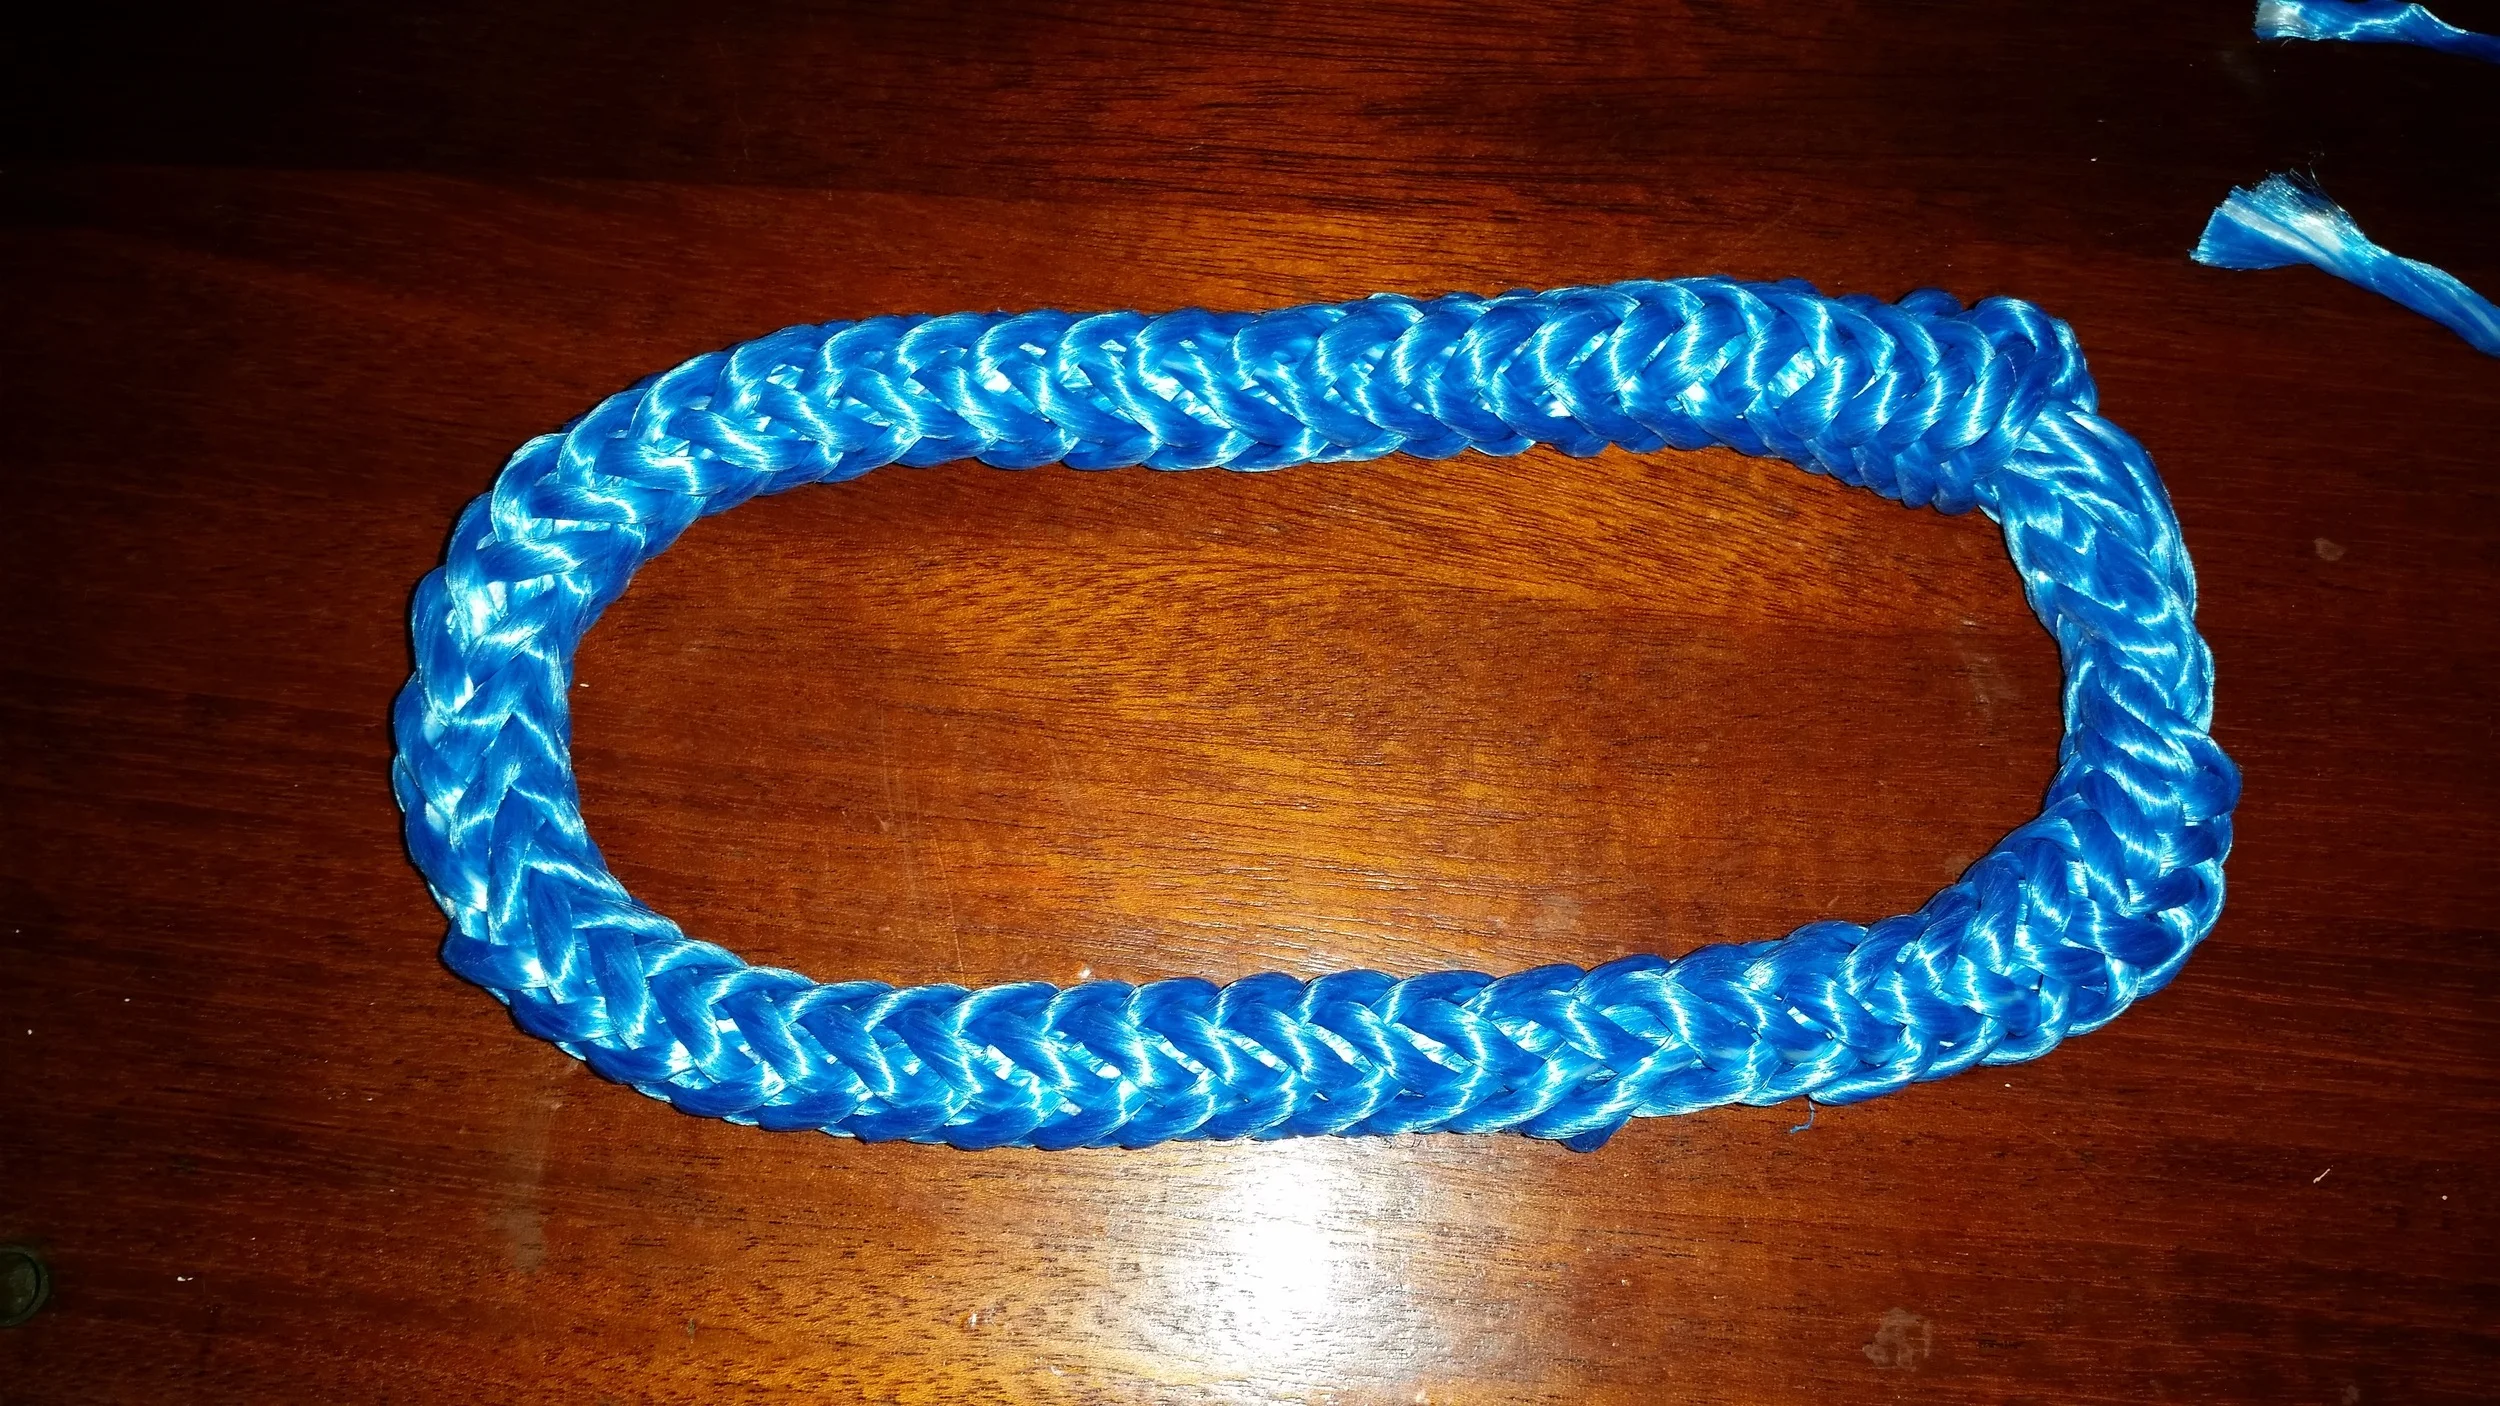
After the tails are tapered, work them back into the grommet and work the grommet back to its expanded size. The tails should disappear into the grommet as if nothing had happened at all.

Now take the long strands of Dyneema that you cut off while tapering the tails and thread it through a needle. Stitch the strand of Dyneema through the line being sure to cross over the strands of the outer line, piercing through the line inside. This will act as a locking stitch to further ensure strength and stability.

Now you have a finished grommet made out of Dyneema that will be able to hold the rigors of standing rigging.

You may be wondering if it will be strong enough since you are grossly under burying the tails? The answer is "Yes", it will be strong enough. The buried tails will wrap 3/4 of the way around the grommet. The tapers will ensure an even transition from tail to no tail, preventing any sharp changes in the weave of the outer line. This will prevent any stress points from arising in the grommet. The locking stitches will keep the tails from sliding around, which will also help keep everything in place and avoid the tails from sliding out to unravel. Since the tails can't move, the Mobious Brummel will serve to lock the grommet closed and keep it secure.

I used 9mm Samson AS-78 for my deadeyes which will support 9mm dyneema stays and have no problems with them. They will stretch out a bit and grow very thin as the weave settles back into place when tensioned to a few thousand pounds! This is why the gradual tapers are so crucial. It may look oversized for the thimbles, but once it is loaded up, it will be just right.

Each deadeye consumes 4 feet of 9mm AS-78 and takes me around 1 hour to make.

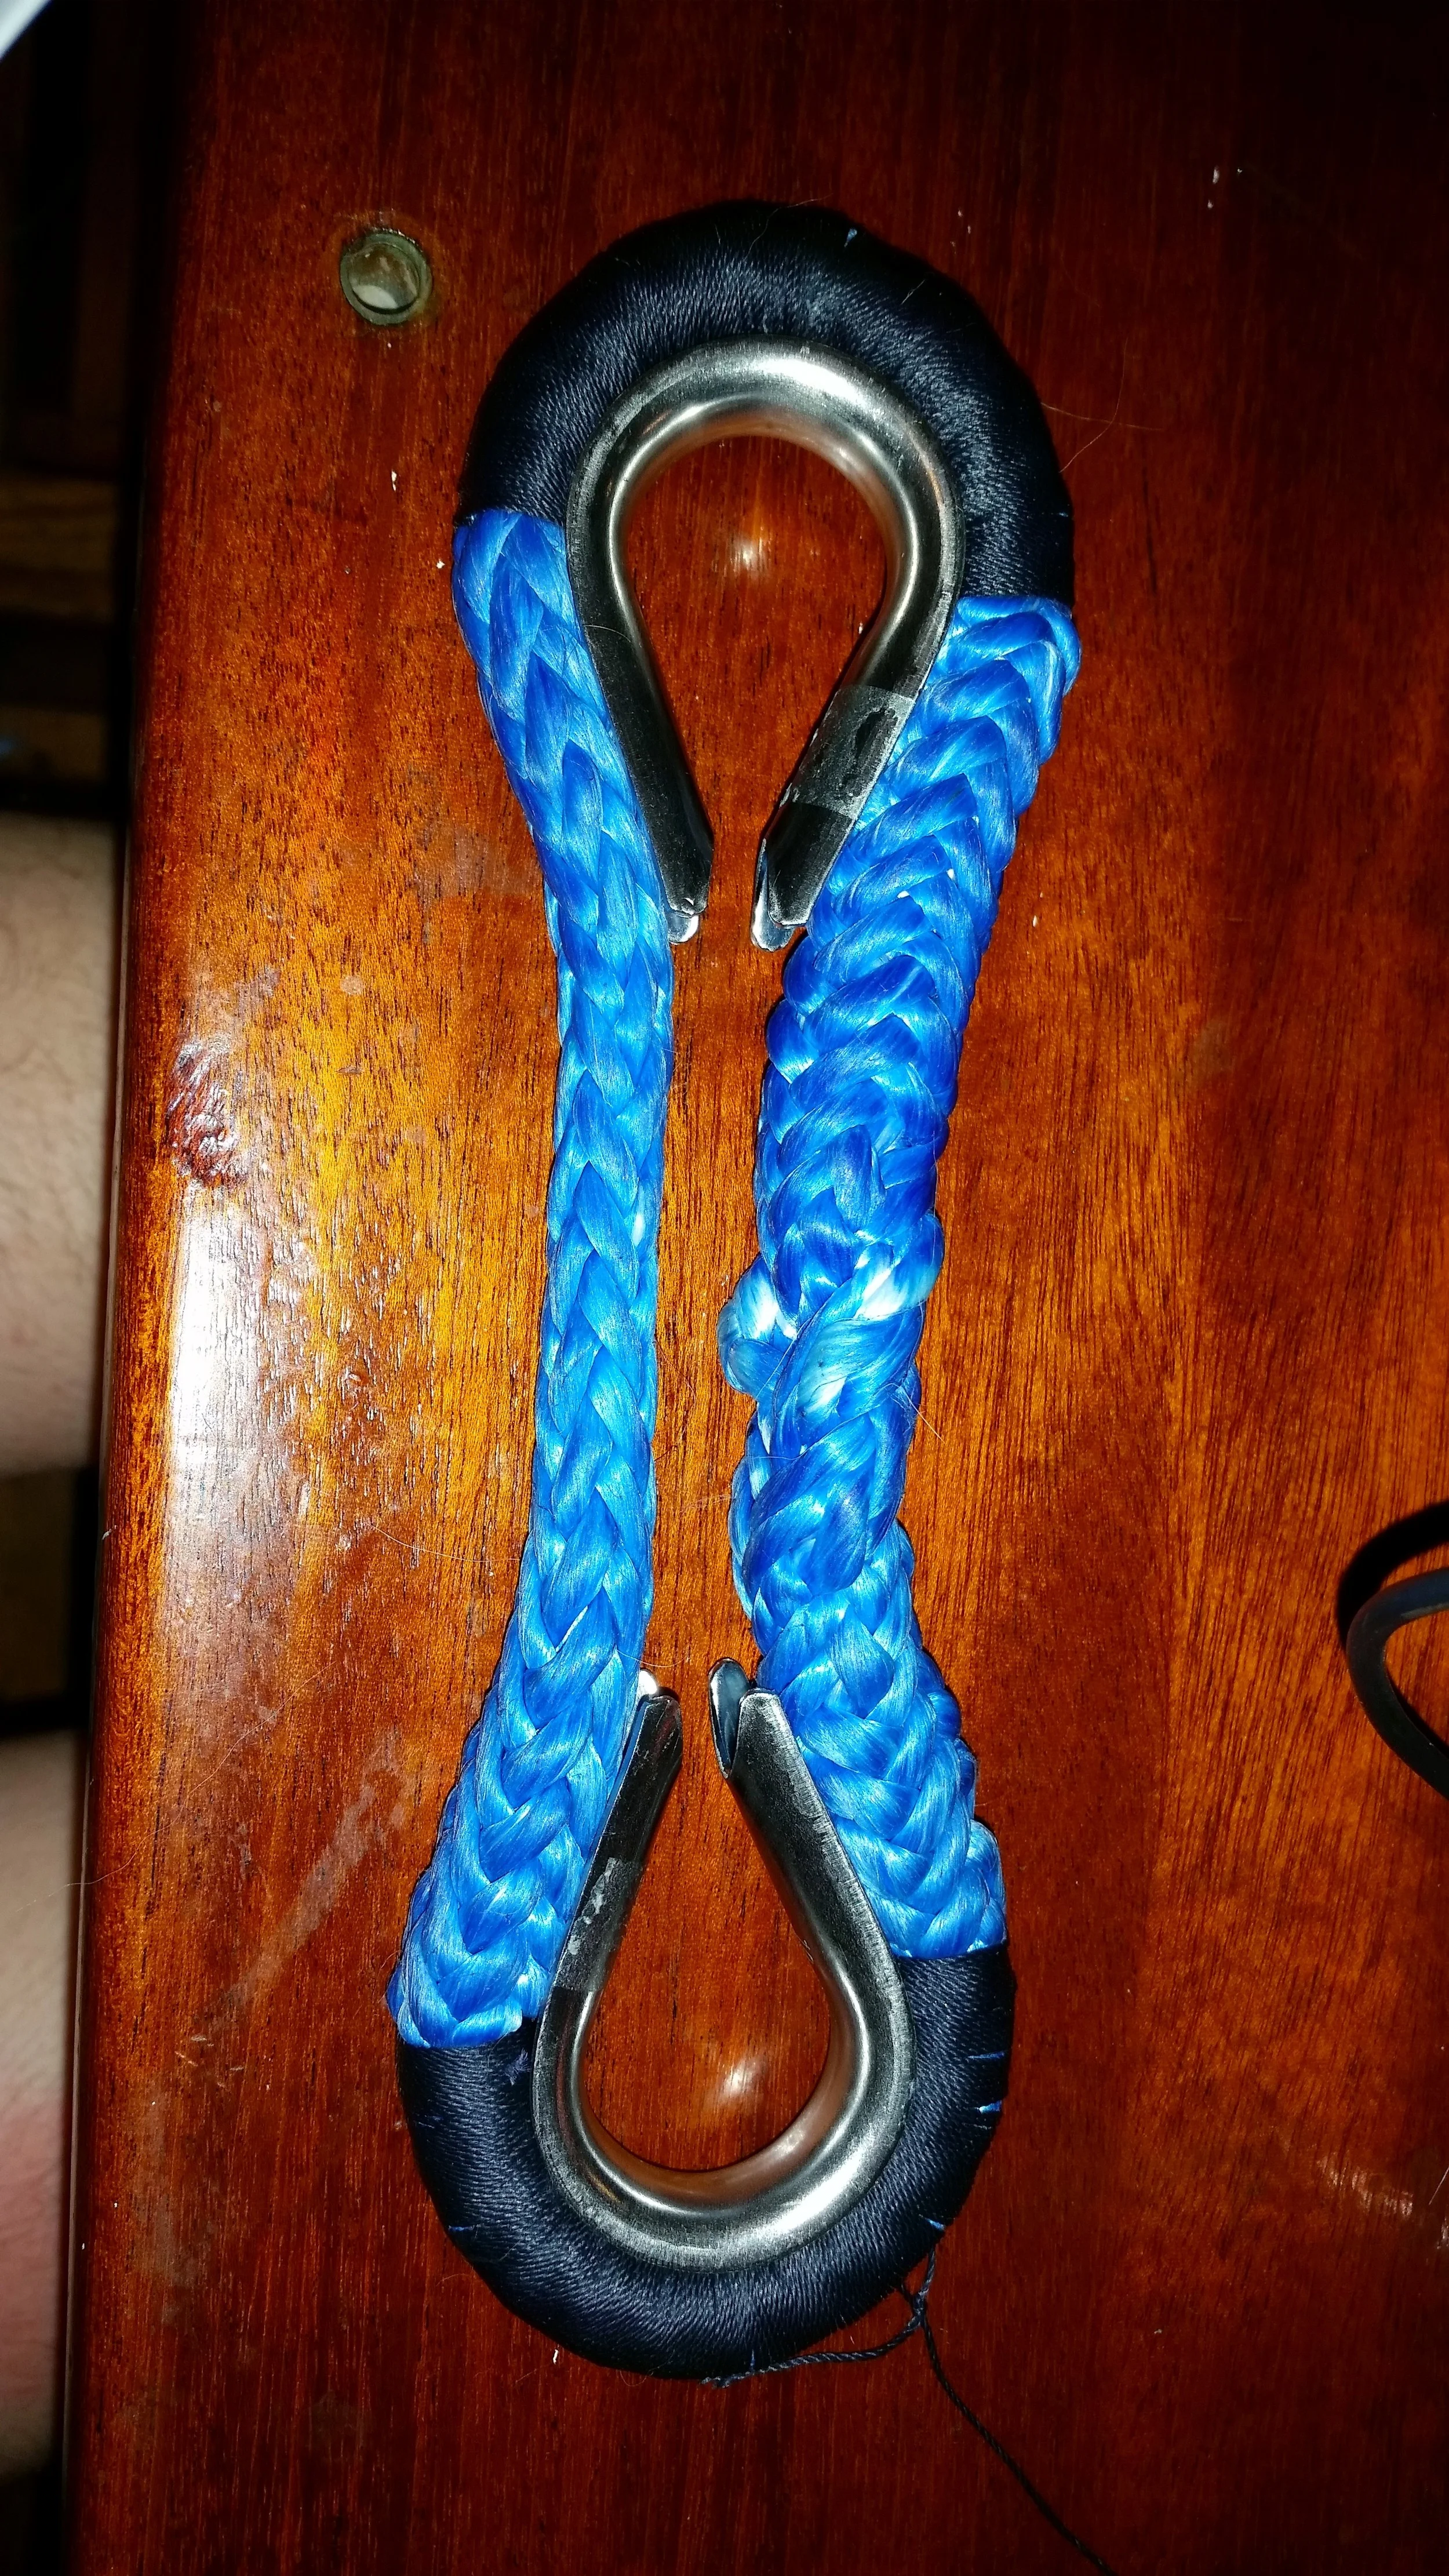
Now that the grommet is made, simply insert the thimbles and hold them in place with a flat seizing knot set in the middle of them to create the finished deadeye.

To see these deadeyes in use, check out the links below.

You can also check out this video where I walk you through the entire process, start to finish, of making the grommet for the deadeye.

Turnbuckle Pin

Turnbuckles are typically secured with with two cotter pins to prevent the turnbuckle from rotating and loosening the stay. The problem with cotter pins is the legs can get caught on lines and flesh of passer byes. 

Some riggers will turn the legs around, bent so far that they point into the turnbuckle. This works well and when covered with rigging tape, provides a safe, snag-free, secured turnbuckle. The problem comes when you try to remove the cotter pin. 

The legs have been bent so far that they are hard to bend back to remove the pin. Since the legs were bent so far, they are mangled and will not be easily reused. The excessive bending also runs the risk of breaking the legs, which would make the pins worthless. 

The alternative to cotter pins on small day sailors is to use a single piece of stainless steel welding wire. The wire is bent to look like a "[". The horizontal parts slide through the turnbuckle screw holes and are then bent over to hold the wire in place. 

This single welding wire will hold the turnbuckle in place, while offering no risk of snags. I don't cover the wire in rigging tape because I like to visually inspect the wire frequently. Since it is snag free, the tape is not required!

To remove the wire, simply straighten the legs and slide the wire out of the pins. It can easily be reused over and over. If the legs break from use, another piece of wire can be fabricated to replace it.

Synthetic Backstay

While the best material for synthetic standing rigging is Heat Set SK78 Dyneema, the backstay plays by its own rules.

Backstays come in two flavors, static and adjustable.

Static backstays are just that, static. They are set up just like any other stay on the boat and adjusted infrequently. 

Adjustable backstays are a superb addition to synthetic rigging system. They allow "on the fly" tension control of the headstay. If you are beating to windward and notice that your headsail's luff is sagging, simply tighten the adjustable backstay to increase tension on the headstay. The opposite applies when running, as more belly can be induced into the headsail by easing the backstay to slacken the headstay.

Since the backstay will be adjusted frequently, additional creep is not as detrimental. For reasons of reduced cost and additional chafe resistance, normal SK78 dyneema works wonderfully. I used a combination of New England Ropes STS-HSR and Samson Amsteel-Blue SK78 on my own adjustable backstay. The top part is STS-HSR, and the bottom half (where the adjustments take place) is in regular dyneema.

There are several ways to set up an adjustable backstay ranging from a hydraulic system, to a block and tackle system. The choice for synthetic backstay material greatly depends on the type of backstay adjuster. 

Single backstays, especially on larger craft, tend to do better with a hydraulic system. Smaller crafts with lighter rigging loads can benefit from a simple but sturdy block and tackle setup.

When a single backstay is used with an adjuster, be it block and tackle or hydraulic, Heat Set Dyneema will shine supreme. The minimal creep can be absorbed by tightening the hydraulic ram. I would caution away from using regular dyneema with a hydraulic backstay adjuster because the hydraulic system has a fixed amount of distance it can travel. The creep of regular dyneema may consume most of the travel available by the hydraulic system. This can be rectified by moving the splice further up the backstay to absorb the creep experienced. Heat set dyneema will still creep during Phase I of its life cycle, but it will still be much less then regular dyneema would exhibit. 

If it is a small craft with light rigging loads, a block and tackle will suffice with regular dyneema. The additional creep can be easily absorbed by an "initially long" block and tackle system. As the dyneema creeps and settles into Phase II of its life cycle, the block and tackle system will begin to look more reasonable in length while still having wonderful adjust-ability available to work with.

Split backstays have more options available to them. It is best to set the backstay up as a V and either set a block and tackle on one leg of the backstay or create a slide system that will squeeze the backstays together to provide the tension. Smaller craft with lighter rigging loads can get away with the simple to install and adjust "block and tackle" system, where larger craft will benefit from the slide system.

Either system will work wonderfully, but I prefer the peace of mind of a slide system as compared to a block and tackle. My fear with a block and tackle is if the blocks were to break or the pulley line come free, the whole backstay would go slack and could lead to damaging consequences. The slide system is safer because if the slides were to break, the backstay is still secured and tensioned. 

Backstay.png

The slide system is very easy to manage and adjust, even in high winds with large sails exerting tremendous loads onto the rigging. The slides pinch the backstays together which then increases the tension on them. To tighten the backstay (and in turn the headstay), simply slide the system down. To loosen the backstay (and in turn the headstay), slide the system up.

Due to the slides passing over the backstays which will attribute a negligible amount of chafe, the use of a more chafe resistant rope is preferred. For this reason, the lower half of the backstay is Samson Amsteel-Blue which is much more abrasion resistant then Heat Set Dyneema. 

How much creep can be expected when using regular dyneema instead of heat set dyneema? A lot! The headstay on Wisdom (45 foot Morgan) is around 60 feet long and made of New England Ropes STS-HSR Heat Set SK78 Dyneema and creeped around 2 inches. The backstay is composed of 20 feet of STS-HSR and nearly 60 feet of Samson Amsteel-Blue SK78 Dyneema and creeped nearly 36 inches! This is not a comparison of New England Ropes to Samson, but instead a comparison of Heat Set vs Regular Dyneema. While Heat Set Dyneema is less resistant to abrasion and sharp turns, it is very resistant to creep, making it wonderful for static backstays and single backstays. The sharp turn for a split backstay should be performed by regular dyneema and simply calculate in tremendous amounts of creep. 

In conclusion, the best material for a synthetic backstay greatly depends on the type of backstay in question. 

Heat set dyneema is best for single adjustable backstays and static backstays.
Regular dyneema is best for split backstays with an adjuster.

Dyneema in the Cold

Dyneema experiences a negative linear thermal expansion coefficient in the direction of the fiber. What this means is that it stretches as it cools. Minor differences in temperature will not create an appreciable difference in length, leading to loss of tension, but more drastic differences will.

What this means is that your rigging will go slack during the winter which is of little consequence since the sailing season ends before it gets cold enough to notice the difference. I tensioned my rigging when it was between 60F and 80F. Now that the temperature has dropped down to below 20F, we are seeing an appreciable slackness in the standing rigging. 

The headstay which is usually bar tight in the spring, summer, and fall, is now loose. I can easily pull down on the headstay's deadeye and create this much gap (nearly 6mm or 1/4") with one of my arms and little effort. I needed an incredible pulley system to achieve the necessary tightness when the rigging was installed in warmer weather. 

If I were inclined to sail on these freezing days, I would need to tension the rigging again. By waiting for the warmth to return before I set sail again, I don't need to do such adjustments. When the air warms again, rigging will once again regain its pre-established tension without being touched.

The other option I have available on these frigid days is to tighten the rigging by hand, when the warmth returns, the rigging will be tighter than I could have ever dreamed of achieving. This is nice from the standpoint of "achieving sufficient tension" but this unnecessary tension can lead to greatly increased forces exerted on the rigging which can lead to premature failures of the fittings.

Rigging tensions, as everything else on the yacht, is a double edged sword. More tension equates to more forces which leads to greater loads and stresses, which leads to premature gear failures. Always be mindful of how tight your stays are and remember that the mast fittings and chainplates have to distribute these great loads.

The Best Material for Synthetic Standing Rigging

Synthetic Standing Rigging is a wonderful system to work with. It weighs next to nothing compared to steel, yet holds your mast up with even more strength. The term "Synthetic Standing Rigging" is a generic term for standing rigging that does not use steel cables to hold the mast up. This broad category tends to include PBO, Vectran, Spectra, and Dyneema .

PBO is prohibitively expensive and tends to only be seen on race boats. It will not creep and is incredibly strong. It's major disadvantage is that it will quickly degrade when exposed to UV light. This is fine for sponsored race yachts where money is no object, but not very practical for the average cruiser.

Vectran is a wonderful product for standing rigging. It is in the Kevlar family and exhibits incredible strength with virtually no creep. While both of these features would make it wonderful for standing rigging, it is very susceptible to UV damage. The use of covers will help prolong its lifespan, but at the cost of higher windage. 

Spectra is the same as Dyneema, but is produced by DuPont. They have transitioned over to government armor contracts and no longer produce rope for civilians.

Dyneema is produced by DSM and is the same as Spectra. Dyneema is made of Ultra High Molecular Weight Polyethylene (UHMWPE) and is my favorite material for standing rigging on a cruising sailboat. It is incredibly strong with minimal creep, but with very good resistance to UV damage. This allows the fibers to be left exposed to the sun, minimizing the bulk of each stay to minimize windage.

So you decided that Dyneema is the material of choice for your synthetic standing rigging. Wonderful! Then you go to purchase the line needed for your standing rigging and they ask "Which one do you want?" Instantly you are flooded with numbers and strange words like SK78 or Heat Set. Lets take a look at the different types of Dyneema.

Dyneema comes in many flavors, each with its own properties:

SK75
SK78
SK90
SK99
DM20
Heat Set

SK75 was the be the best form of dyneema available for a while, but we have come a long way since these fibers. Some still tout SK75 as the best because of its incredible strength and resistance to UV damage, but it creeps a lot. Creep plagued SK75, and spurred the development of the newer fibers that do not creep as much. Most applications for SK75 have been phased out and replaced by SK78.

SK78 is the improved version of SK75. It offers the same high strength of SK75 but with greatly reduced creep. SK78 has pretty much replaced SK75 for all uses on the boat and many manufacturers have stopped offering SK75 since the introduction of SK78.

SK90 is the improved version of SK78 and offers significant increases in strength but no improvement in creep properties. SK90 offers a 10 to 15% increase in strength which made this fiber the best thing since sliced bread when it was launched in 2009. It reigned supreme until 2013 when an improved version replaced it.

SK99 is the improved version of SK90. It was launched in 2013 and offers 20% more strength as compared to SK78 but still no improvement over creep. SK99 may sound like a miracle fiber, but its price is equally set. For this reason, SK99 is not seen as often as SK78 which offers incredible strength with a more reasonable price.

DM20 is a different class of dyneema which has nearly zero creep but less strength as compared to SK78. The lack of creep would make it seem like the ideal fiber for standing rigging, yet it doesn't seem to be the popular choice. This is because there are treatments that SK78 can receive to improve its properties.

Heat Treatment is part of the manufacturing process whereby the Dyneema is subjected to heat and tension which causes molecular changes in the fibers themselves. Dyneema is made of polyethylene chains. The heating process under tension causes the fibers to stretch out further and creates more crystalline structures in the fiber which give the rope more strength. It also creates longer chains of polyethylene which are able to bear more load than the shorter chains found in untreated fibers, which results in less creep. The end result of heat treatment is a much stronger rope with less creep.

This may sound like a magic bullet, but sadly, there are drawbacks. The rope becomes much less resistant to bending and abrasion. This is not a problem for standing rigging because they are straight and do not move; just be sure that any bends are distributed over an appropriate radius to avoid damaging the rope. 


Lets take a moment to digest all of this information.

SK75 is strong but creeps.
SK78 is strong and has low creep.
SK99 is awesome but too expensive.
DM20 does not creep but is weak.

Heat treating SK78 results in low creep and incredible strength.

The downsides of Heat Treated SK78 can be easily overcome. Providing properly sized thimbles produces the proper radius turns needed and protective chafe coverings guards the line from abrasion. 

For these reasons, Heat Treated SK78 is the best rope for synthetic standing rigging. The price is not too much of a jump from regular SK78, and its strength and creep properties are vastly improved. 

I personally prefer New England Ropes STS-HSR which is Heat Treated SK78 and use this rope for my own synthetic standing rigging.

I'm sure as new technologies come to the market, these views will change. For now, this is the best product for the money and it will have a long service life as standing rigging if properly cared for.