Standing Rigging

Tuning the Aft Lowers

The aft lowers are the easiest stay to set. They are the loosest stay on the rig compared to the others and take the least load. They attach just below the spreader and come down to the deck. Their purpose is to keep the mast in column as the boat heels over when the heads of the sails pull on the top of the mast.

If they are too loose, the mast will bend to leeward when sailing. This is part of the rigging is adjusted during the test sail.

For the dockside rig tune, you will tighten the stays until they are a bit looser than the forward lowers while making sure the mast stays in column. If there is any slight bow or bend in the mast, you will simply adjust that out using these stays.

If the mast bends to port, tighten the starboard aft lower a bit more.
If the mast bends to starboard, tighten the port aft lower a bit more.

That's all there is to that stay! It's not as complicated as it looks!

Tuning the Forward Lowers

Now that you have tuned your headstay, backstay, and cap shrouds, it is time to move on to the Forward Lowers.

These stays are not found on all boats, so if you don't have them, you can skip this section and move onto tuning the aft lowers (which in your case would be the "Lowers"). The purpose they serve is to help induce bend into the mast. They pull the middle of the mast forward while the backstay pulls the top of the mast back. This causes the mast to bend slightly, which is a good thing!

The sailmaker will want this bend, as it is important and calculated into the design of the mainsail. If the mast were straight, the sail would not fly as well. 

The tension on these stays will be less than the Cap Shrouds but more than your lowers. It is important to tension both sides at the same time and by the same amount to ensure that you don't pull the mast to one side or another.

If you are using turnbuckles, this will go very quickly and easily. If you are using dead eyes, then you will need to set up the tensioning line system.

As you go tightening, you want to sight up the mast to make sure it remains in column (which means straight). There are different ways to sight the mast, which we will go over at a later point as well. You will continue to tighten the stays while watching for the forward bend to happen and making sure that it doesn't begin to bow to the sides. This is why you want to do them at the same time.

For turnbuckles, you will start off

2 turns on port, 2 turns on starboard, sight the mast,
2 turns on port, 2 turns on starboard, sight the mast, ...

Once they begin to have some resistance, you will switch to

1 turn on port, 1 turn on starboard, sight the mast.
Proceed as needed until it is perfect

For deadeyes, crank the

port winch 1 full turn on high speed, starboard winch 1 full turn on high speed,
port winch 1 full turn on high speed, starboard winch 1 full turn on high speed, ...

Until the slack has been removed from the system. Then

port winch 1/2 turn on low speed, starboard winch 1/2 turn on low speed, sight the mast.
Proceed as needed until it is perfect

If the mast bows to one side, either tighten the side it bows from a bit more and sight the mast to make sure it corrected, or loosen the side it bows to a bit and sight the mast again to make sure it corrected.

If the forward lowers are tighter than the cap shrouds, you want to stop and reassess the situation. This is usually caused by a loose backstay. Since the mast is tipped too far forward, you need to crank down on the forward lowers to achieve proper mast bend. If this happens to you: 

Release the forward lowers
Tighten the backstay and possibly loosen the headstay to move the masthead aft.
Moving the masthead aft can make the cap shrouds slightly looser, so they will need to be readdressed. 
Then tighten the forward lowers again.

At this point, the forward lowers should be able to achieve the proper mast bend without becoming tighter than the cap shrouds. 

The next stay to set are the aft lowers

Tuning the Headstay

The headstay is very easy to set up, there are just a few points to keep in mind:

Too tight and it adds stress to the stem and mast fittings
Too loose and the headstay will sag
A tighter headstay is better for sailing to windward
A looser headstay is better for sailing down wind
You need to headstay to be longer than the luff of your headsail

With synthetic standing rigging, I like to set up the headstay and backstay at the same time. I set the rake with a slight aft bias and then tension the headstay and backstay until it feels right.

Once the right amount of tension has been achieved, simply tie the Shroud Frapping Knot on the headstay lashings and tiddy up the ends.

You will quickly know if the headstay is too loose, as it will sag and the luff of the headsail will fall to leeward. 

If it is too tight, the headsail will never sag. This may sound ideal, but the sails are designed to work with a bit of sag. If the headstay is so tight that it won't budge, it will place extreme stresses on all of the fittings and the sail will not perform as well as it could.

If you are not setting up the headstay and backstay at the same time, set the length needed on the headstay and when the backstay is set up, the headstay will subsequently be tensioned. The headstay and backstay pull against each other via the masthead, you should use this fact to your advantage when setting up your rigging.

I like to take advantage of an adjustable backstay to fine tune the headstay tension while under sail. If we are going to windward all day, I'll tighten the backstay adjuster. If we are running or broad reaching, I'll ease the backstay adjuster and let the headstay sag a bit, filling the sail with more air as it sags out into the wind. More about the adjustable backstay in a later post.

Tuning the Cap Shrouds

To properly tune synthetic rigging, you need to adjust in a certain order. 

Headstay and backstay at the same time to get the mast head centered and a rough rake setting
Cap Shrouds to center the masthead over the center of the boat
Forward lowers to properly set the bend
Lowers to center the middle of the mast
Finalize the mast rake bend amount

The whole time, you want to make sure the mast stays in column. If it begins to bend or have an S curve to it, you need to correct that immediately or it will only get worse as the tuning progresses.

There are two ways to do this, depending on the situation. If this is new rigging being set up for the first time, you want to loosen everything and start from scratch. If it's not new rigging and merely a tune up, then you don't need to loosen everything before you start.

To start with the cap shrouds, you want to make sure that they keep the mast head centered over the boat. There are many complicated ways to do this, but the easiest way is to attach a jug of water to a halyard that comes out in the middle shiv on the back of the mast. Swing the jug to the port side, cleat the halyard, and mark where it hits the toe rail. Then swing it over to the starboard side and make sure it hits the same mark. 

If the jug hangs lower to port, then the mast is tipped to port. 
If the jug hangs lower to starboard, then the mast is tipped to starboard.

For example:

If the jug hangs lower on the port side, you want to tighten the starboard shroud and loosen the port shroud. Then check again with the jug to make sure it is all centered and even.

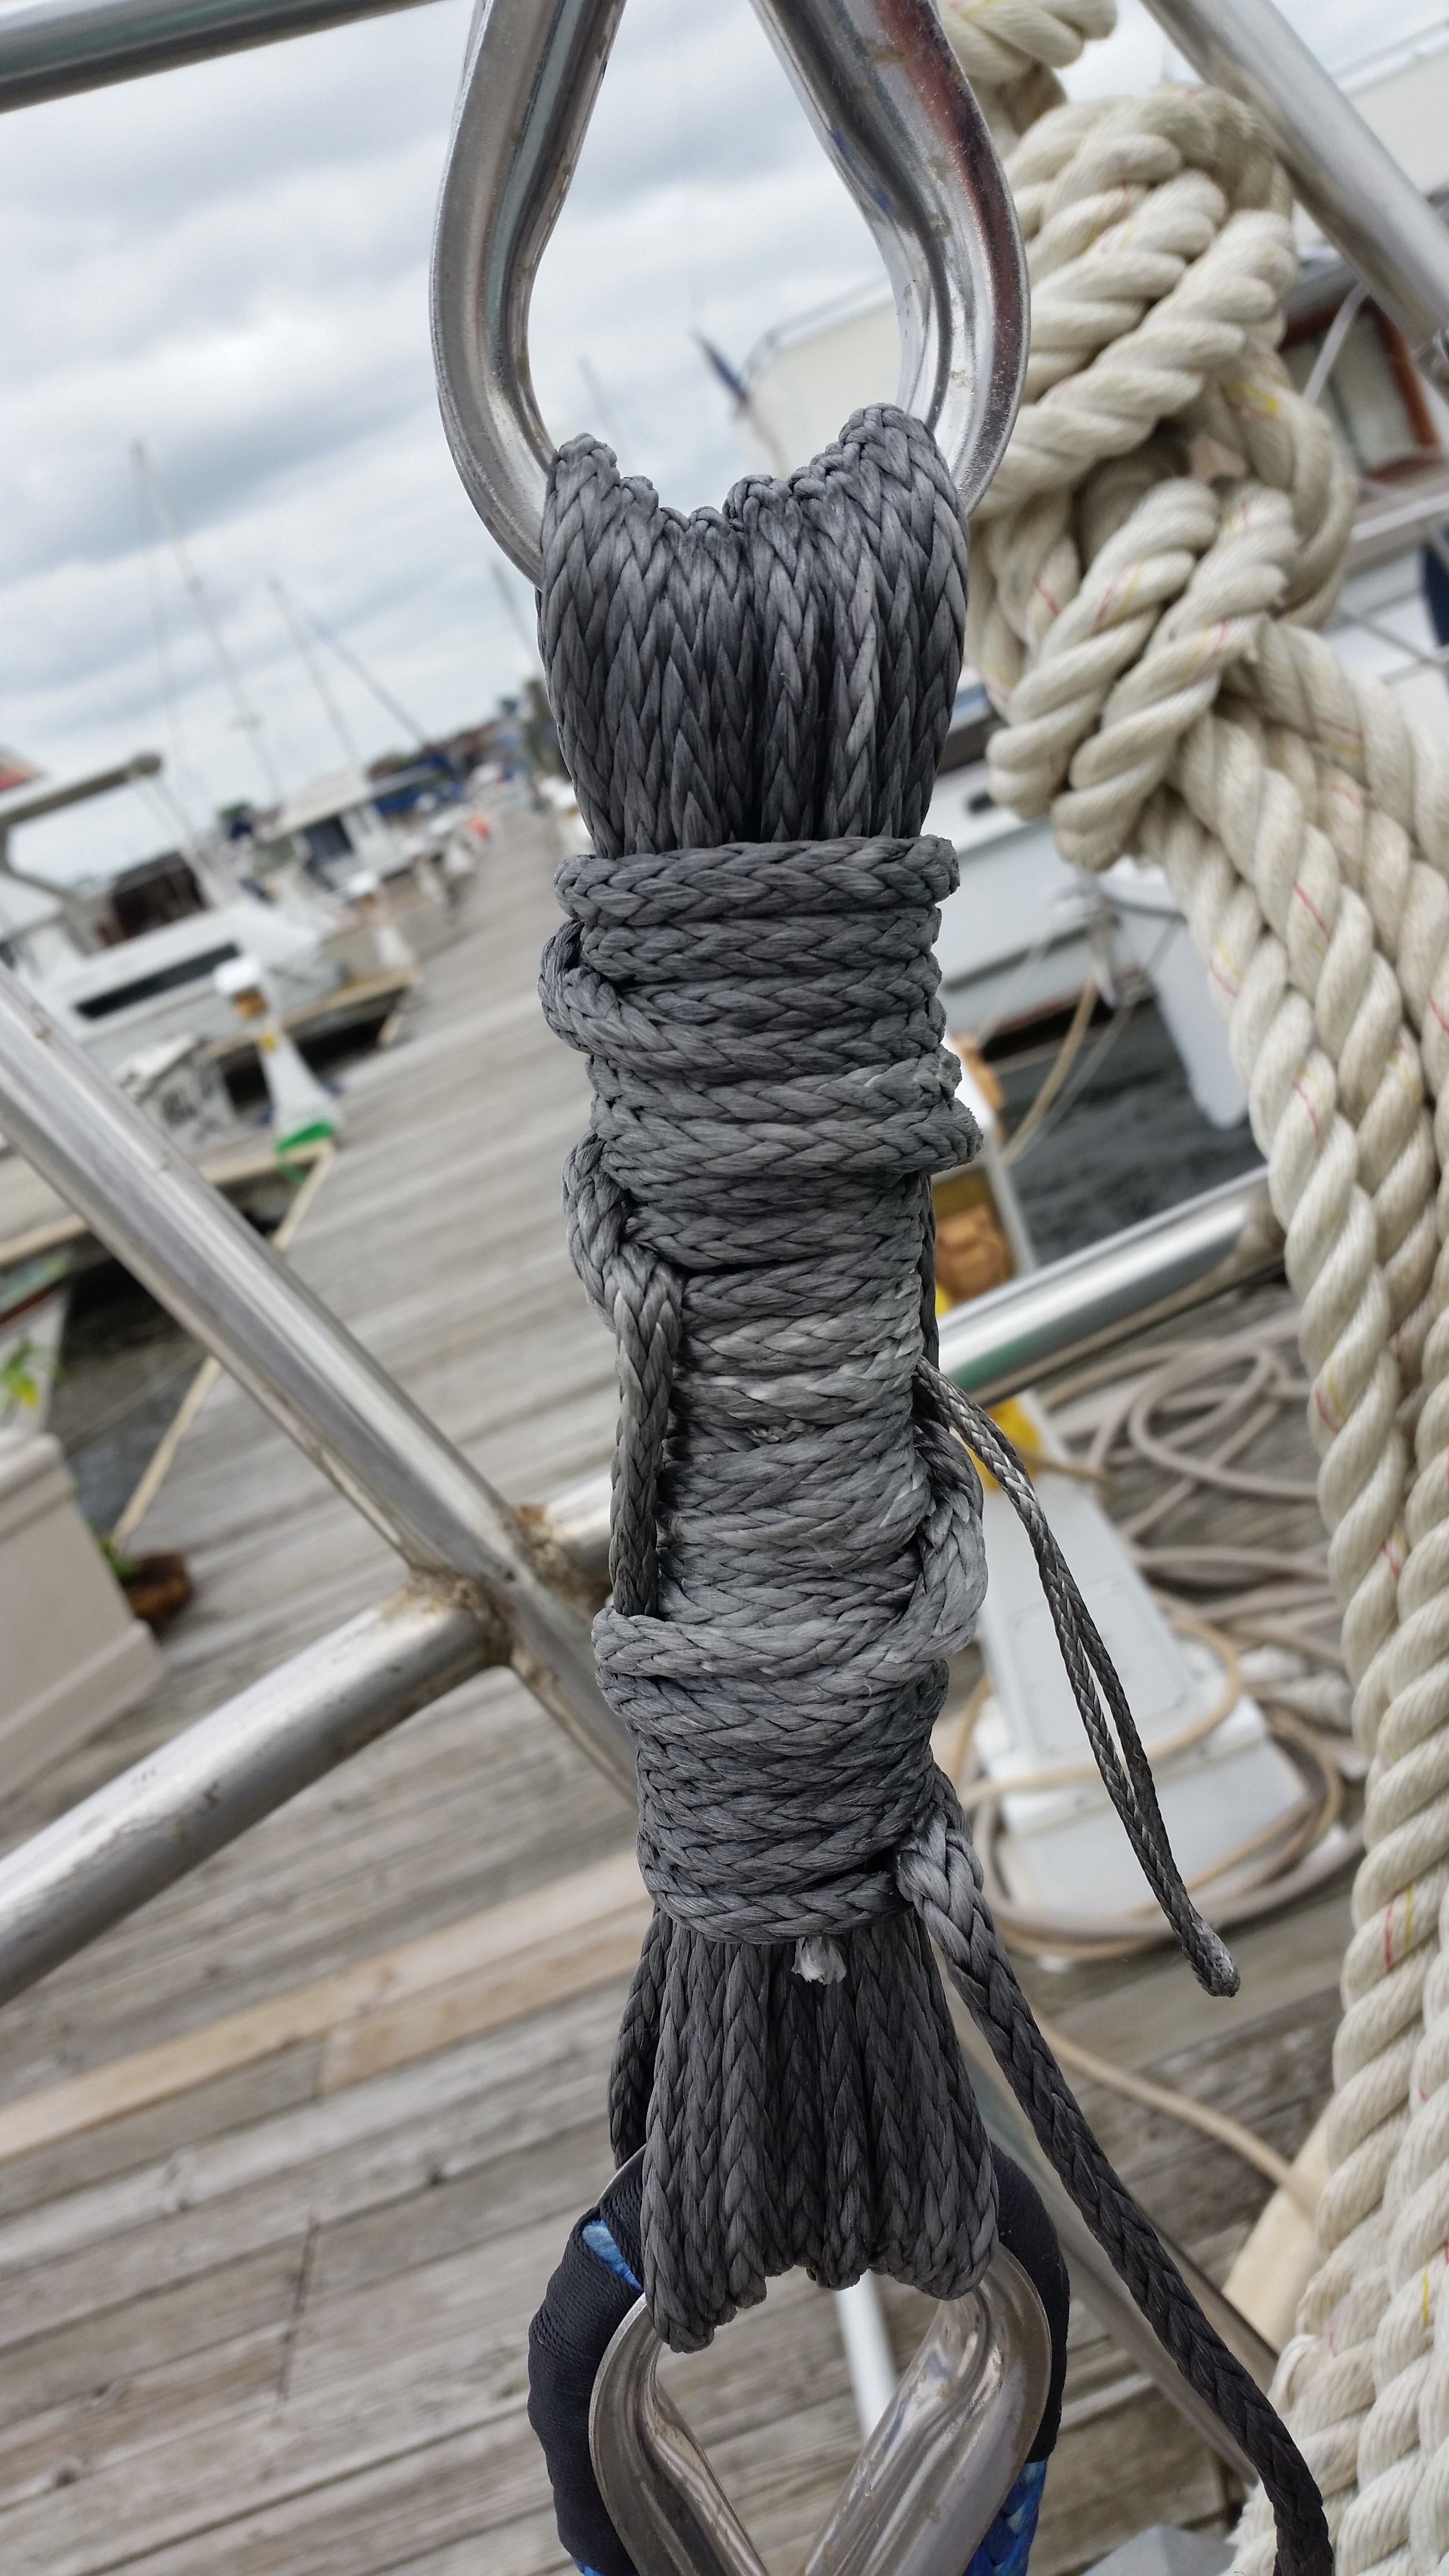
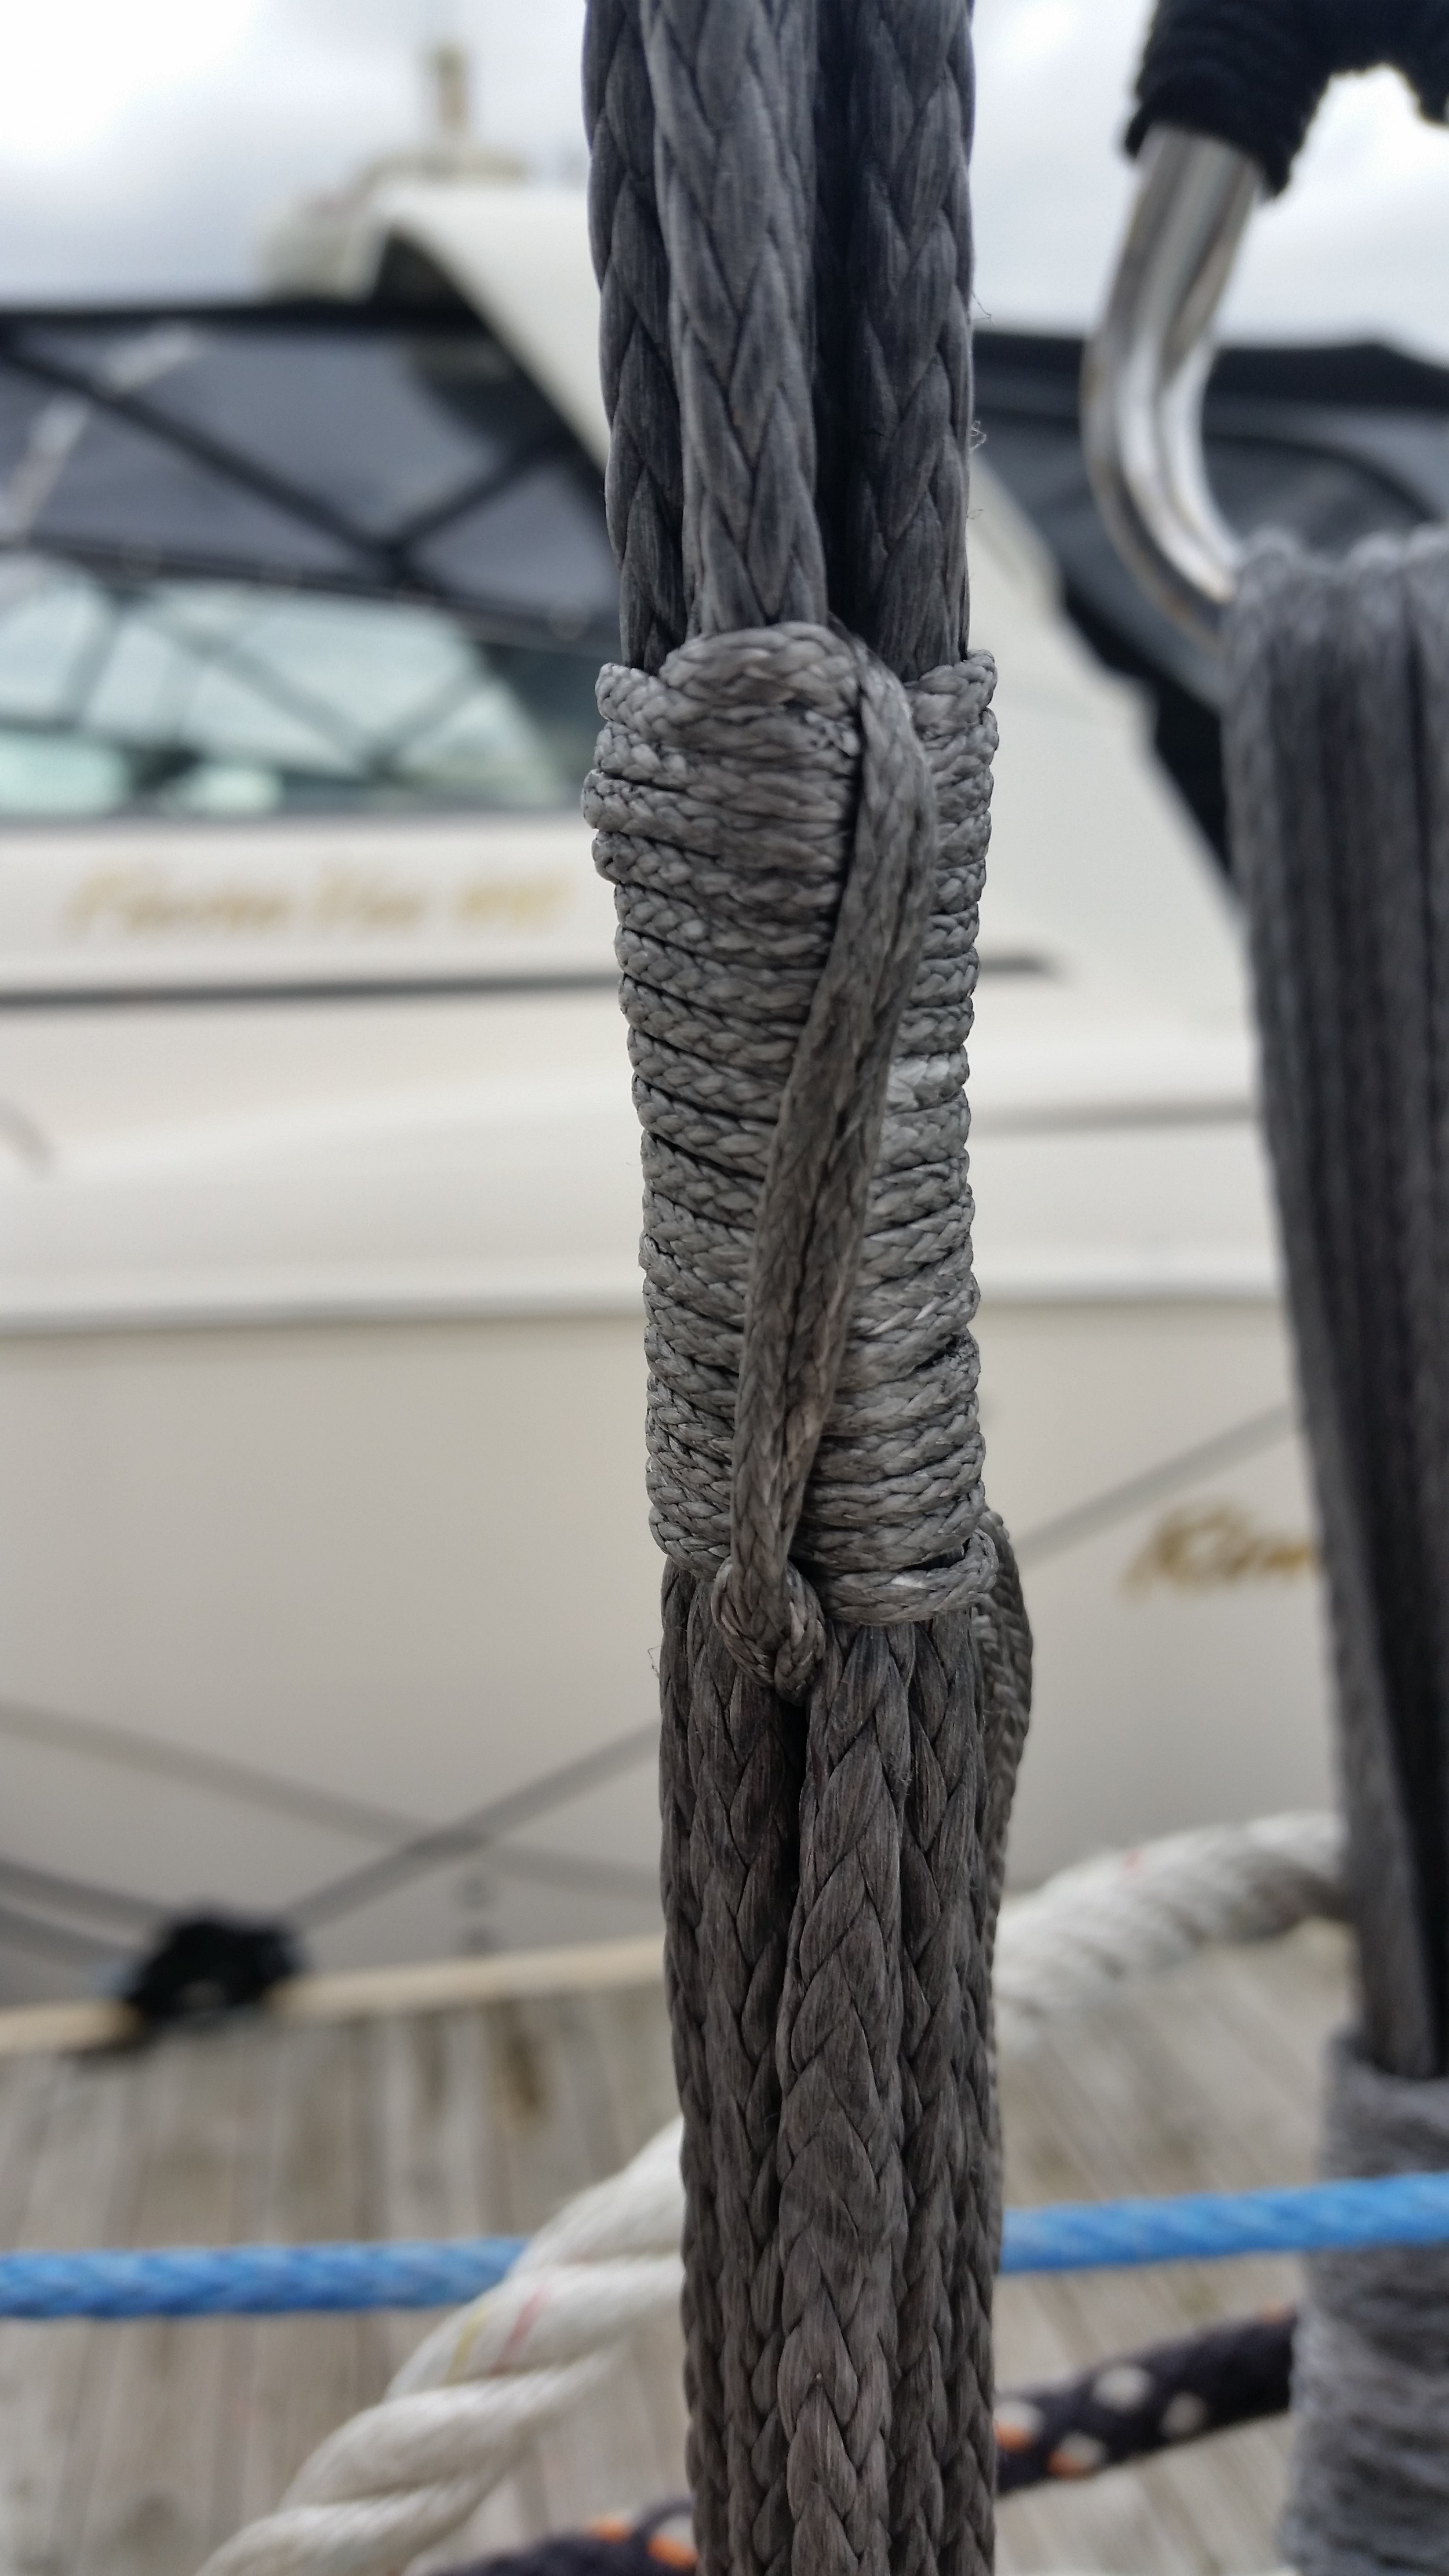
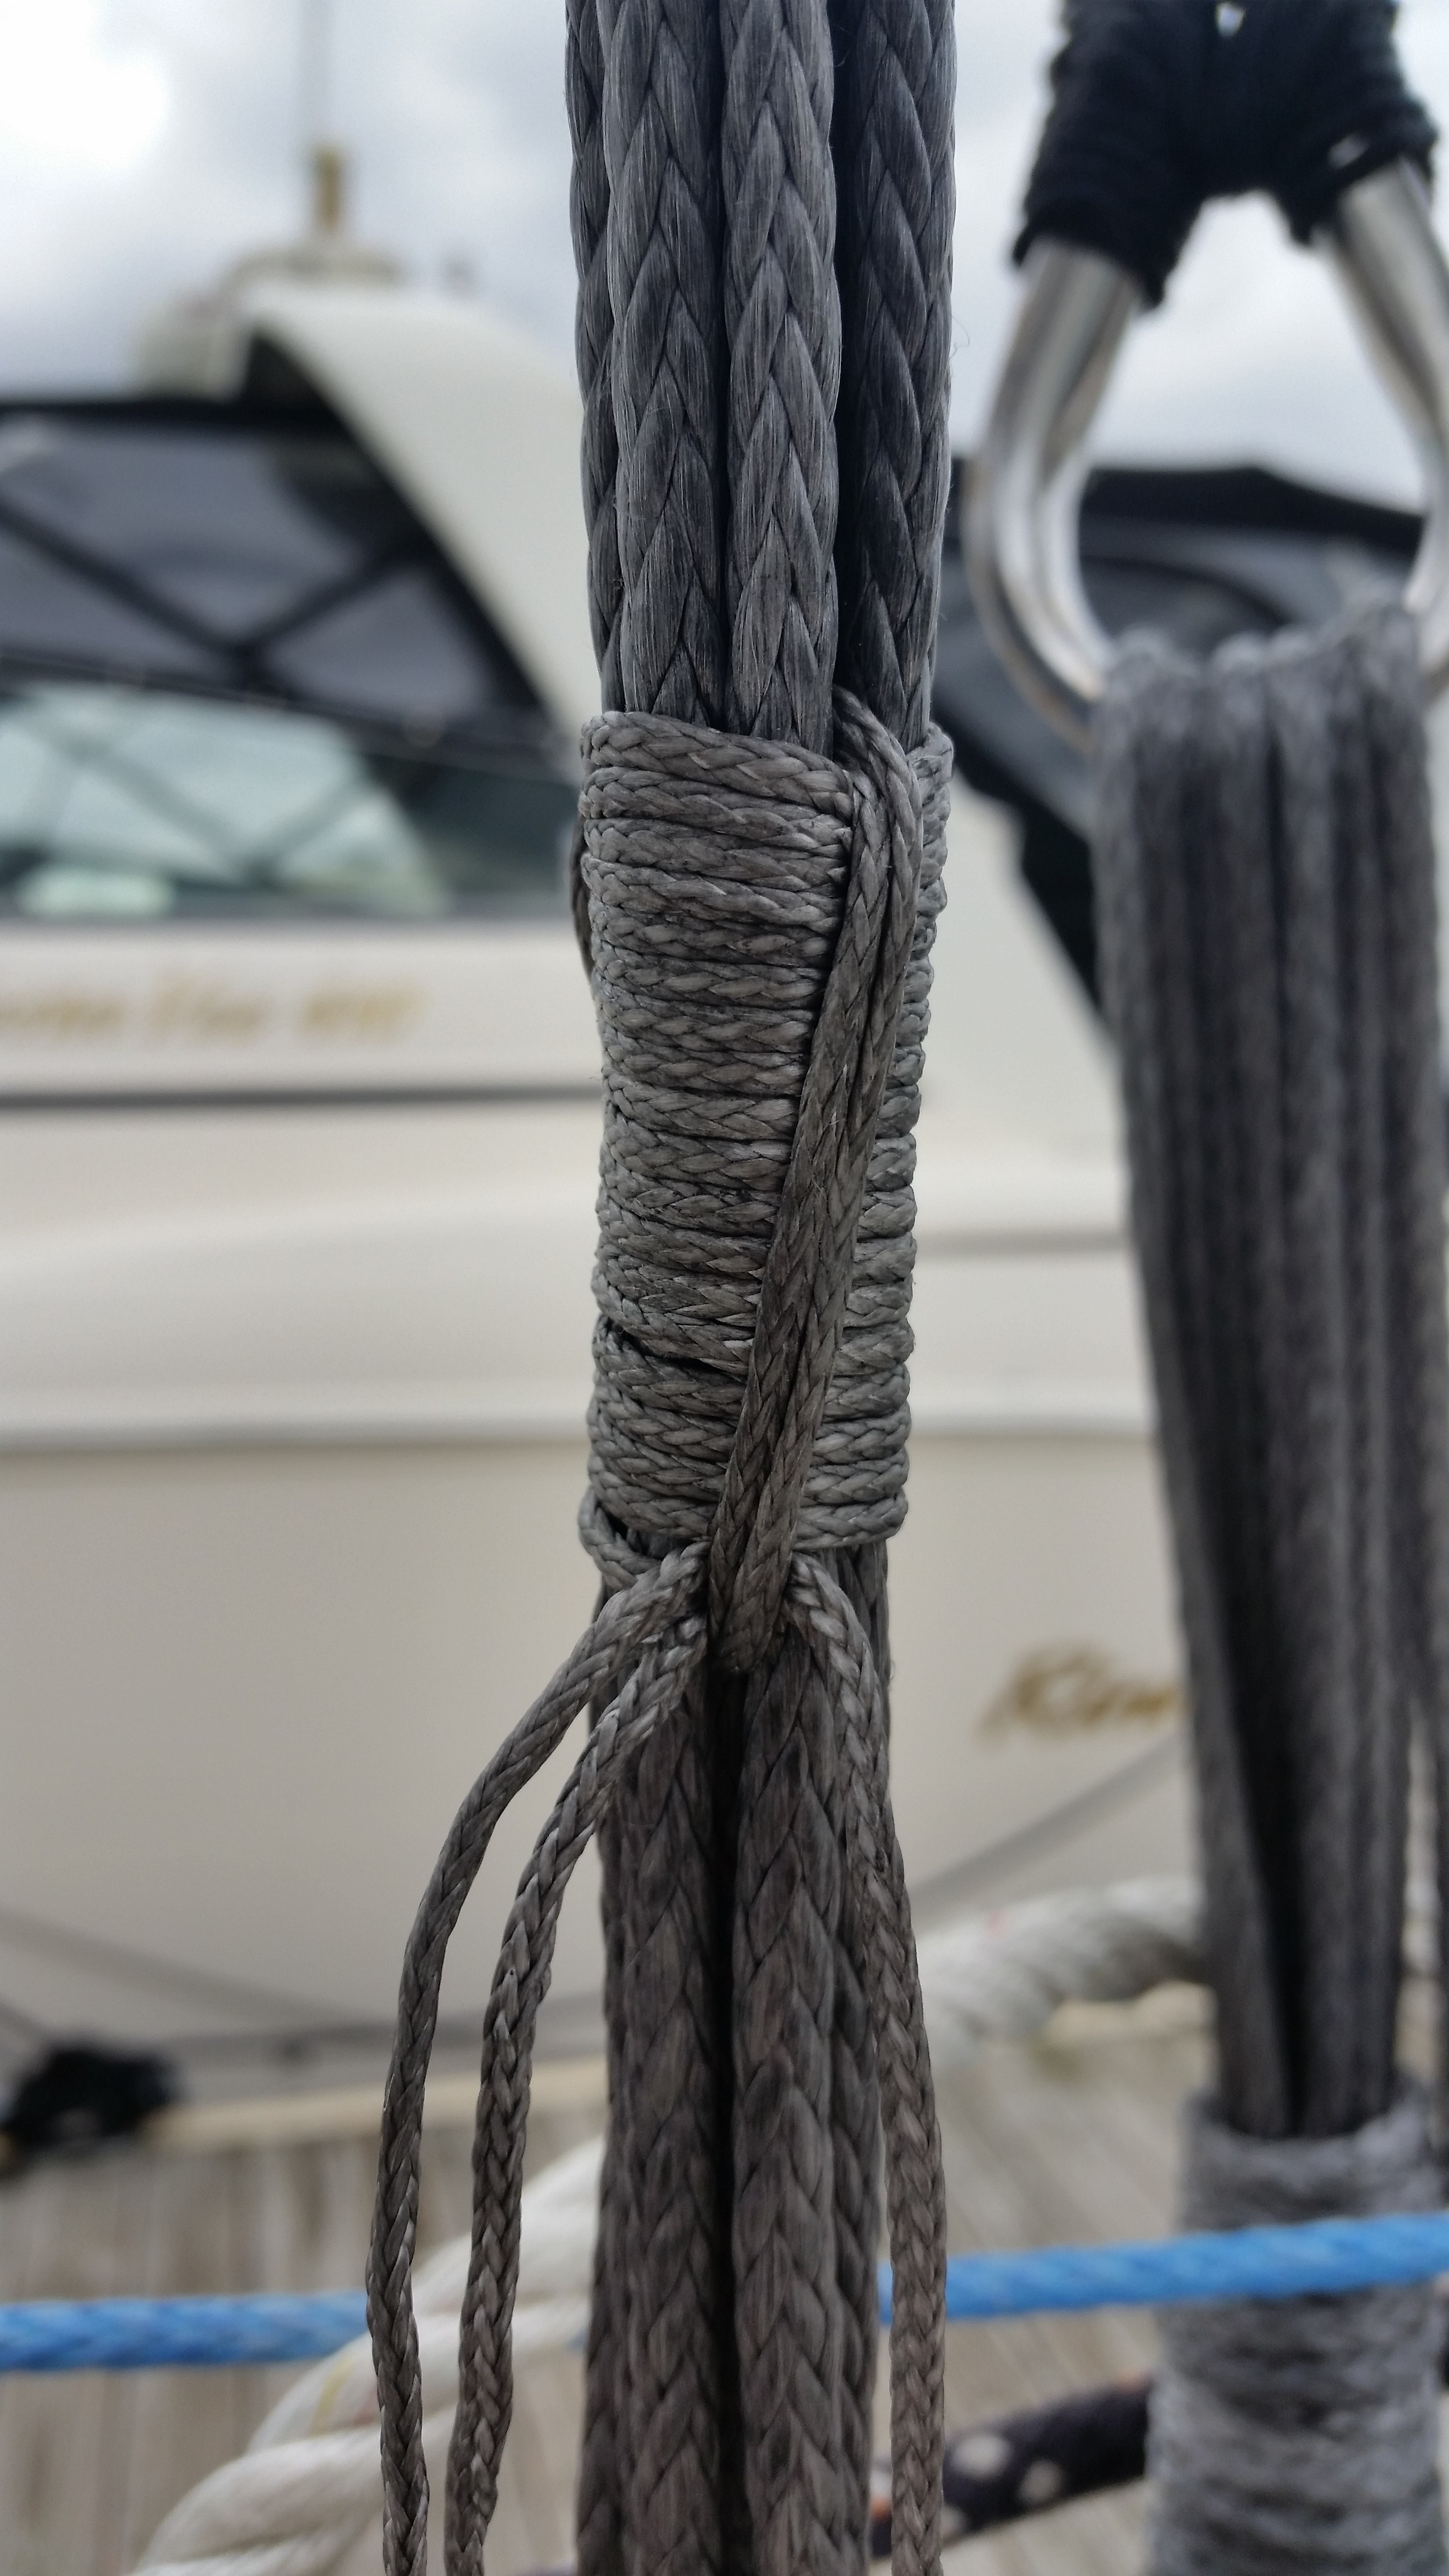
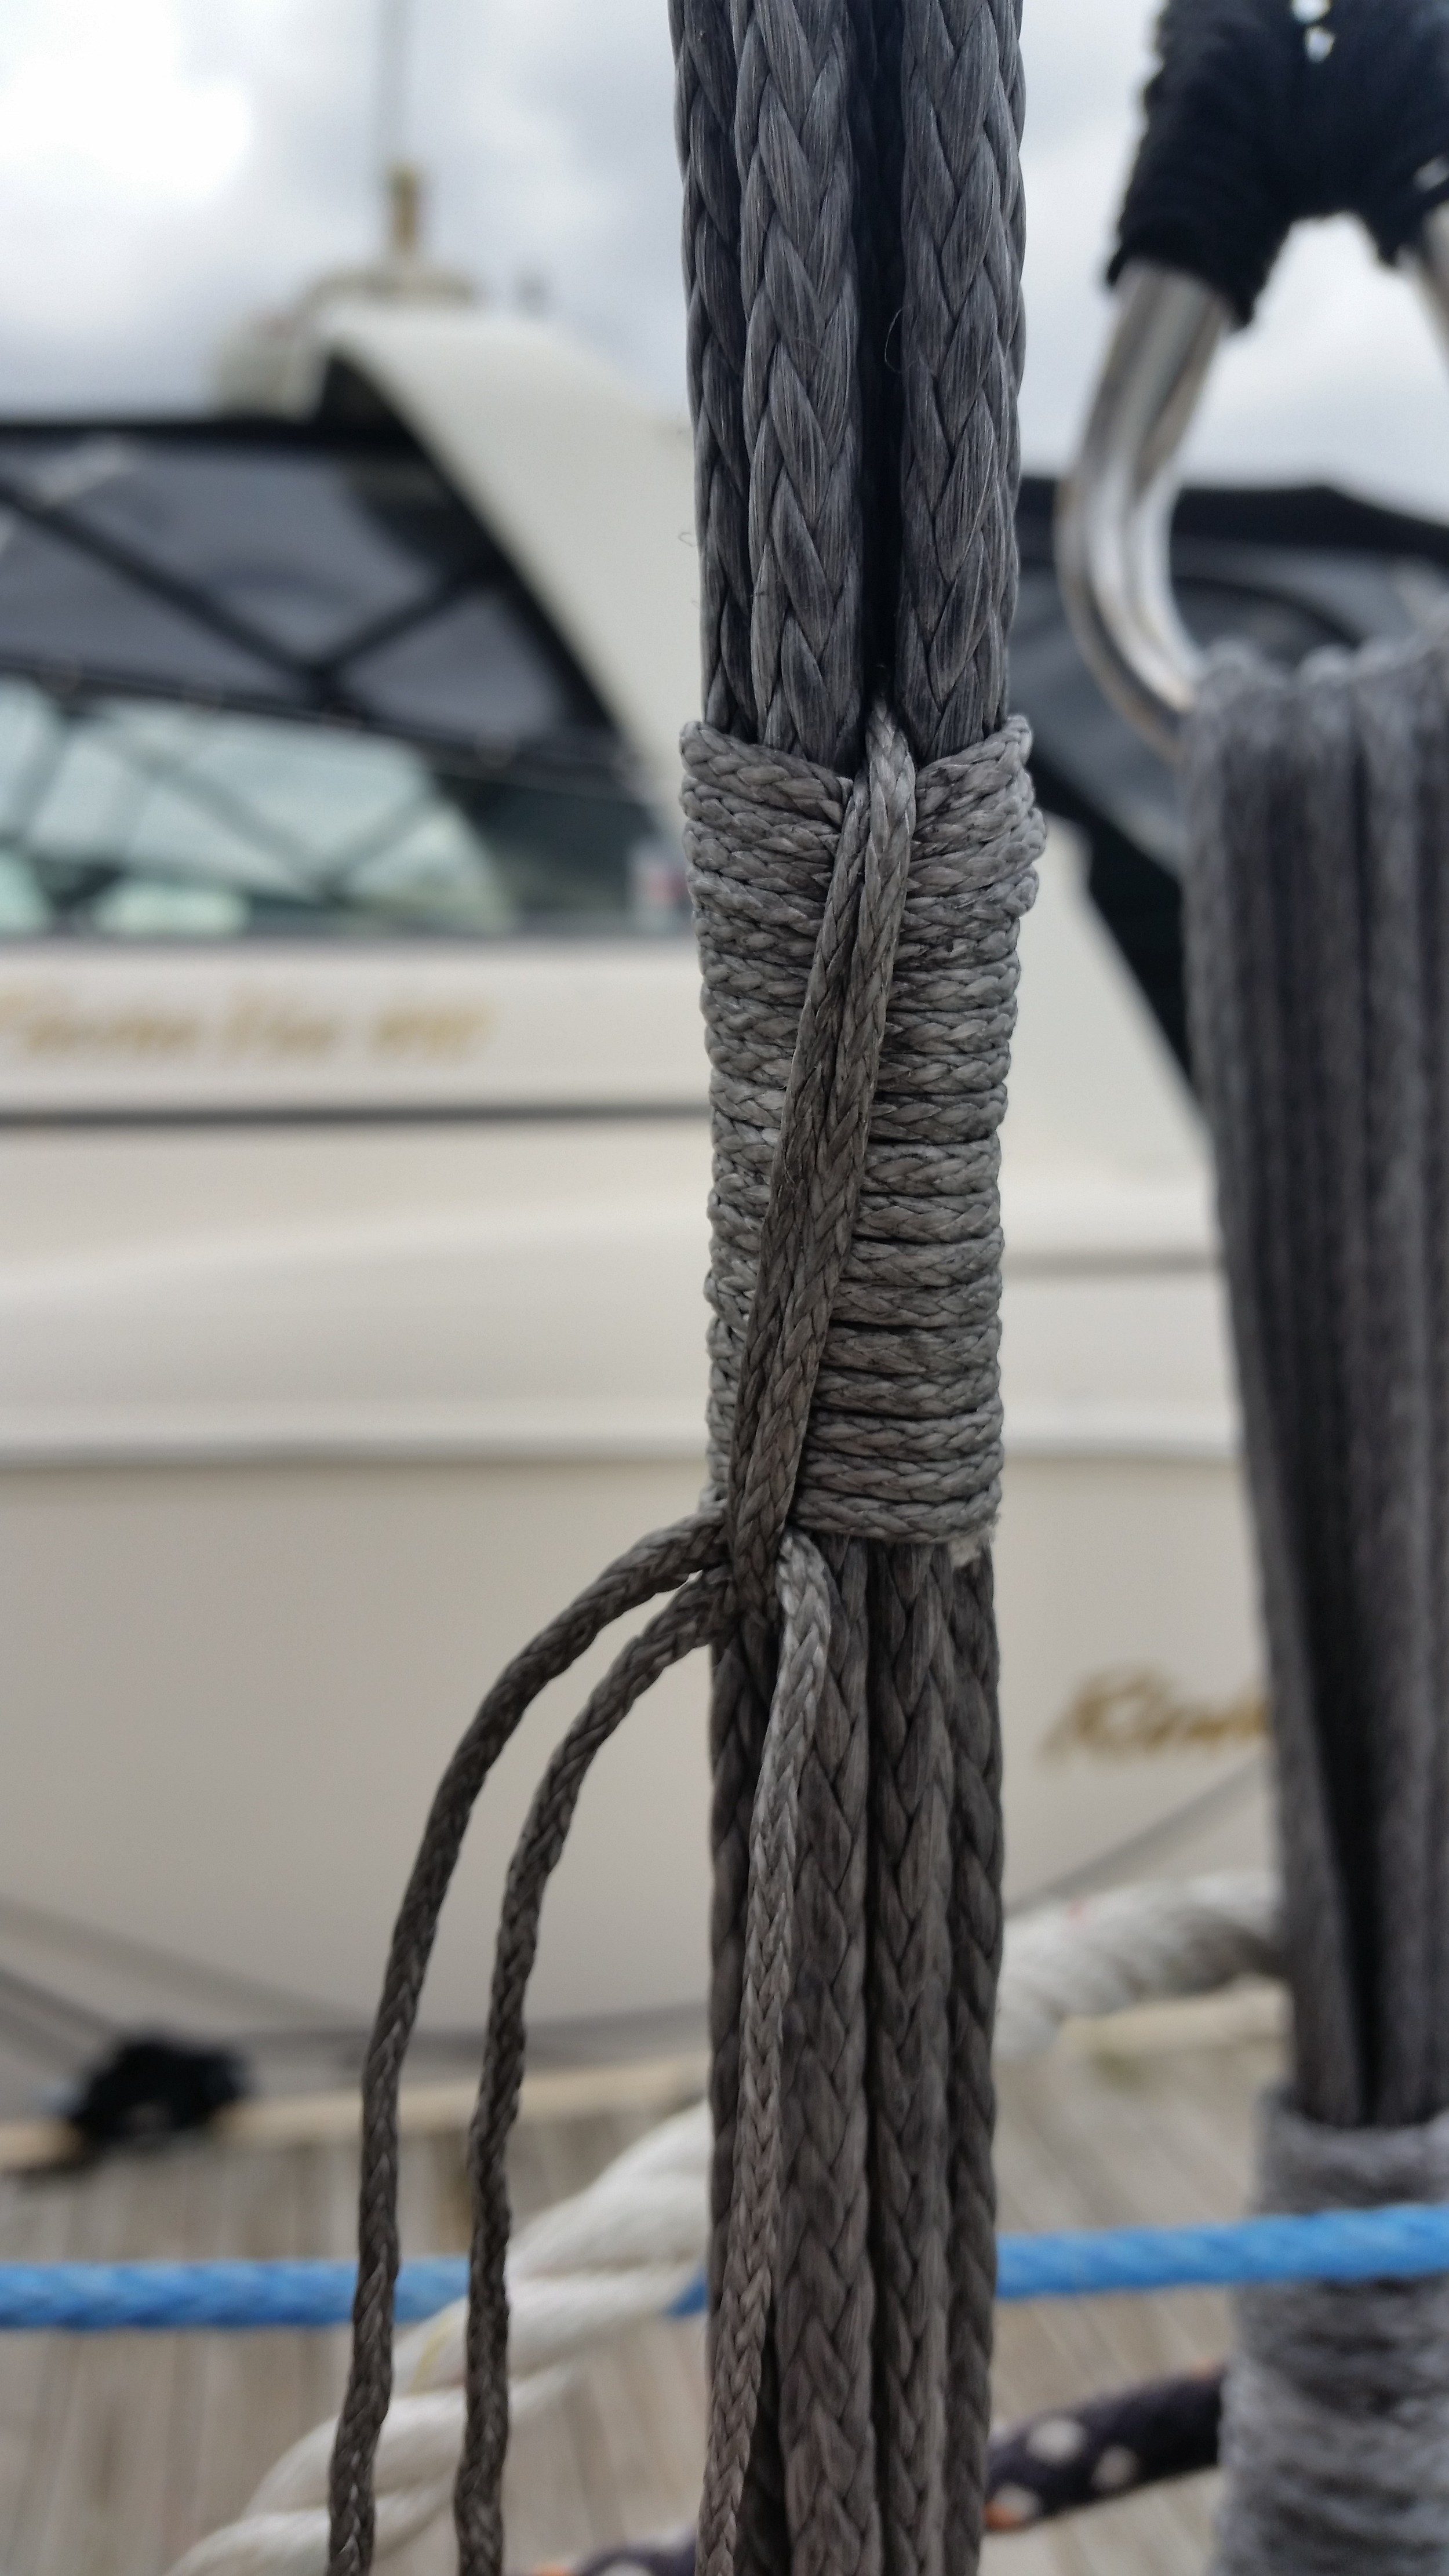
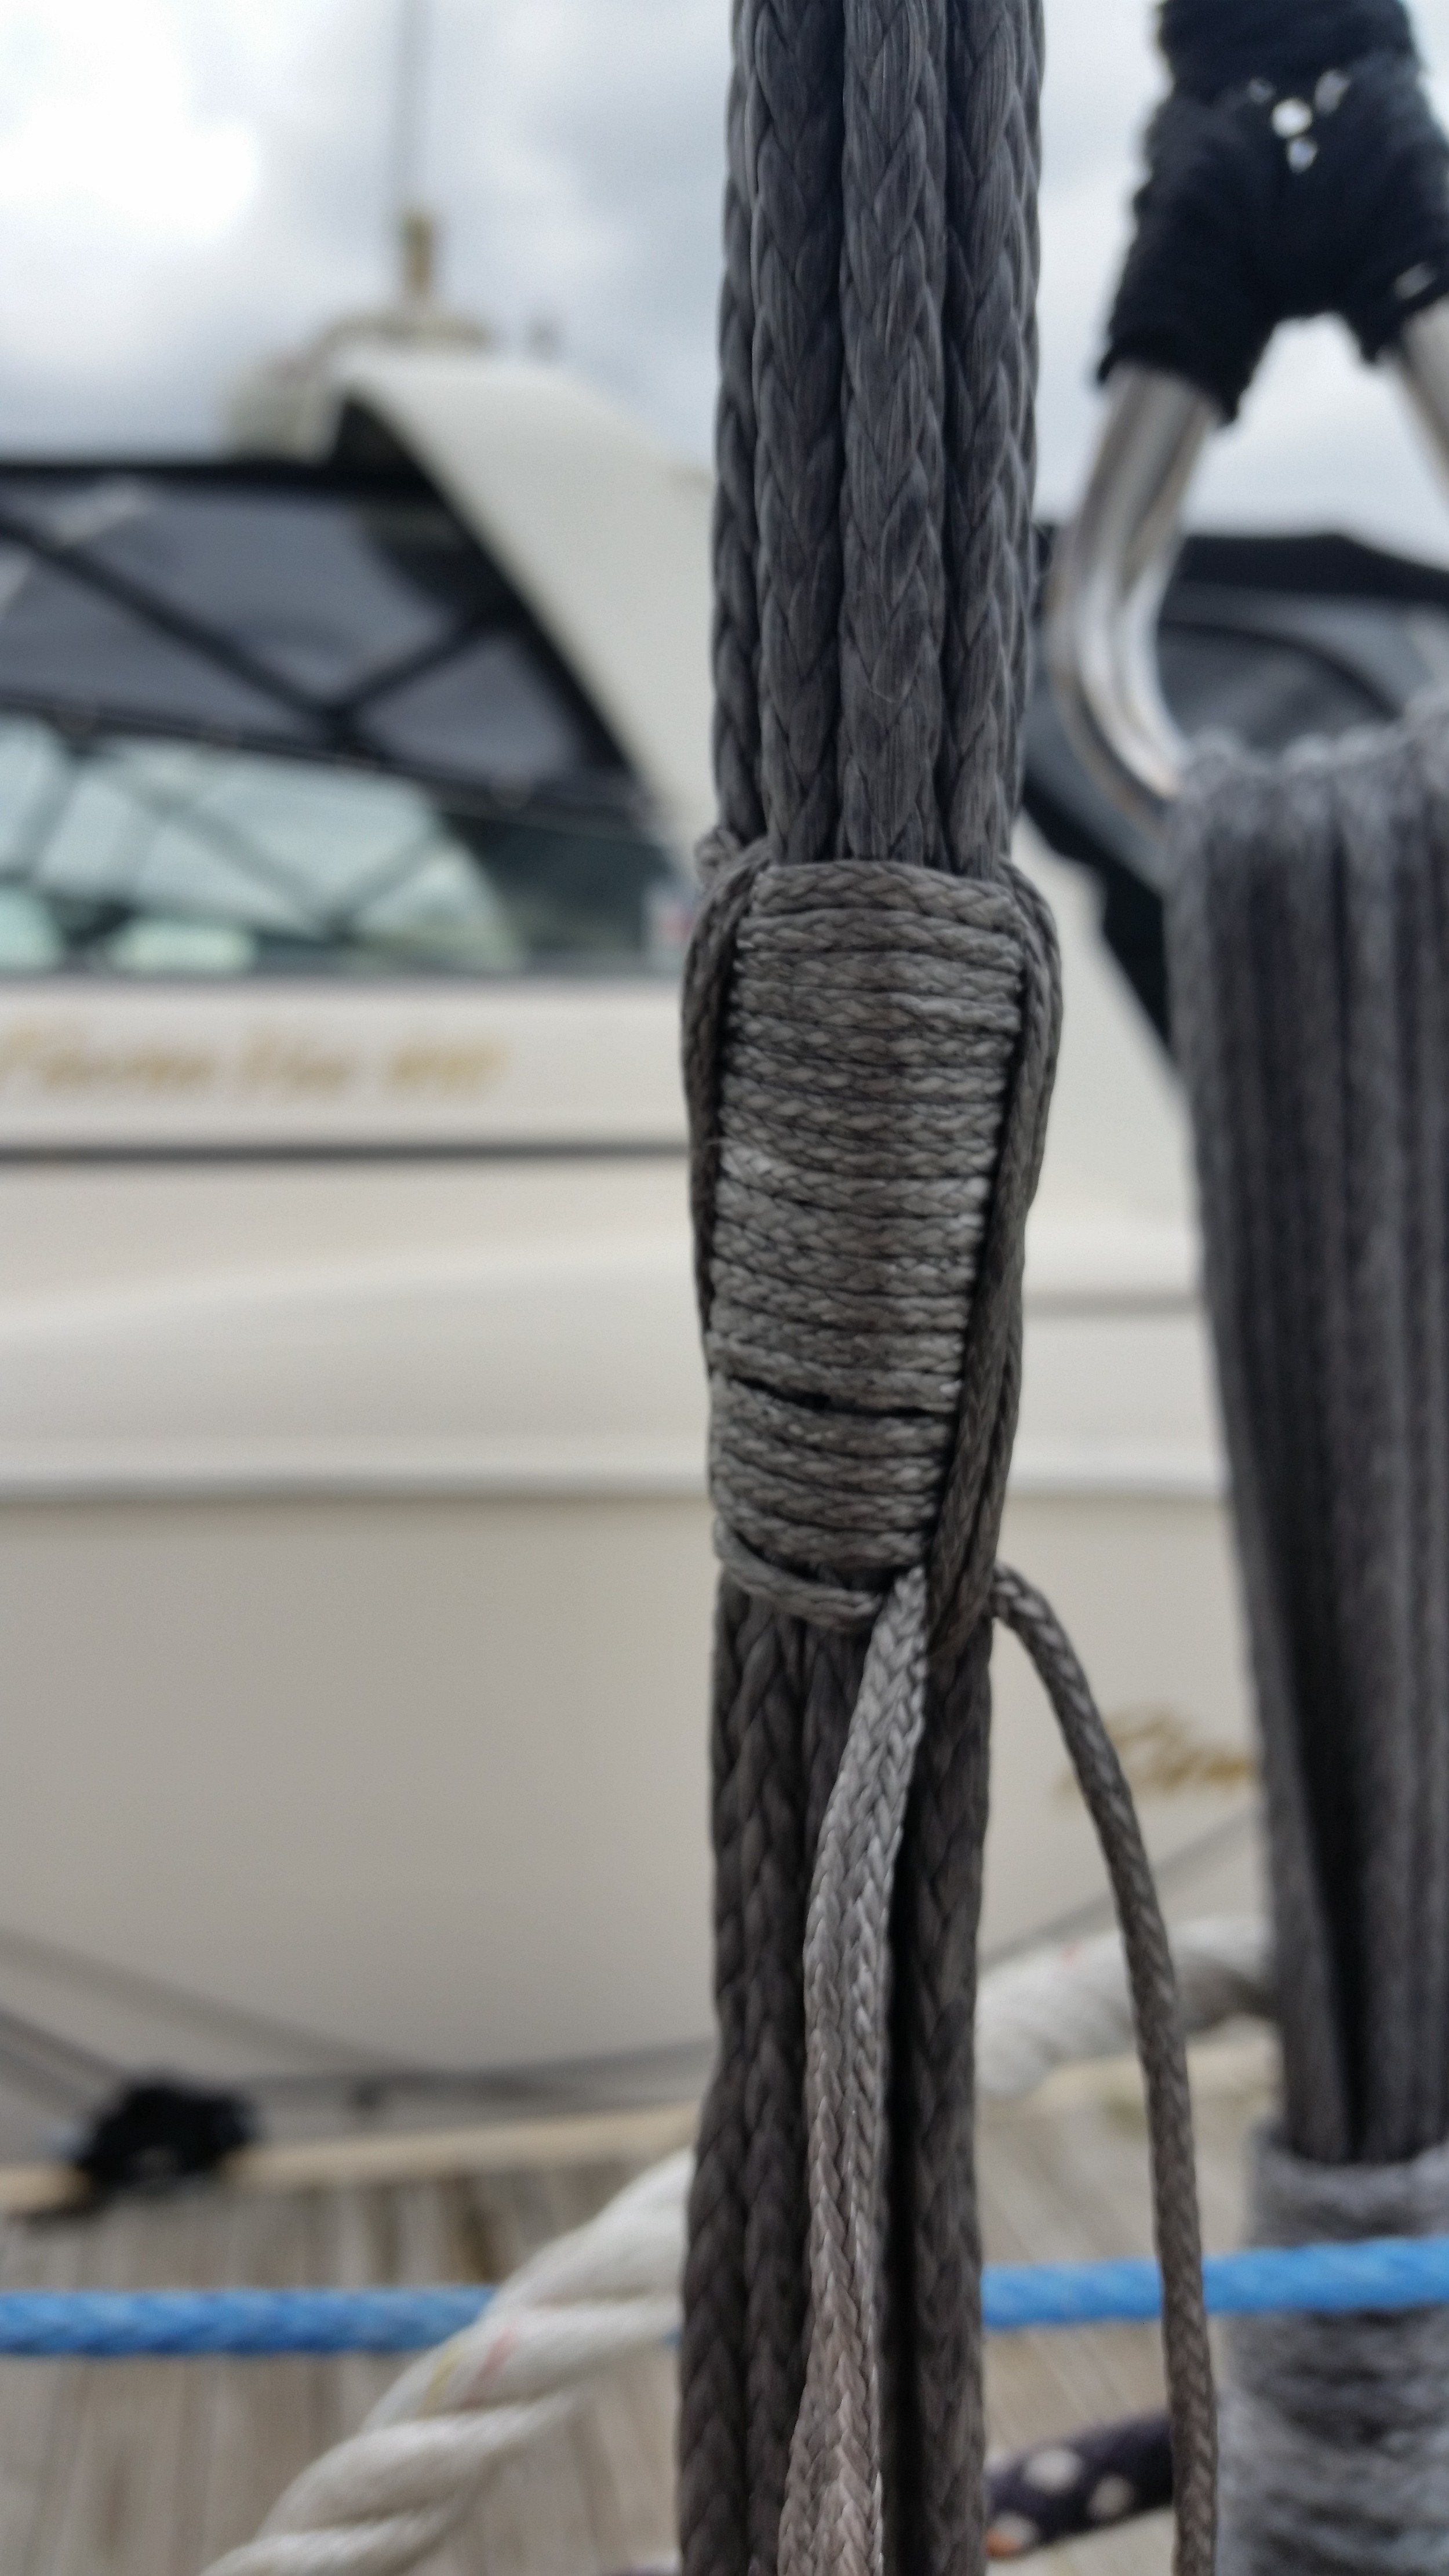
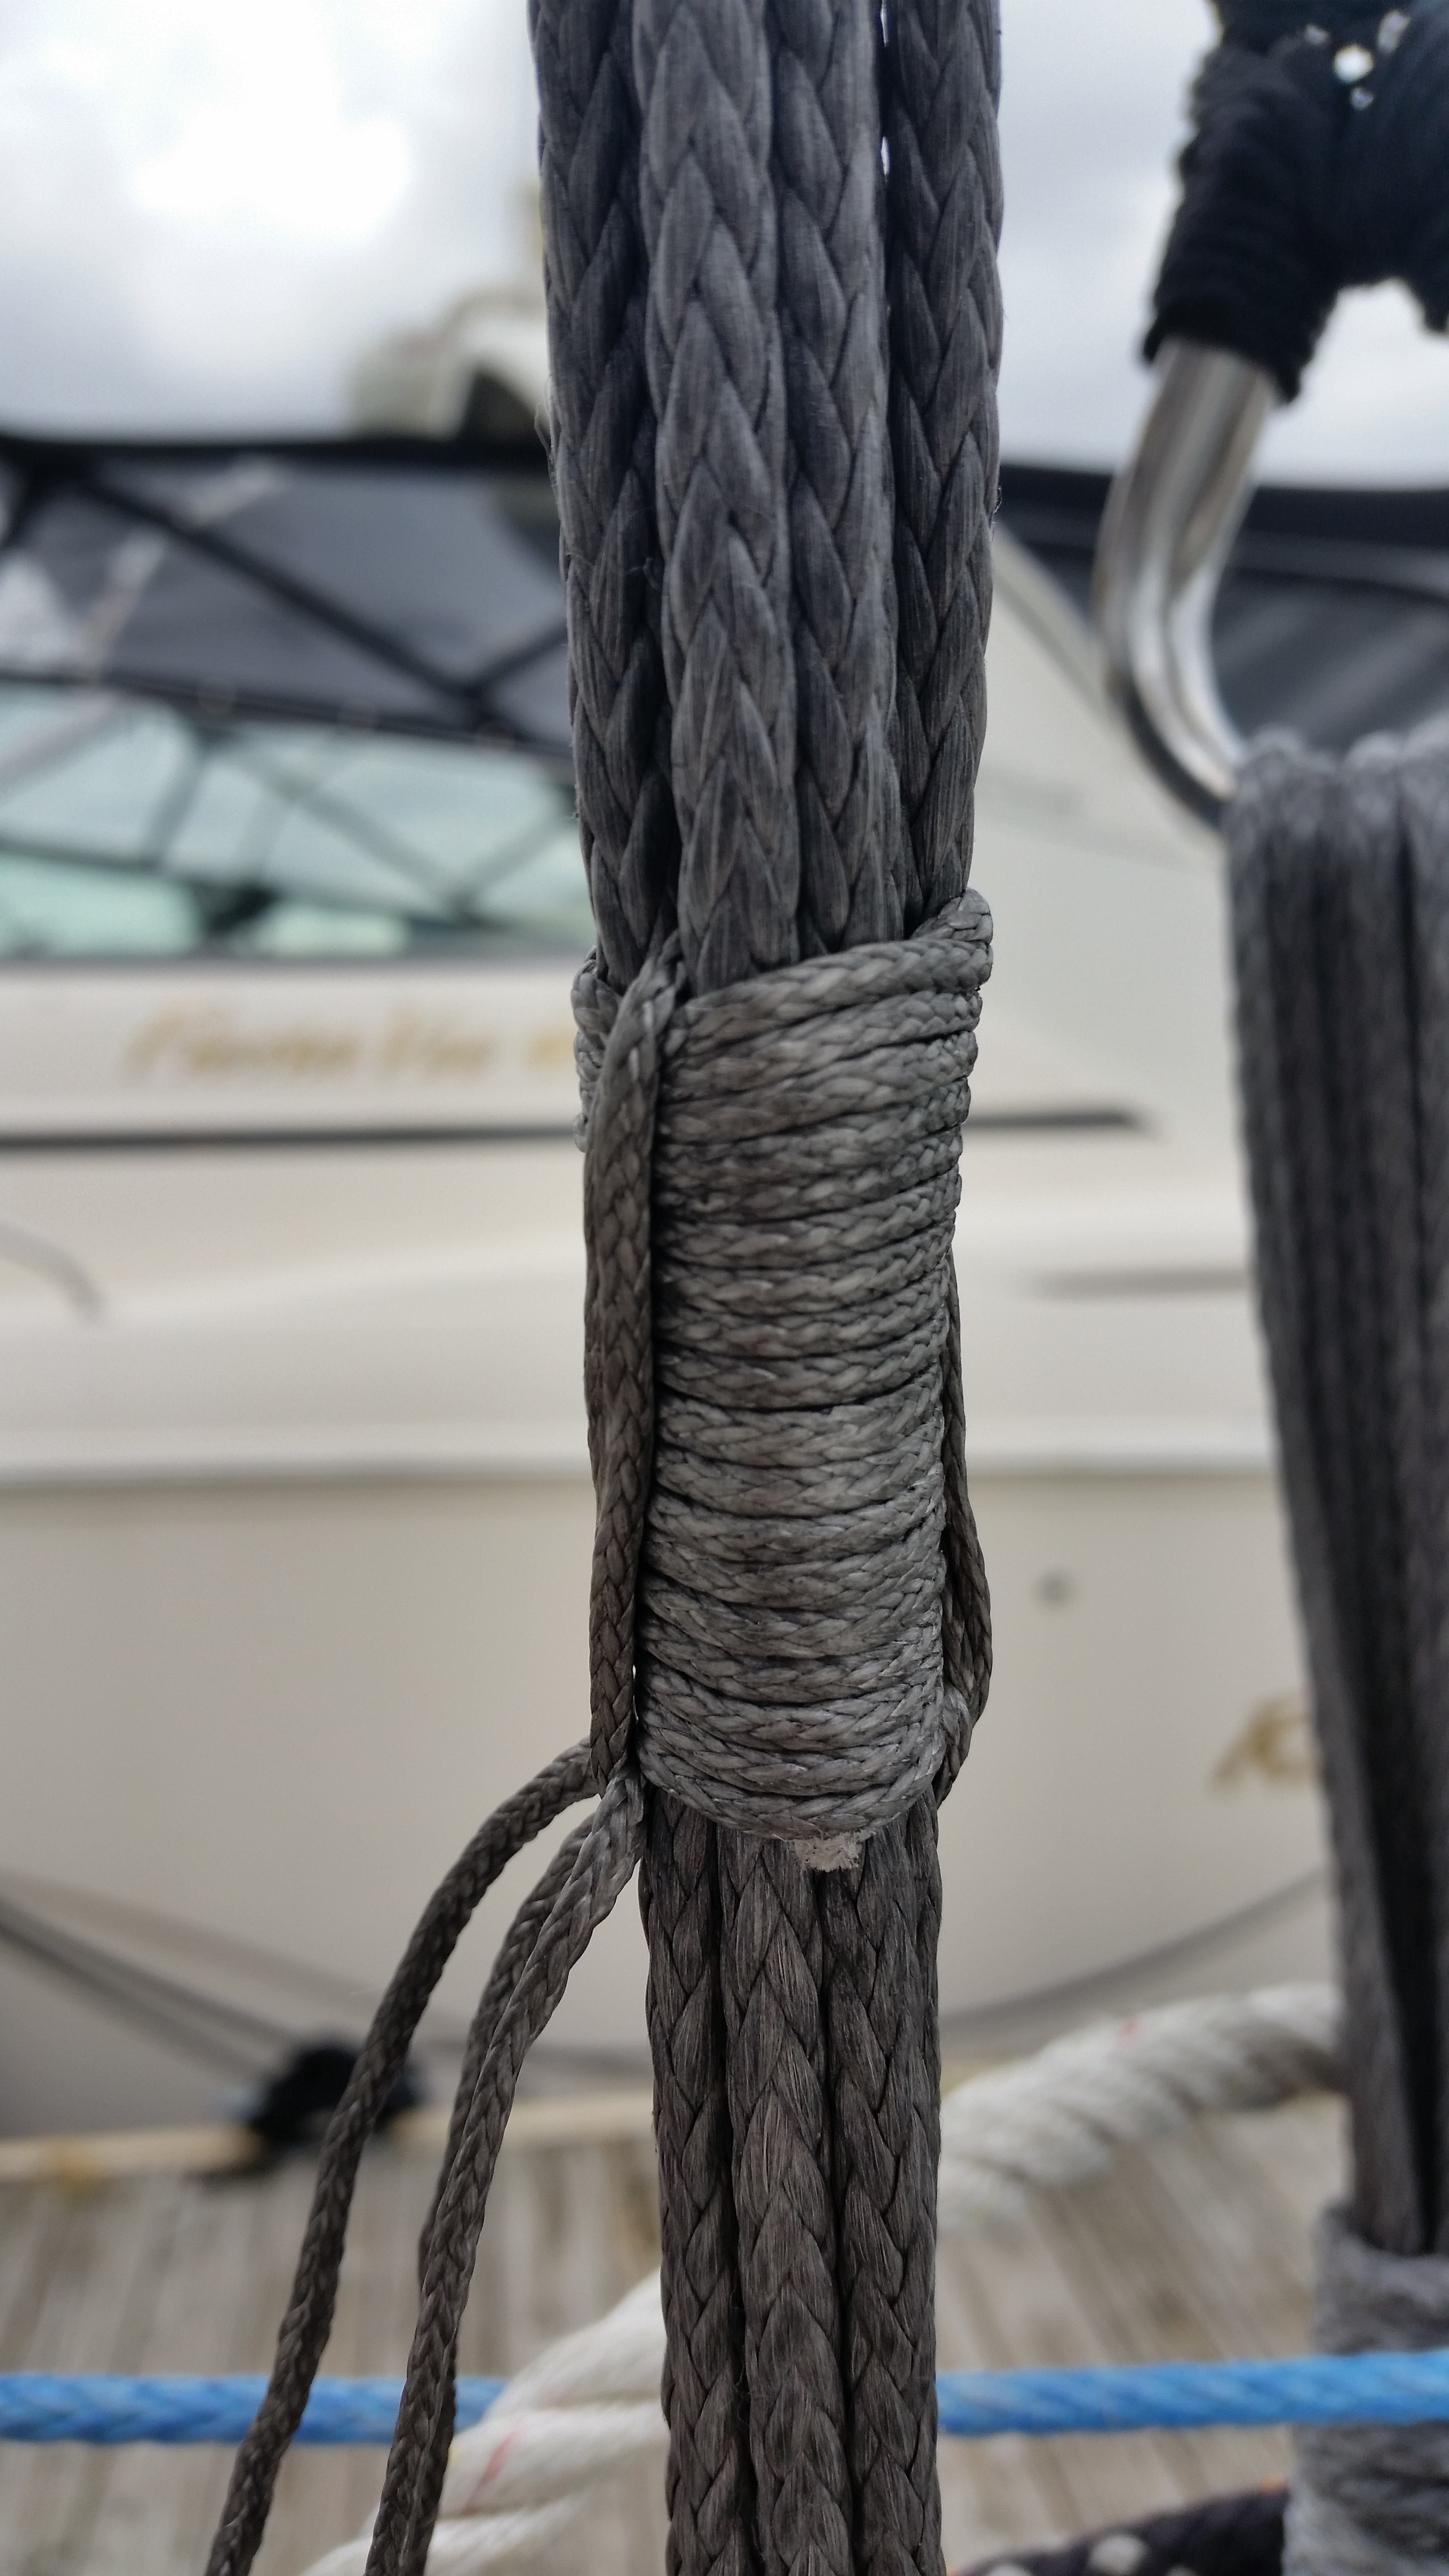
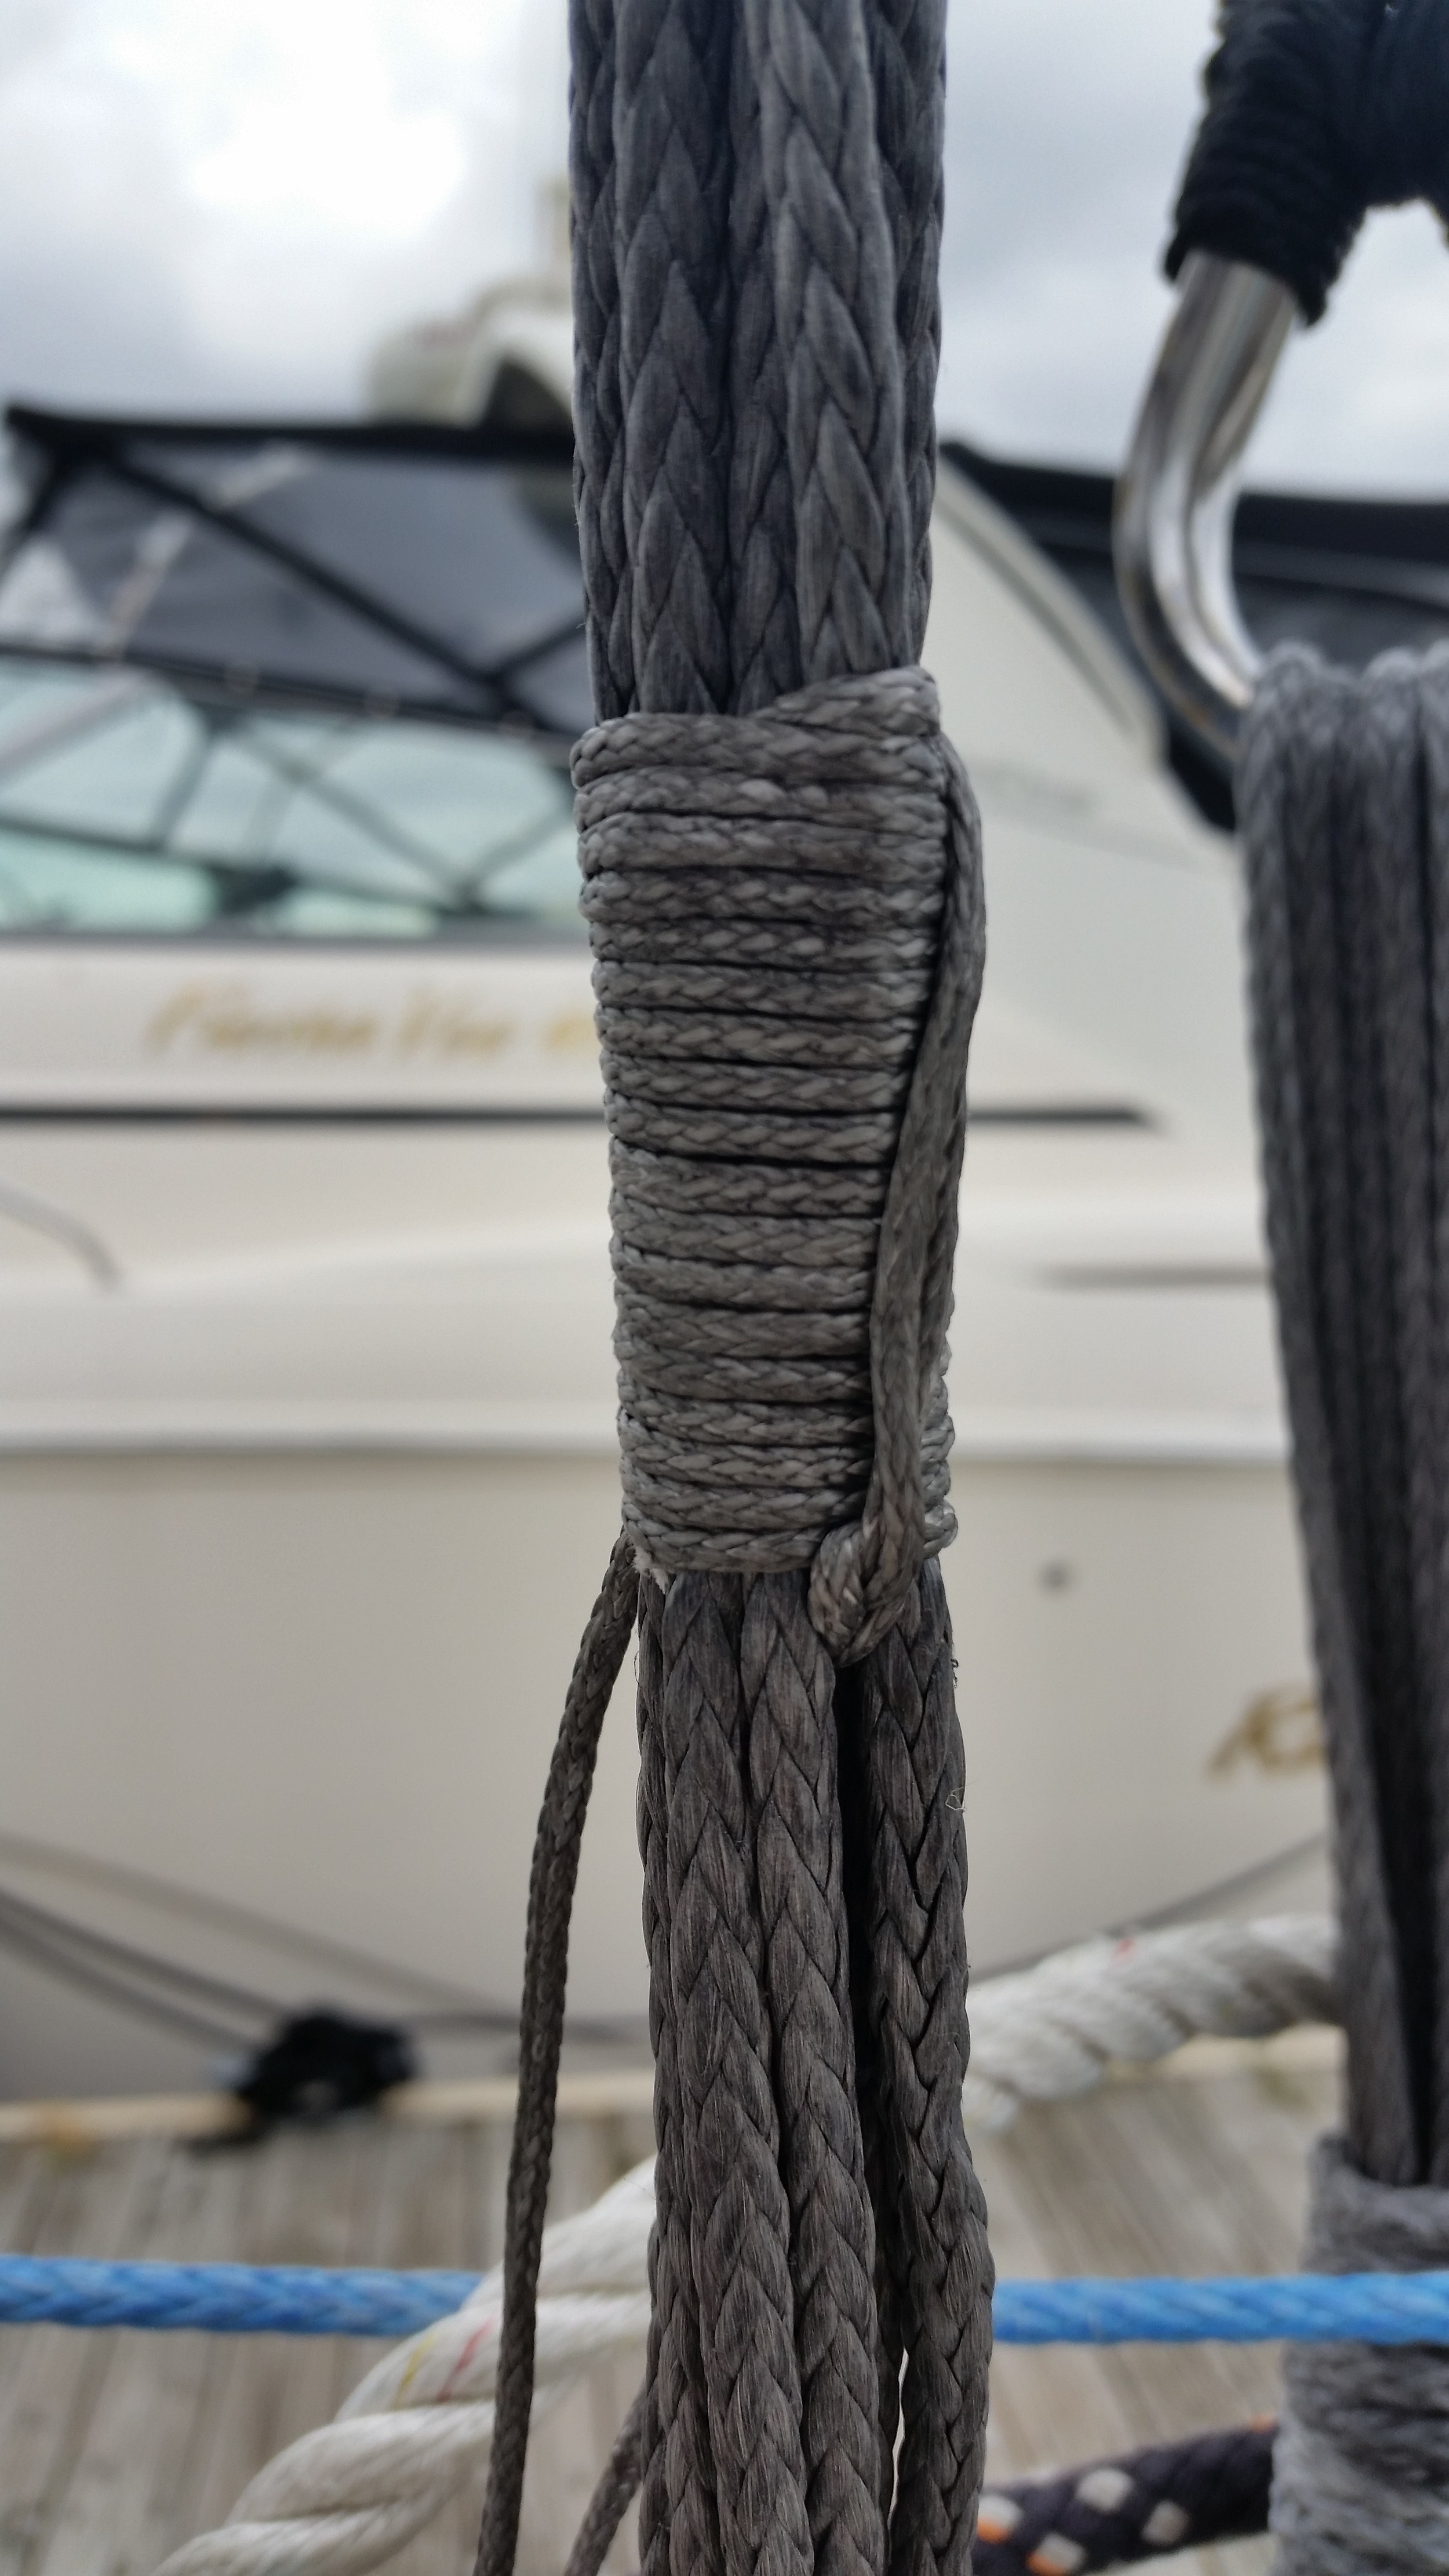
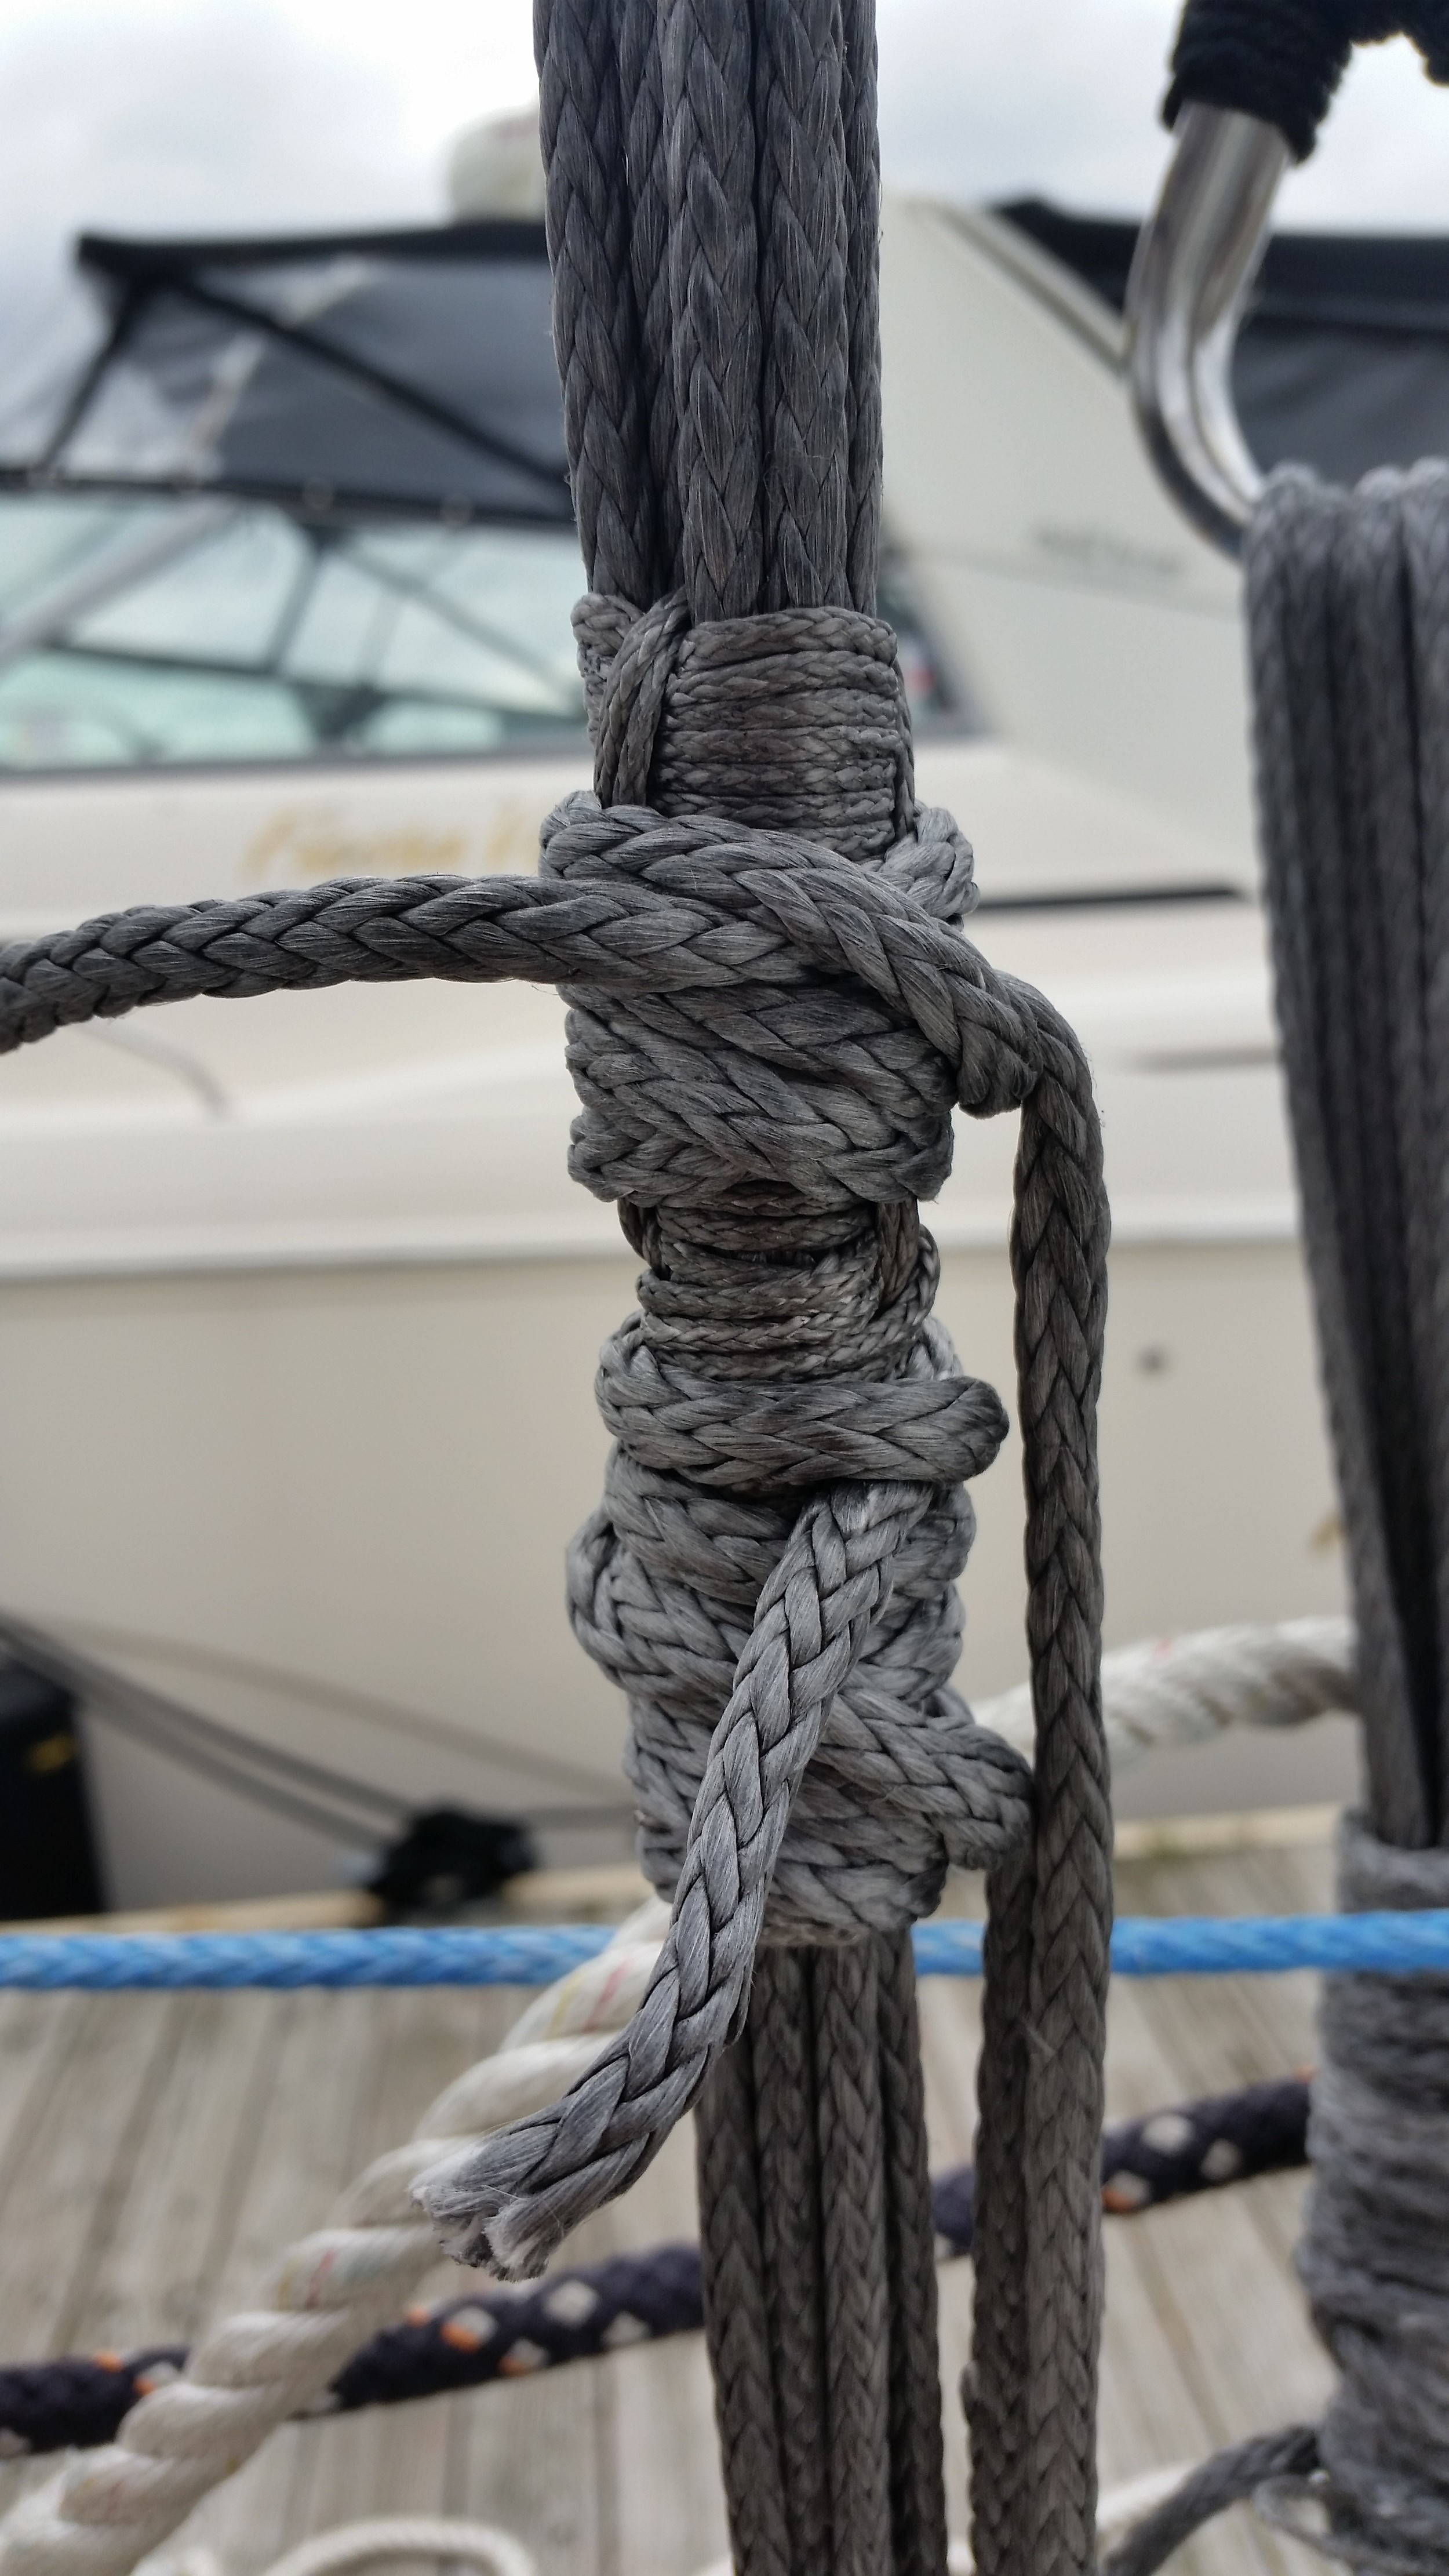
Once you have it centered, you need to begin tightening the cap shrouds. To do this, you want to have the identical purchase system set up on both sides. This means that if the starboard deadeye has 7 passes for the lashing, the port deadeye needs to have 7 as well. Otherwise, the whole system is thrown off.

How much to tighten the cap shrouds also depends on each boat. While some people will tune the rigging with a Loos gauge based on the specs from the boat manufacturer, they will not end up with a satisfactory result and will still need to do a final adjustment by eye and by feel. The boat manufacturer provides these numbers as a guideline for the ideal. In the ideal boat on a line drawing, the mast fittings and chainplates are never purely symmetrical. The slightest variation in placement on the real boat will make each stay have its own unique tension to keep the mast in column. For this reason, it is best to have a general idea of what amount of tension is required and then tune the rest by eye and by feel.

Back to tuning! You want to run the purchase system equally on both sides, to the same type of tensioning lines, to the same size of winches. You will begin grinding the winches, doing a the same number of cranks on each. As the tension builds, you will be able to feel it in the winch handle, so make sure that the force you feel is about equal on both sides.

When you think the tension is about adequate, you will want to re-check that the mast head is centered with the jug trick. If there is any variation, now is the time to correct this by tightening one side a bit more than the other to compensate and then re-check with the jug again.

One thing to keep in mind is that as you tension the cap shrouds, the spreaders will be pulled down slightly. This needs to be addressed at the end of the tuning process, but keep an eye on them as you tighten the cap shrouds to make sure they don't bend down and break.  When you tighten the cap shrouds, they will only pull the spreader tips down a smidge, so it's not usually an issue mid tuning. Since spreaders are expensive, it's best to keep an eye on them.

Back to tuning again! To adjust by eye, you want to verify with the jug trick, then sight up the mast to make sure it's in column. Then to adjust by feel, you want to grab onto the cap shroud and give it a tug, a wiggle, and a snap. You will get a feel for what's right with time, it comes with experience. The idea is, you want to make sure it feels tight, but not as tight as a banjo string. If it is loose, it will not snap back into place when you wiggle and snap it around. If it is tight, it will not budge at all.

If this is your first time, ask some friends if you can feel how their rigging feels. This could give you an idea what you're looking for. The reason they call it "tuning" and not "setting" the standing rigging is because it is an art and a science. You will tune it up at the pier to what looks right, but you won't know for sure until you take it out sailing.

When under sail, you will want to once again go forward to the mast and sight it. With respect to the cap shrouds, you want to make sure that the mast looks straight and isn't bending to leeward. You want to go up on a port tack, as well as a starboard tack. This will tell you which shroud needs to be tightened. 

On port tack, the port shroud should be tight, the mast straight, and the starboard shroud a little less tight. If the mast head is bent to leeward, the port shroud is too loose and should be tightened. If the mast is straight but the starboard shroud is loose and flopping around, the starboard shroud needs tightening. If the mast has a bend midway up, then that has to do with the lowers which will be discussed later.

After you do a test sail, you will know what needs to be tuned some more. Then you will tune it and take it out again. If you are 100% confident in your ability to tie perfect knots and are able to develop a large enough purchase system, you can actually tune the mast while under sail. I do this on my own sailboat and it saves a lot of time since I can get it set perfect while under sail and tested at the same time. 

There are two ways to know you need to adjust your cap shrouds. One is by doing a quick rigging inspection where you go around and feel all the shrouds via the tug, wiggle, and snap. If they feel loose, it's time for an adjustment. The other way is by sailing and recognizing the characteristics of poorly tuned cap shrouds. The boat will heel much more than usual and will not point to windward very well. A simple mast sighting will confirm the loose cap shroud and let you know it's time for a tune up.

With synthetic standing rigging, you will need to do many tune ups when it is brand new. Dyneema has 3 phases that it goes through. Phase 1 is the beginning, phase 2 is the wonderful time when everything works wonderfully, phase 3 is the warning that the end is coming and needs to be replaced. We will also talk about the phases in the future.

During phase 1, the standing rigging will be creeping and go slack in a few days. When you first set it, it will be beautifully tuned! In a few days, it will be completely slack and desperately in need of tuning. I suggest tuning the rigging weekly during this stage right before you go sailing so that it's nicely set for your trip. Once in phase 2, this won't be a weekly occurrence, but it will still happen from time to time.

For a description of how to set up the rig tuning lines, please look over this post:

If you have any questions or comments, let me know in the comments section down below.


How To Tension your Synthetic Standing Rigging with Deadeyes

20150922_125345.jpg

The main advantage of a deadeye over a turnbuckle is corrosion resistance and up front cost. Turnbuckles allow quick adjustments with a few pins to keep them locked in place. I can tune a rig with turnbuckles in a matter of minutes; there is no real setup or takedown, they just work great. 

They are available in a variety of metals, galvanized steel is the cheapest and will rust the soonest. Stainless steel is much more expensive, but suffers from crevice corrosion, leading to catastrophic failure on a still shiny turnbuckle. Bronze is the most expensive and best option. Bronze suffers the least damage from corrosion, but should be replaced on a 10 year interval due to metal fatigue. When each turnbuckle can cost over $100, it becomes rather costly to replace them all every 10 years. 

Deadeyes don't suffer from any form of corrosion, they are made from synthetic fibers known as dyneema. The metal thimble in them is simply there to reduce friction and can be easily replaced if it were to corrode. They are very time consuming to make, taking me over an hour to make just one, but they will last a very long time. Their end will be met by chafe, so long as they are protected from it, they are well worth the investment.  

The downside to deadeyes is the difficulty to adjust and tune the rig. There is some setup, work in the interim, and the takedown that needs to occur to tune the rig. 

To make deadeye synthetic rigging work, you need to be able to tension the stay, and then maintain that tension while you tie off the lashings. To do this, you need to use the knot that I have developed: The Shroud Frapping Knot. I will explain how the knot is tied later, first I want to explain the whole process.  

First, a very strong line (I use 10mm VPC) is led from an anchor, forward to the stay, then back to a powerful winch. I use a smaller winch as an anchor. 

Second,  I tie a dyneema grommet to the toe rail so that it is in line with the stay being adjusted. I have a thimble in the grommet to reduce friction and protect the lines from chafe. This dyneema grommet forms a turning block providing a fair lead.  

Third, the lashings are passed through the end of the stay and deadeye without overlap and then led through the grommet and finally to the tensioning line. Each pass through the stay and deadeye acts as 1 part in the purchase system.

For example, 4 passes would have 8 lashings providing an 8:1 pulley system on the deadeye, this leading to the tensioning line which is a 2:1 makes the whole sequence in this example a 16:1. Being led to a which then adds to the system, in my case it is led to a 32 winch, effectively making the system a 512:1 system.

By adding additional lashings on the deadeye, you can increase the pulley system.

You can also add more 2:1 multipliers, which will again greatly increase the whole system.

When I tensioned my forestay, I had 7 passes (14:1) and two 2:1 multipliers, the lashings leading to an anchor and being pulled in the middle by the tensioning line (28:1, then 56:1), then led to the 32 winch (1792:1). If I needed more leverage, one more 2:1 multiplier would transform it to 3584:1. As you can see, huge pulley systems are easy to create on the deck of a sailboat to tension the stays. There will be loss due to friction as the lashings pass through all the turns, but you will still be able to achieve the tension needed. 

Fourth, the lashings are tied using a sheet bend with a slip to the tensioning line or to another anchor.  

Fifth, the winch is used to achieve the desired tension, always working from top down and doing both sides simultaneously to ensure the mast stays in column and centered over the boat. 

Sixth, once the stay has reached the desired tension, the Shroud Frapping Knot is tied over the lashings to secure them in place while still under tension from the tensioning line on the winch. 

Seventh, the tensioning line is released.  

Eighth, the long tails of the lashings are tied over the Shroud Frapping Knot to protect it from chafe.  

Ninth, the tensioning line is coiled and stowed for the next time tensioning is needed.  


To tie the Shroud Frapping Knot, you must start by laying about 1.5 inches of line parallel to the lashings, then give it 4 frapping turns wrapping over the initial vertical piece. Then tighten the frapping turns by hand making sure the starting piece stays in place.

With a marlin spike hitch, tighten frapping turns fully.

Now provide at least 6 more frapping turns to the knot, tightening every other turn with a marlin spike hitch.

You need a minimum of 10 frapping turns. 

As this single knot is holding up the rig, I highly recommend more than just 10, within reason.

Once you are satisfied with the frapping turns, you want to seize the knot.

Begin by passing the line through the lashings and out the other side.

Do at least 2 full loops and tighten the loops with a marlin spike hitch.

Now pass the bitter end between the frapping turns and the seizing turns from left to right when looking at this side of the knot.

Pull tight with a marlin spike hitch.

Now pass the bitter end back through the bottom of the knot between the lashings and to the other side.

Form a loop and pass this loop through the space between the frapping turns and the seizing turns but from right to left when viewing this side of the knot.

This will seize the end but still provide a slip to easily release the knot when you need to adjust it again.

Wrap the excess around the lashings and then cover with the excess lashings.

This concludes tying the Shroud Frapping Knot. 

Views of the different sides of the knot. 

I know it sounds very confusing, but watch the video where I take you step by step through the whole process.  

If you have any questions, post them in the comments section down below and I'll be sure to answer them as soon as I can.  

Also, subscribe for updates to the blog.  


If you are interested in hiring my services, please feel free to contact me. To give an idea what the cost per foot is for New England Ropes STS-HSR which I used for my stays, please look over the table below